The Guillow’s Sky Streak
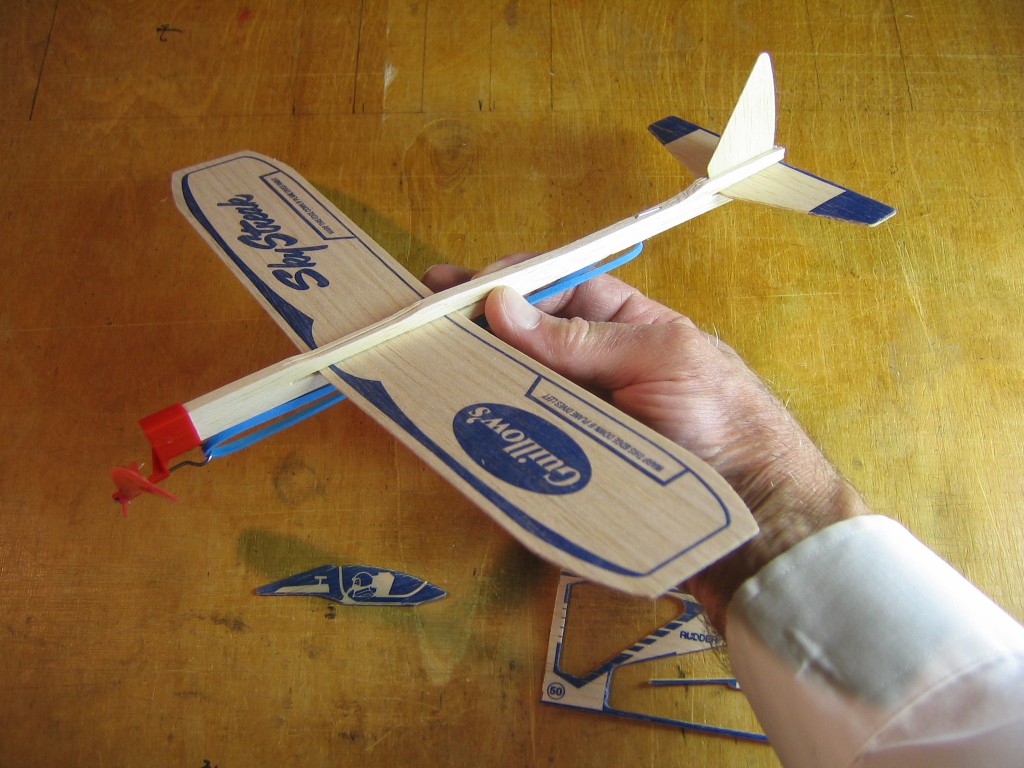
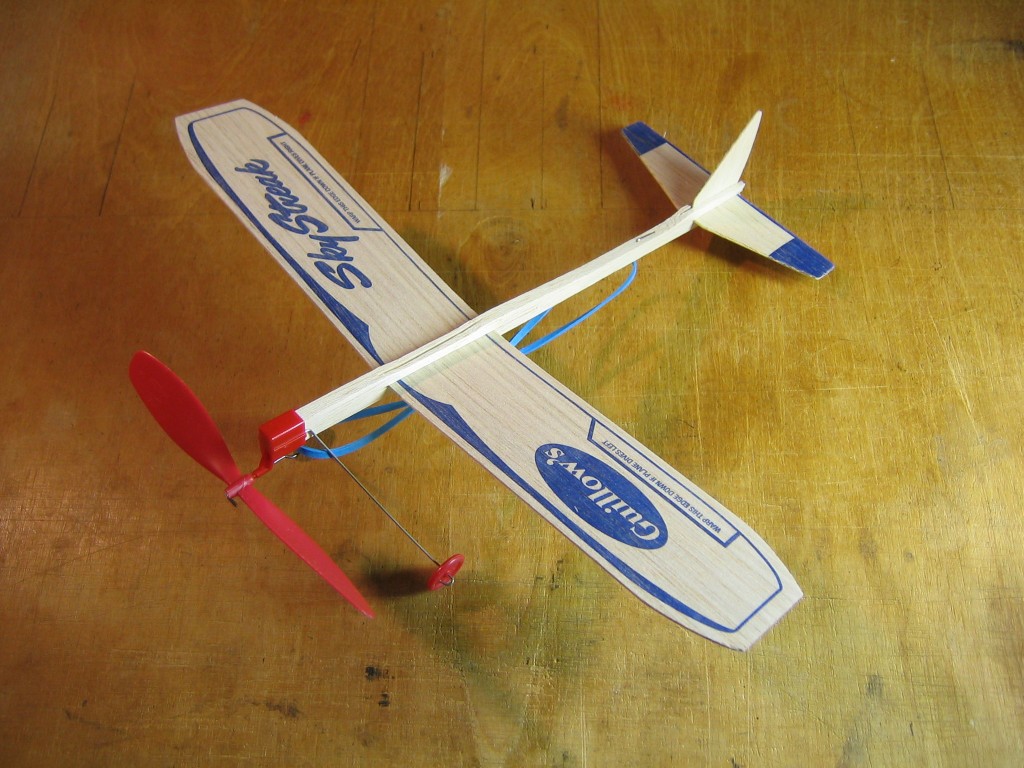
The Guillow’s Sky Streak is a simple, sheet balsa, rubber powered, free flight, stick, toy airplane. It has a 12″ wingspan and is 11″ long. It slips together in less than two minutes without glue, pins or sharp tools. With care, it can be got to fly reasonably well. It can be used to teach principles of aeronautics and basic piloting skills. First I will show you how to adjust it to get good flights out of it unmodified. Later I will show you how to make modifications that will greatly improve flights.
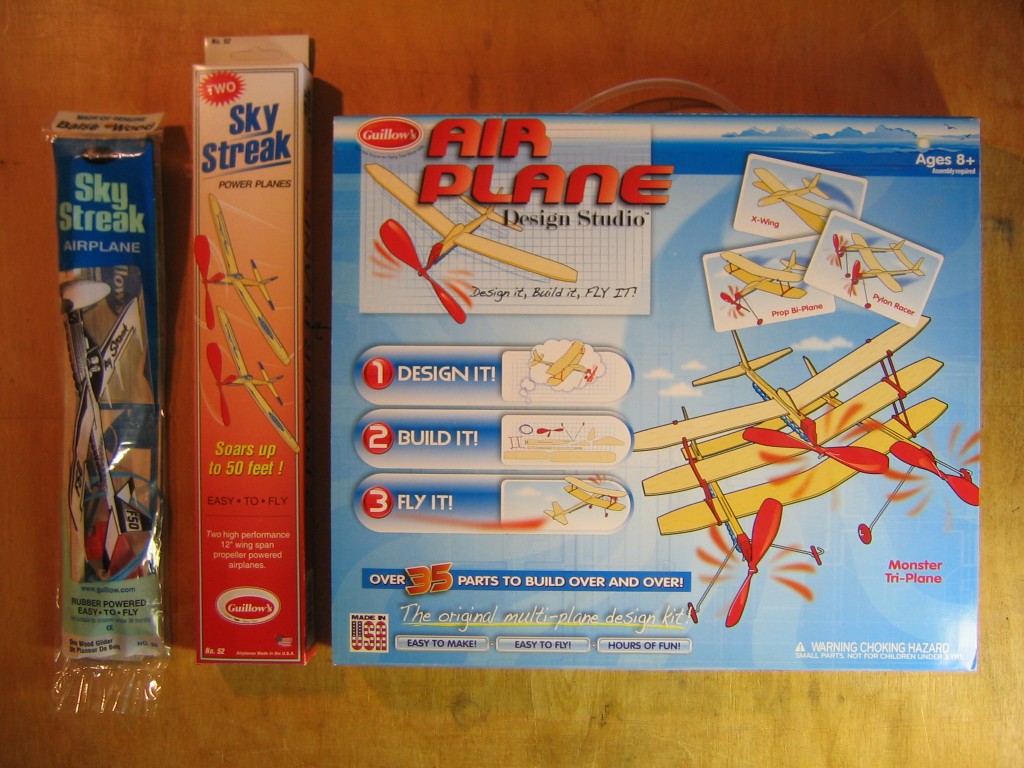
The Sky Streak is available from Guillow’s in three forms of packaging; a poly bagged single, a double boxed set or in their Air Plane Design Studio, which contains parts to make four Sky Streaks, including landing gear that is not included in the other two sets. There is no printing on these parts, so you can decorate them as ever you like. The poly bagged single is also available in sets of ten at a lower unit cost. This would be good for a class, scout or family group. It’s always good to have several examples of a kit, especially if you plan to experiment with changes.
These sets are widely available in toy, hobby and variety stores. They can be found online. See them at the Guillow’s site here:
If you buy them from Guillow’s online, consider getting a bag of extra motors and 6″ props as well.
The Academy of Model Aeronautics is using the Sky Streak to introduce beginners to model aviation. Their AeroLab CD includes an instructional video on building the Sky Streak. They have produced an instructional sheet for the Sky Streak, showing how they bend the wing tips up to improve lateral stability.
The AMA sells Sky Streak kits with the instruction sheet included, as well as a motor of 1/8″ contest rubber.
Dave Gee, who is on the AMA Education Committee, has produced a YouTube video showing him assembling a Sky Streak according to the AMA instructions.
Dave teaches kids how to build and fly Sky Streaks. He has made videos of some of these flights.
You can see that the kids are having a blast. You can do it, too.
After that, I wonder why I should post anything more about the Sky Streak on EndlessLift. Actually, I will be showing you quite a bit that is not included in the above references.
Assembling the Guillow’s Sky Streak
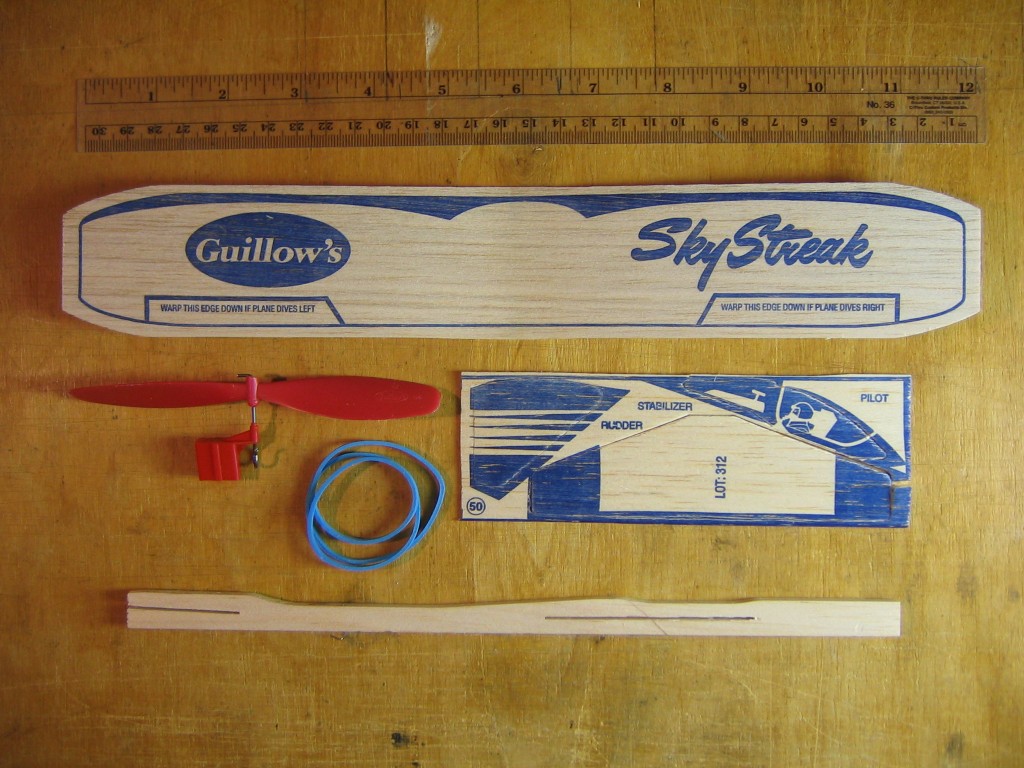
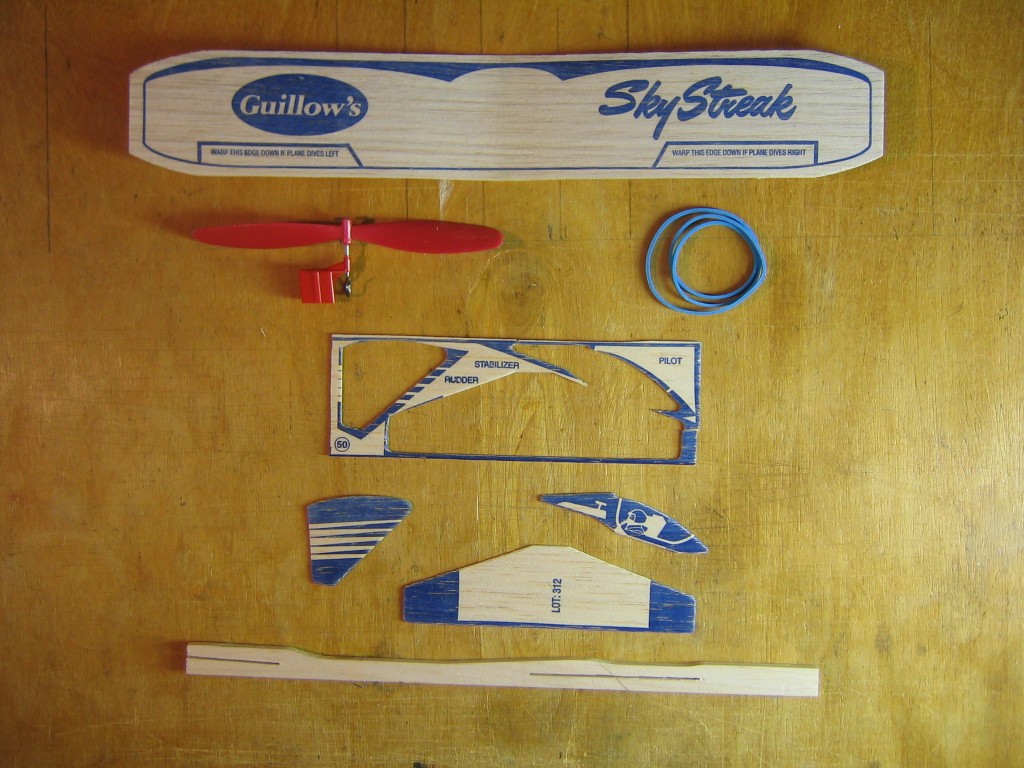
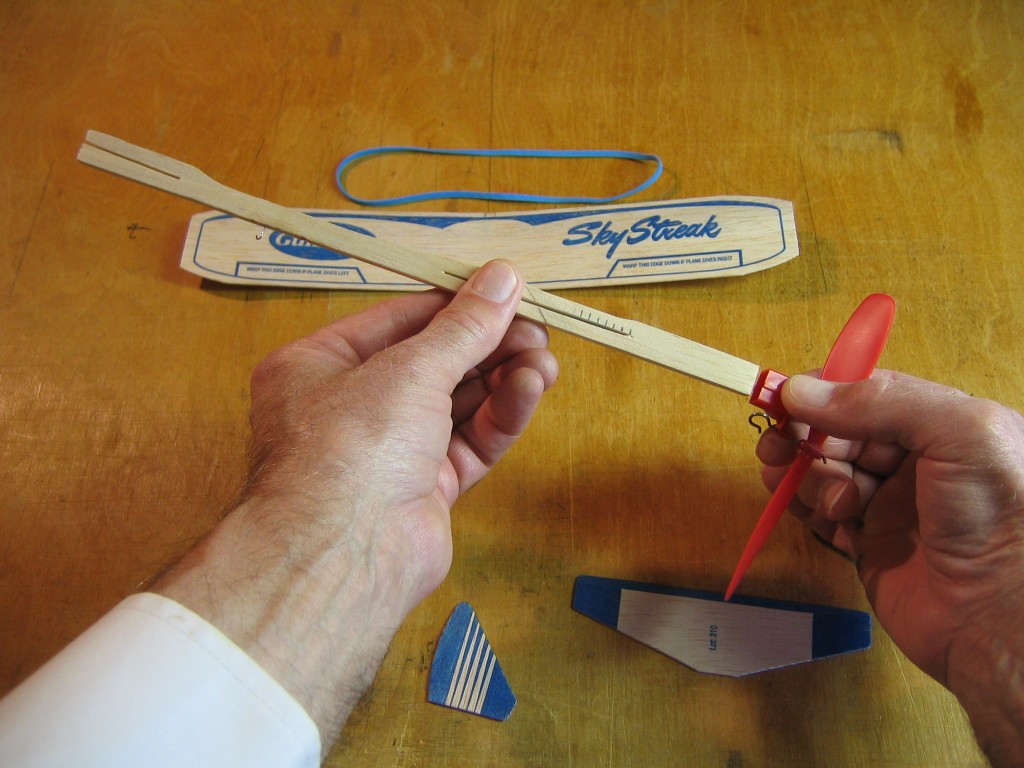
Each set includes five components; a wing, a propeller assembly with shaft and bearing, a 7″ rubber band motor, a parts sheet and a fuselage stick with wire motor hook.
About the only “construction” work required is to punch the tailplane, fin and pilot figure out of the parts sheet. Gently push all around the perimeter of each part, gradually freeing it from the surrounding sheet.
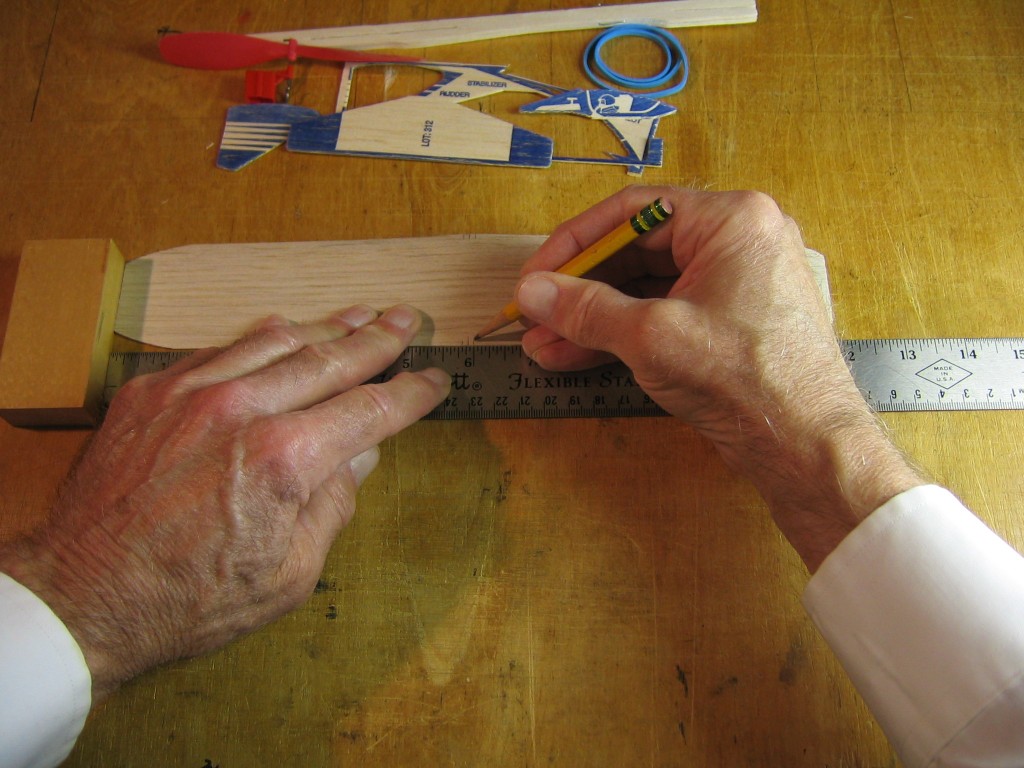
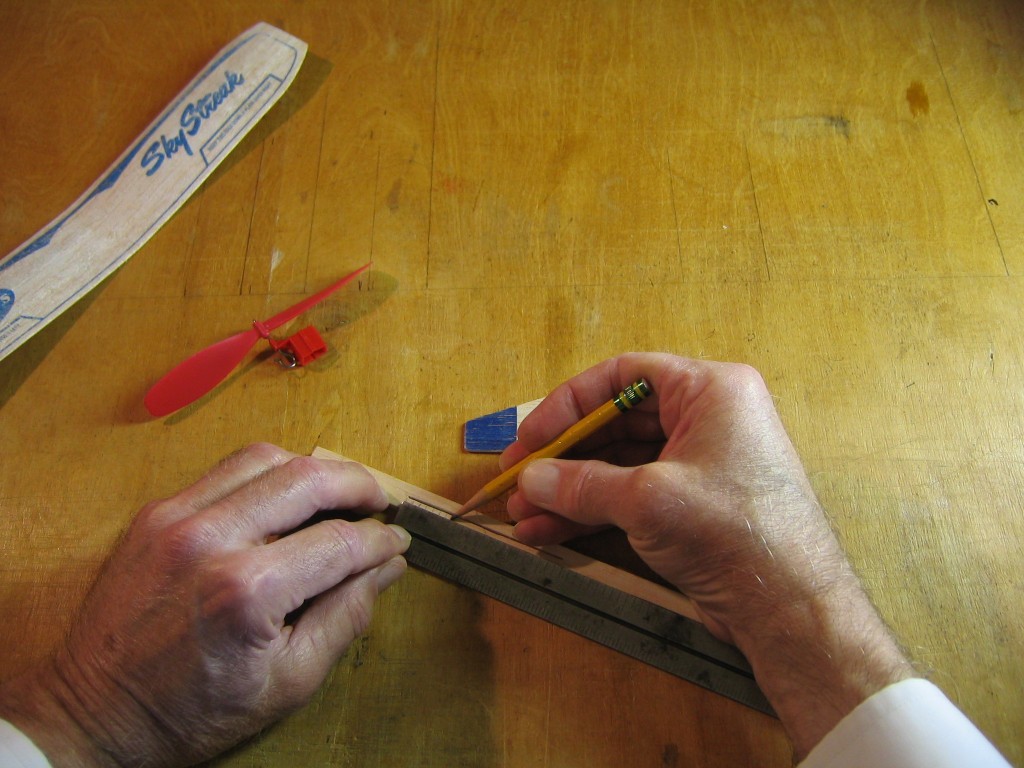
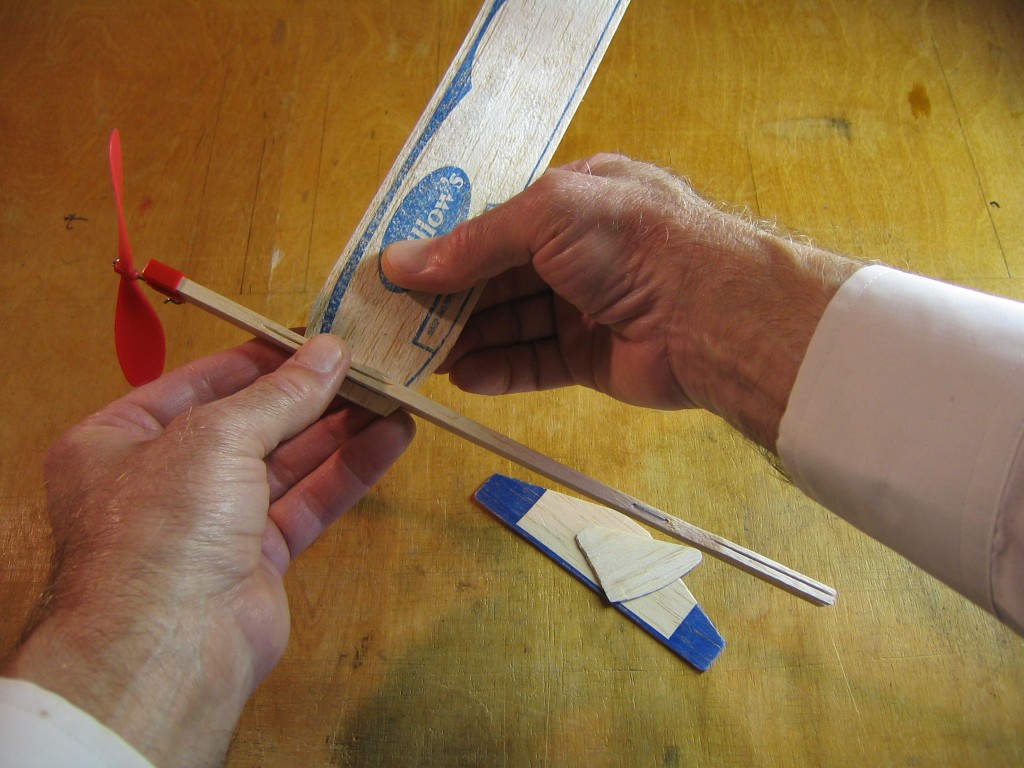
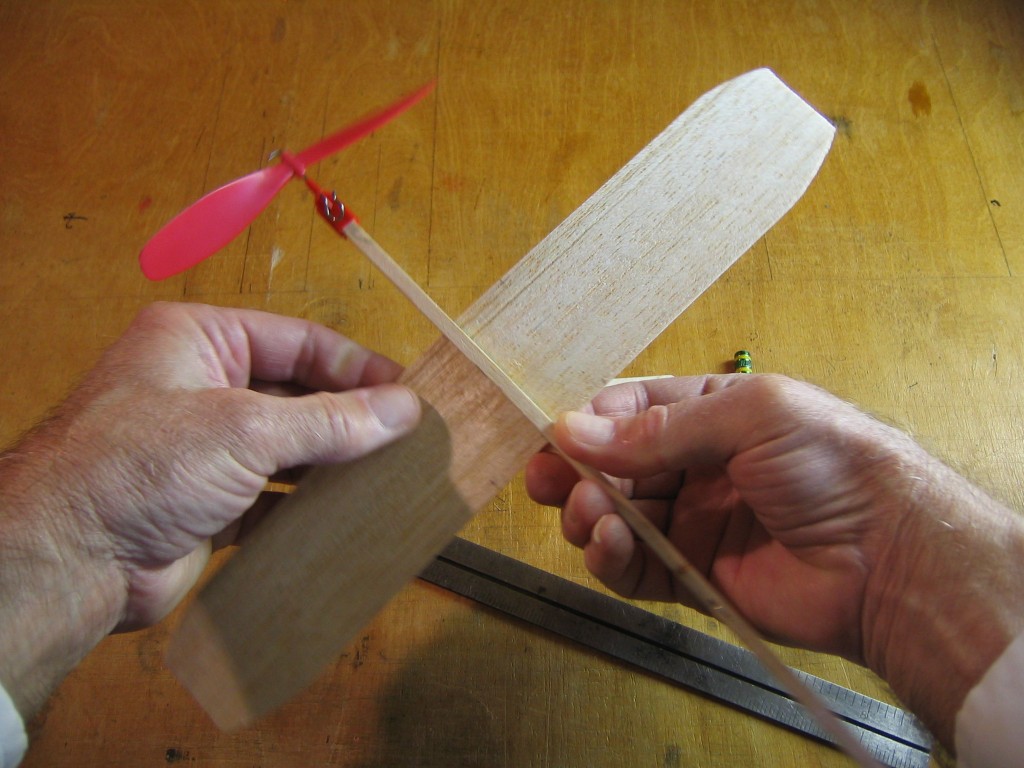
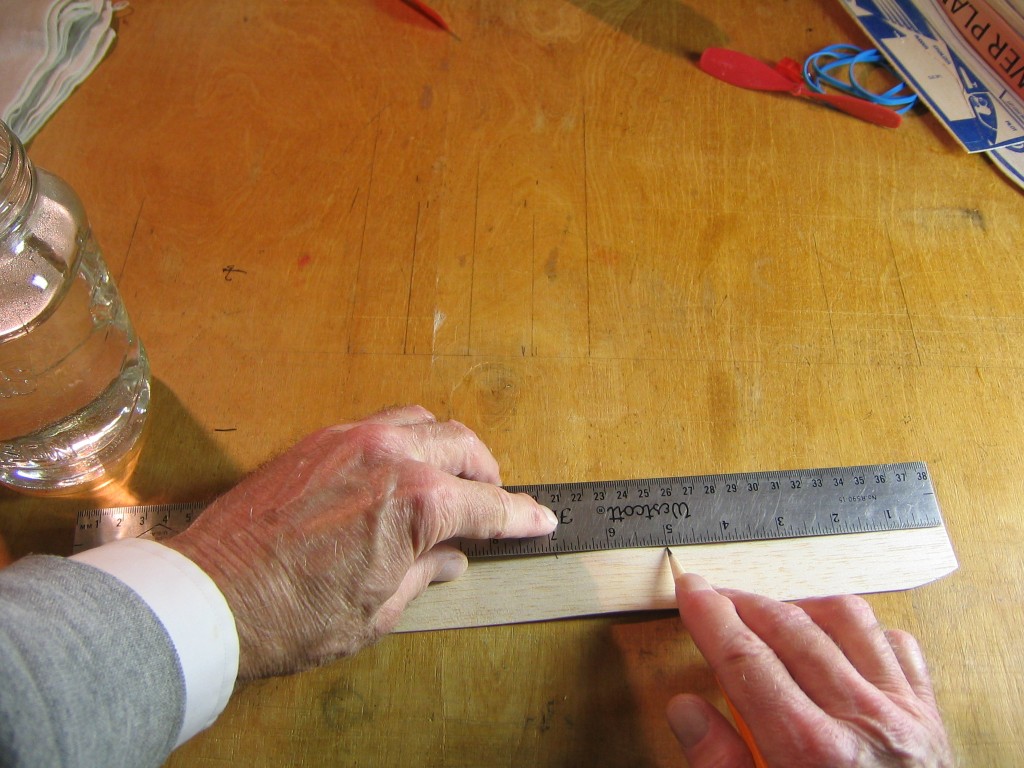
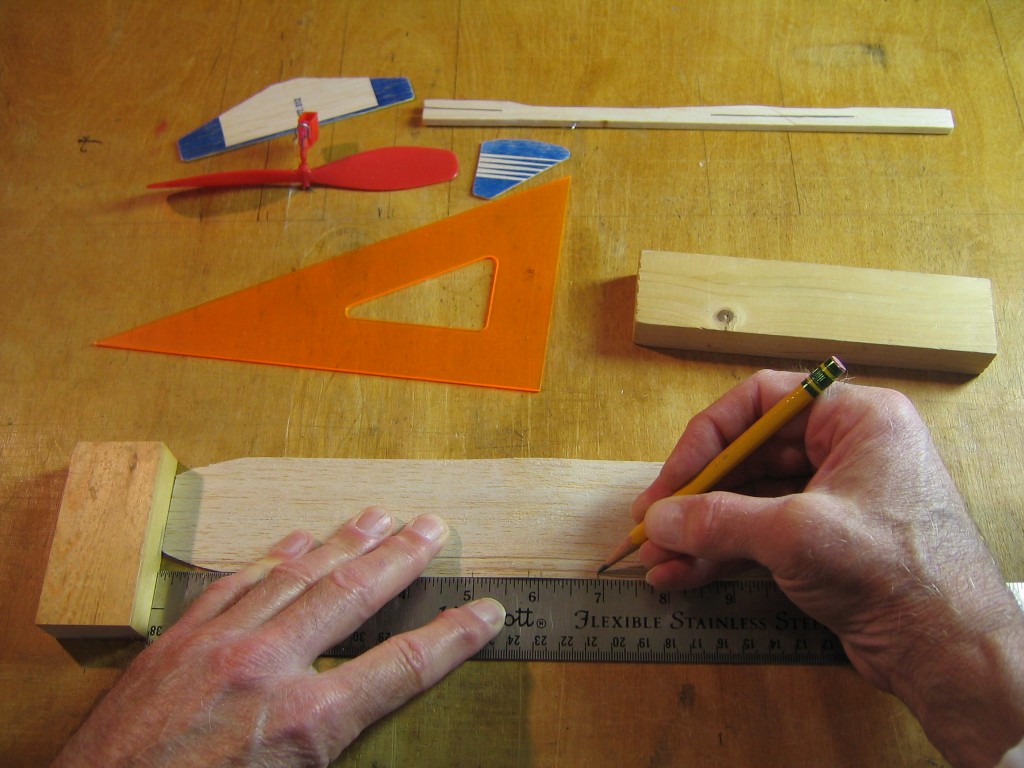
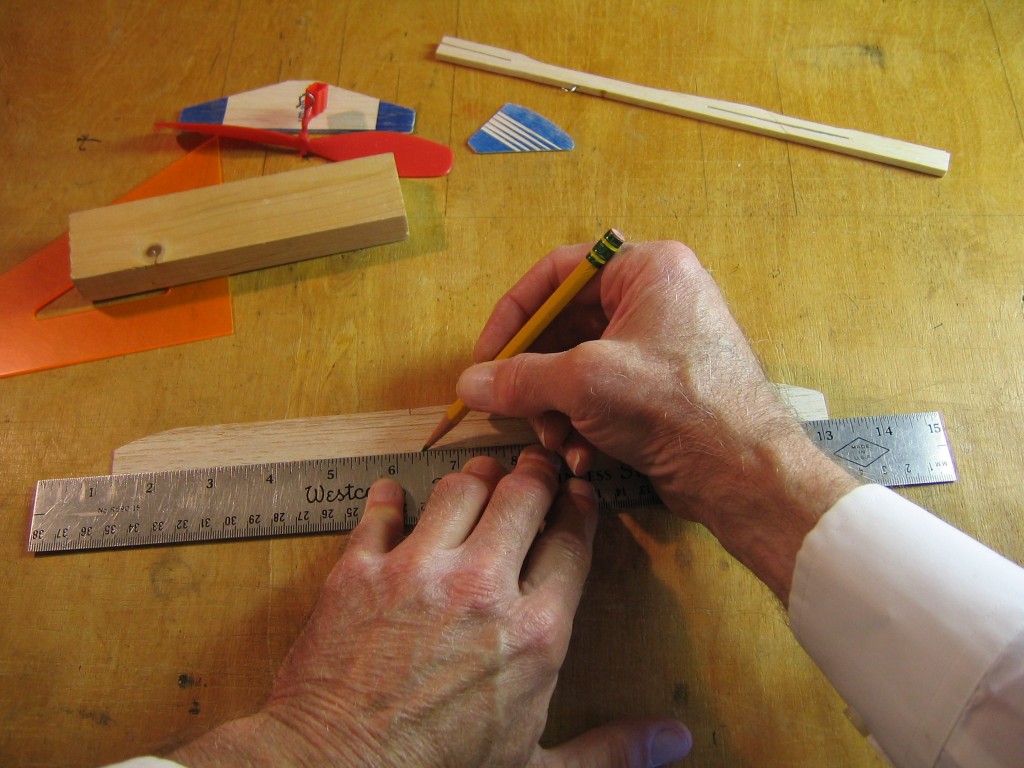
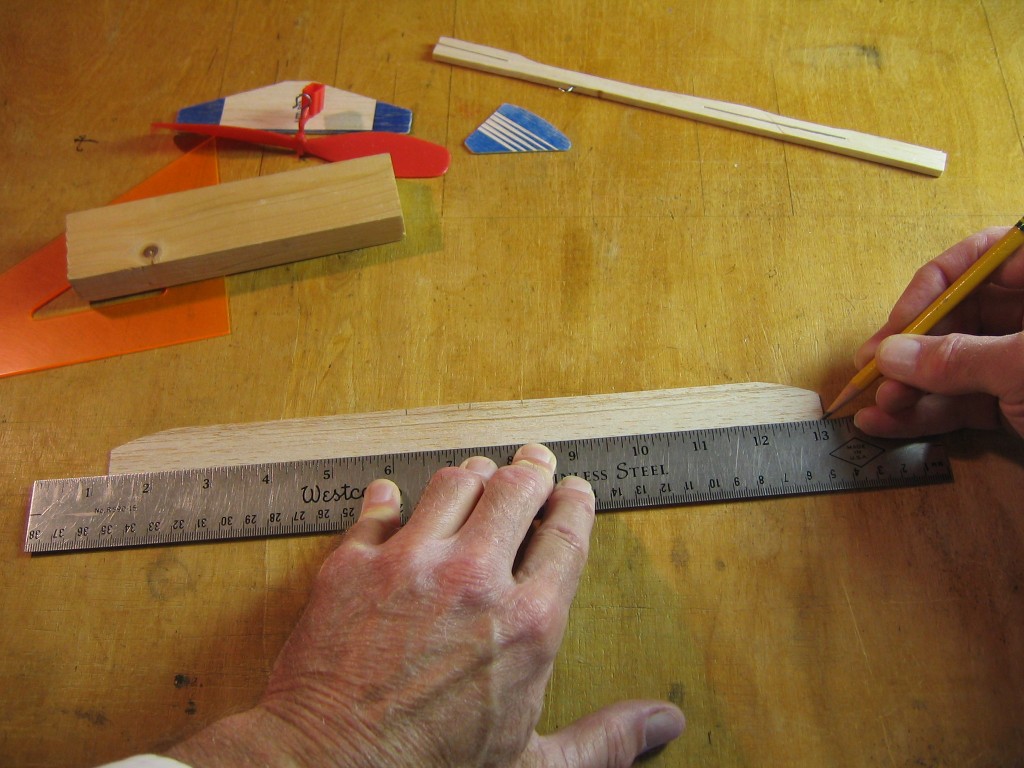
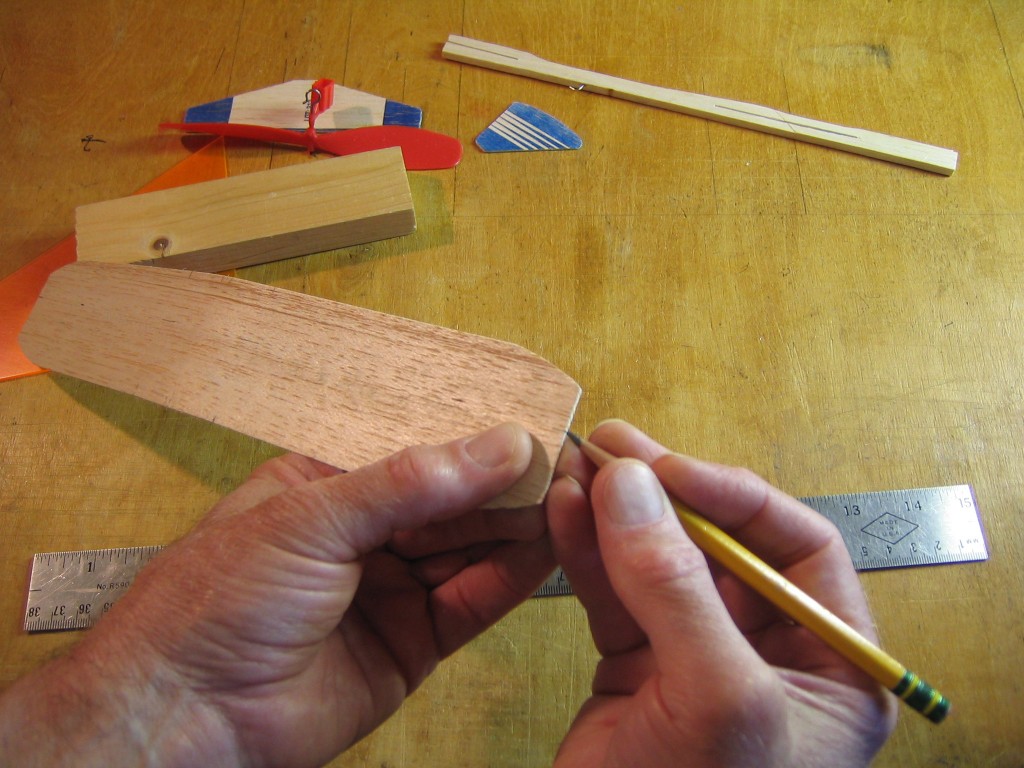
After that, everything slips together according to the instructions. I recommend that you mark the wing and tail center before assembly. It is important that these parts be centered. There may be situations where you will deliberately want something off center, but you still need to know where the center is. The wing may not be exactly 12″ long, so measure carefully and mark the exact center. Also mark 3/32″ on either side of the center. These marks show where the edges of the 3/16″ wide stick should go when the wing is inserted through the slot in the stick. Make similar marks on the opposite edge of the wing, so both the leading edge and the trailing edge are marked.
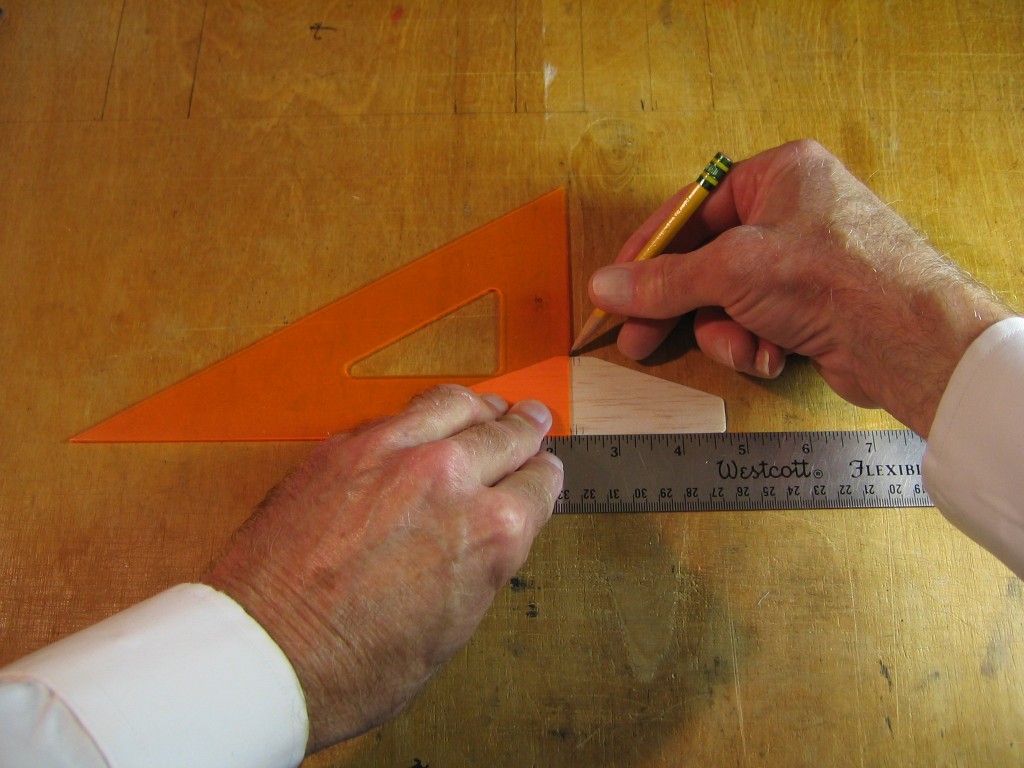
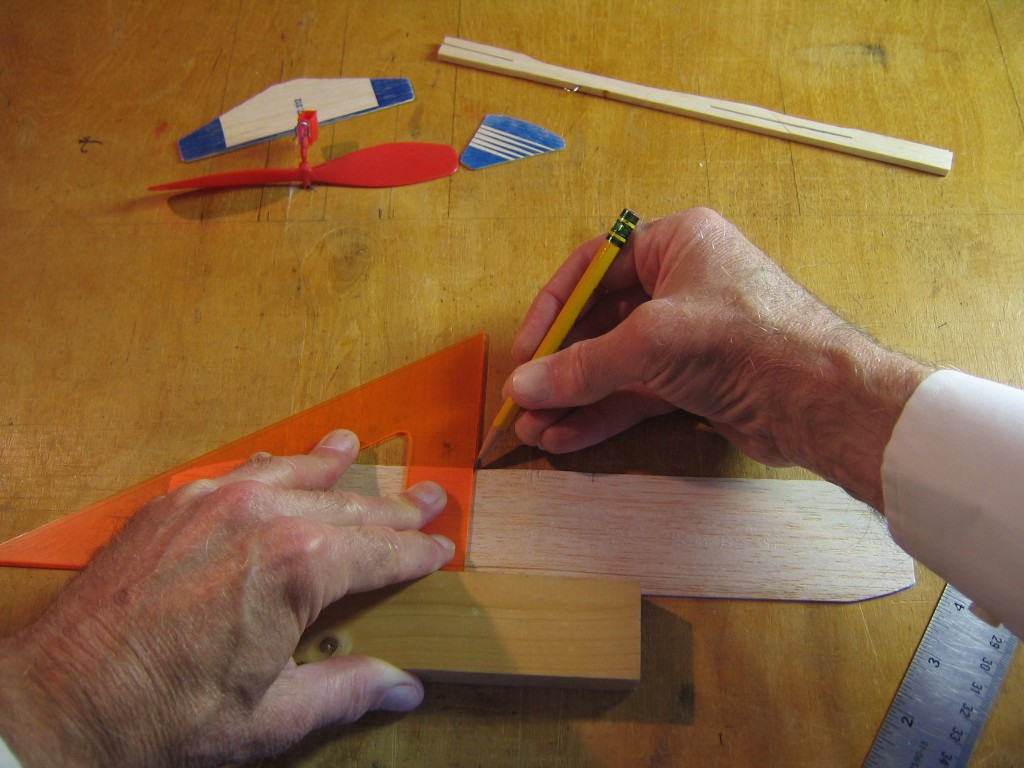
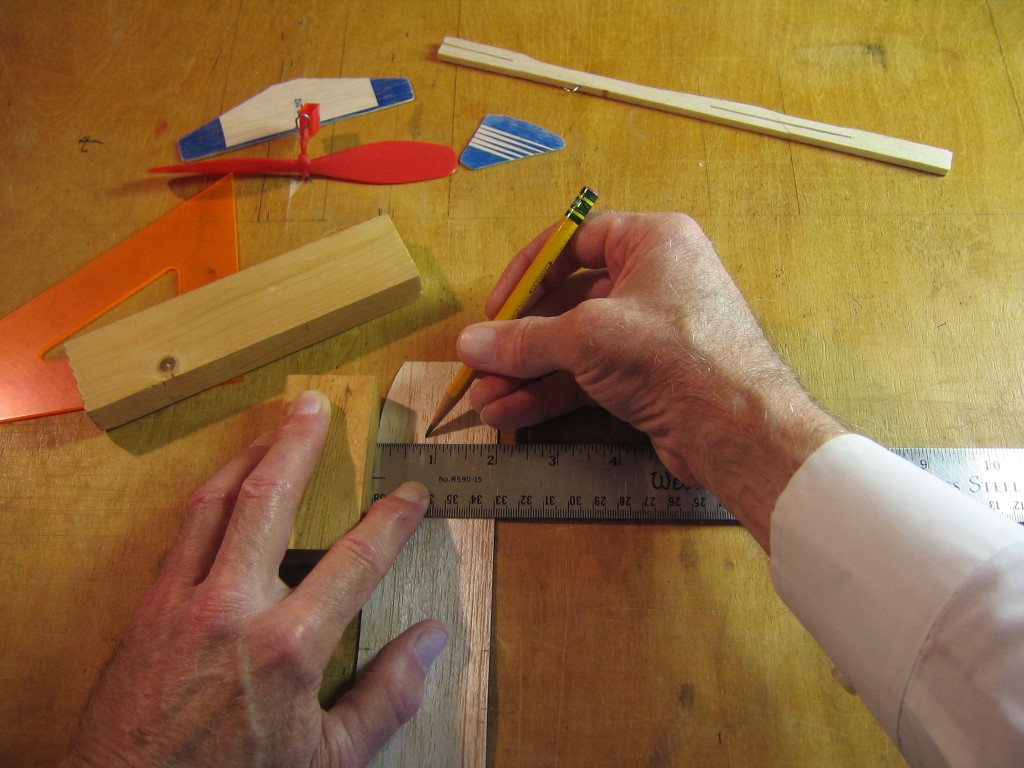
Make a similar set of marks on the tailplane. Start on the trailing edge, then transfer the marks to the leading edge with a right angle, using something like the drafting triangle. A piece of paper can be folded on one edge to make a right angle.
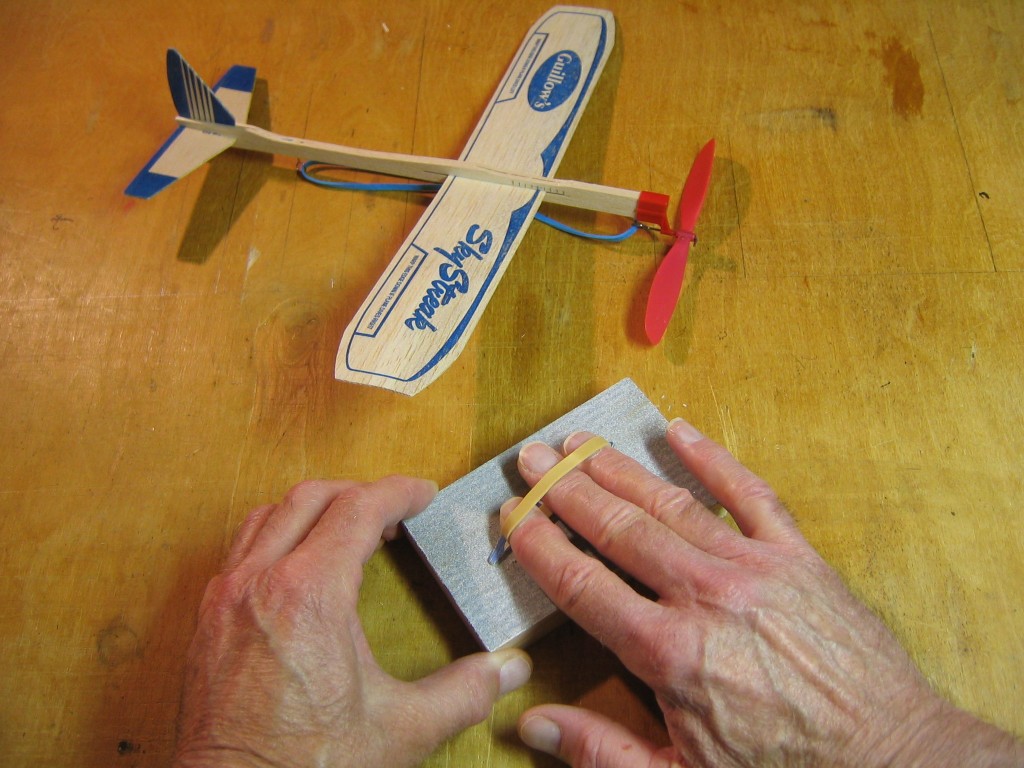
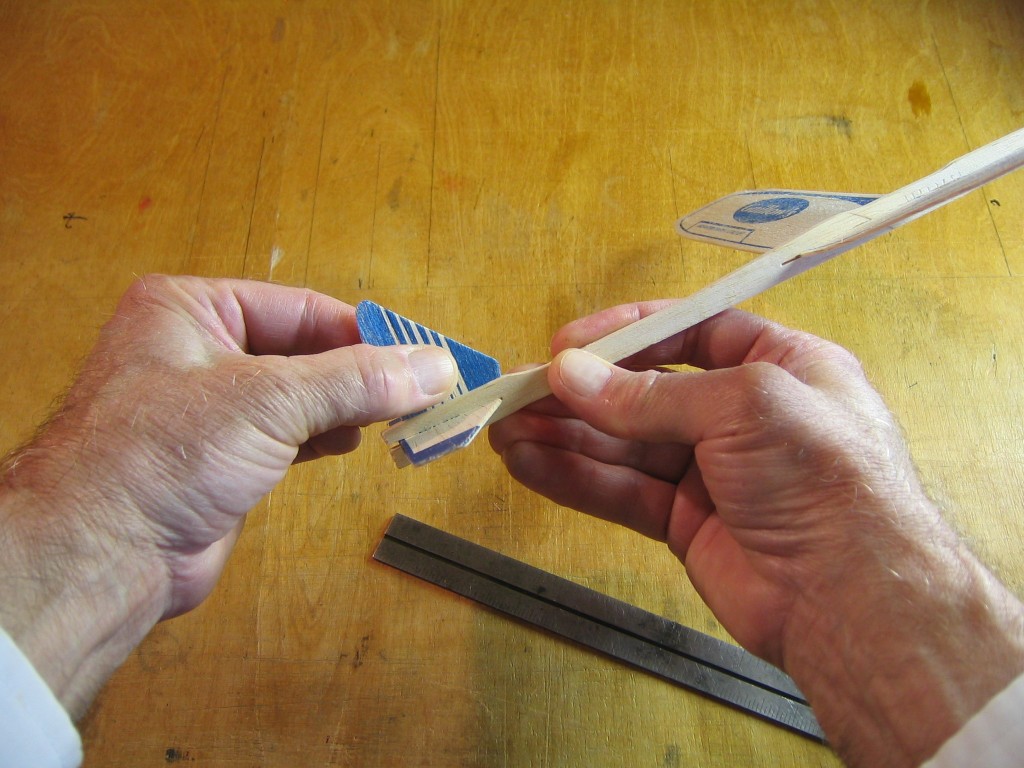
One difficulty is that the slots in the top of the fuselage for the pilot and the fin are not wide enough for these parts. It takes considerable force to get the sheet parts into the slots and it deforms the wood. This can cause breakage of the parts. You can sand the sheet parts to thin them. You may have to lick your fingers to get them to stick to the parts enough to move them back and forth over the sandpaper. You can also wrap rubber bands around your fingers to get a better grip on the parts.
Here is the pilot on the finished airplane. It will buckle and break if it is forced straight into the slot. It should be slid into the slot. Since the pilot piece does not perform any useful function, I leave it off. I put it on just to show you what it looks like. You might like to have the pilot on your plane.
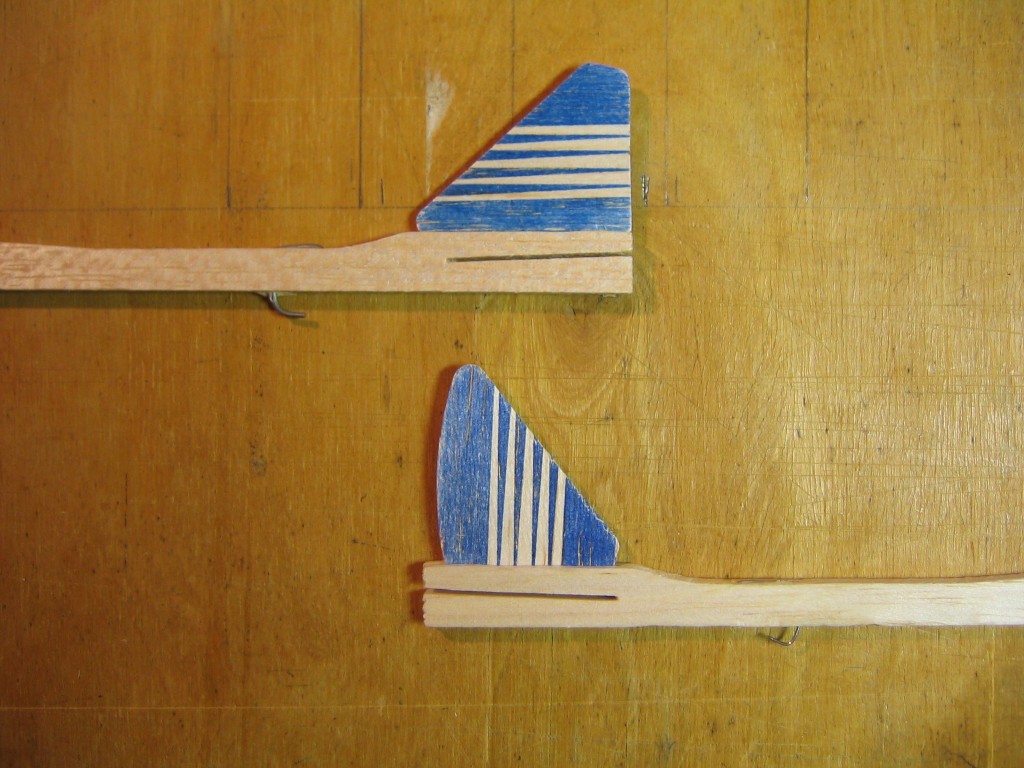
There is an additional difficulty with the fin. The wood has the grain running horizontally. Wood is stronger in the direction of the grain, so it is preferred to have the grain run vertical. Otherwise the fin is much more susceptible to breakage. Although the curved edge of the fin is supposed to go into the slot (above), I put the straight edge into the slot and use the curved edge as a trim tab (below).
An important part of getting this plane to fly well is finding the best position for the wing. It can move back and forth in the slot. It is helpful to have marks along the slot so you can keep track of where the wing is. I slide the wing as far forward as possible and make a mark above the slot at the wing leading edge. Then I make a mark every 1/8″ along the slot for an inch.
I had the experience of having the motor hook slide up through the wood so I couldn’t get the motor on the hook. This can be very annoying when you have a tightly wound, lubed motor in one hand and a prop in the other.
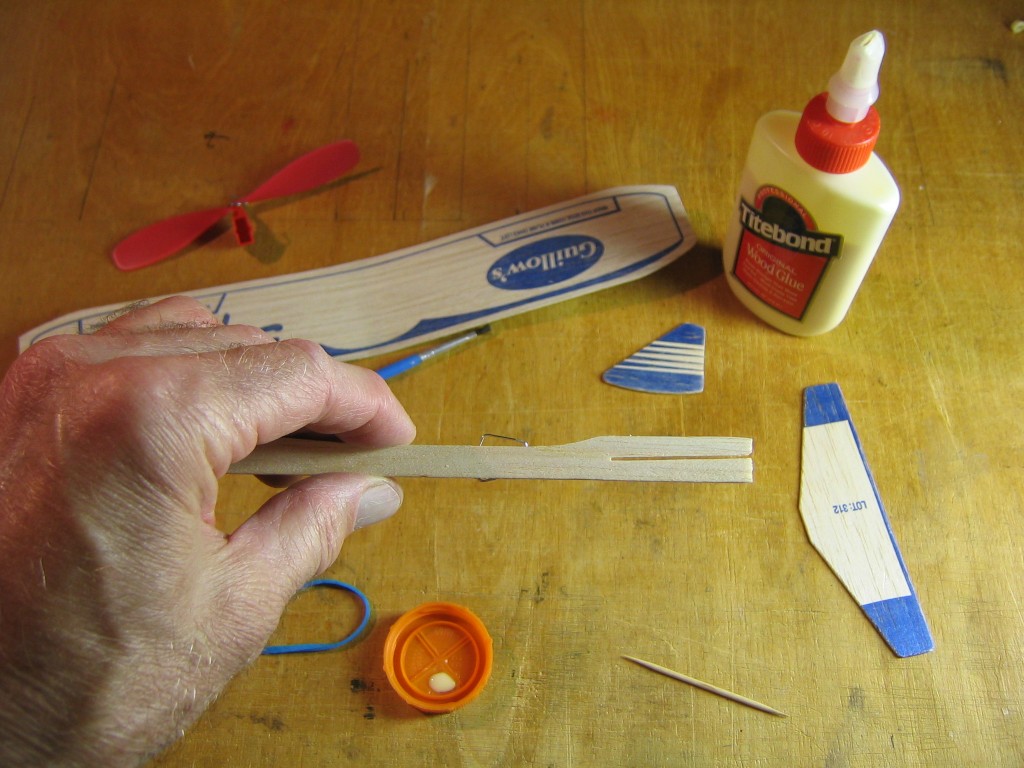
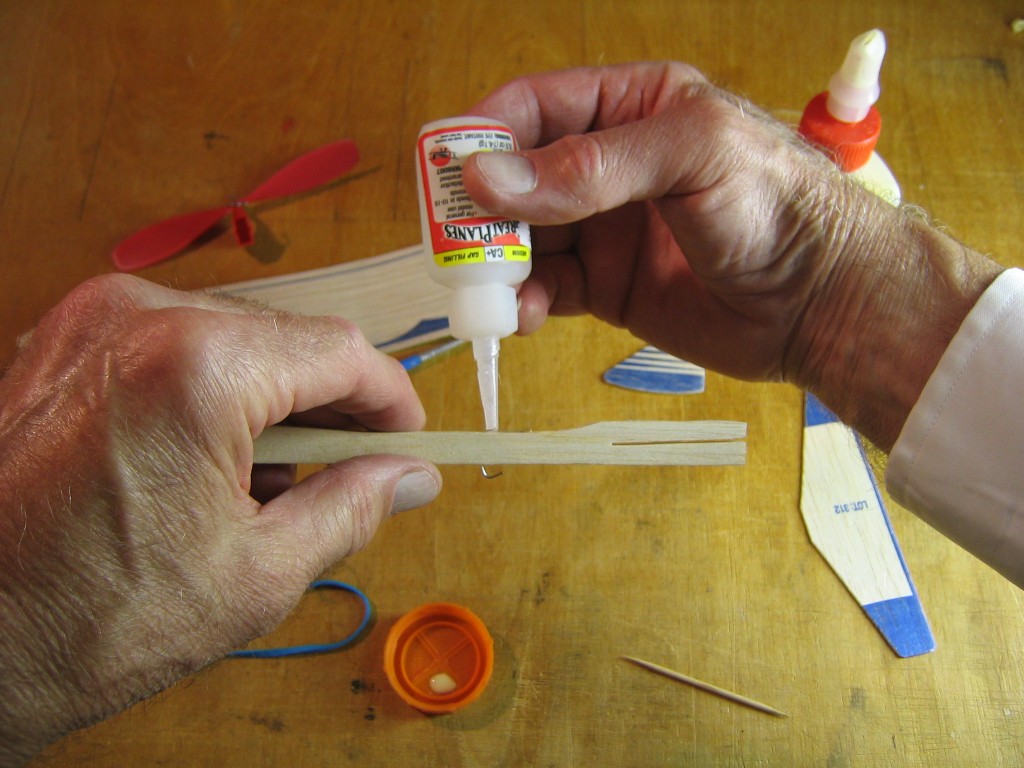
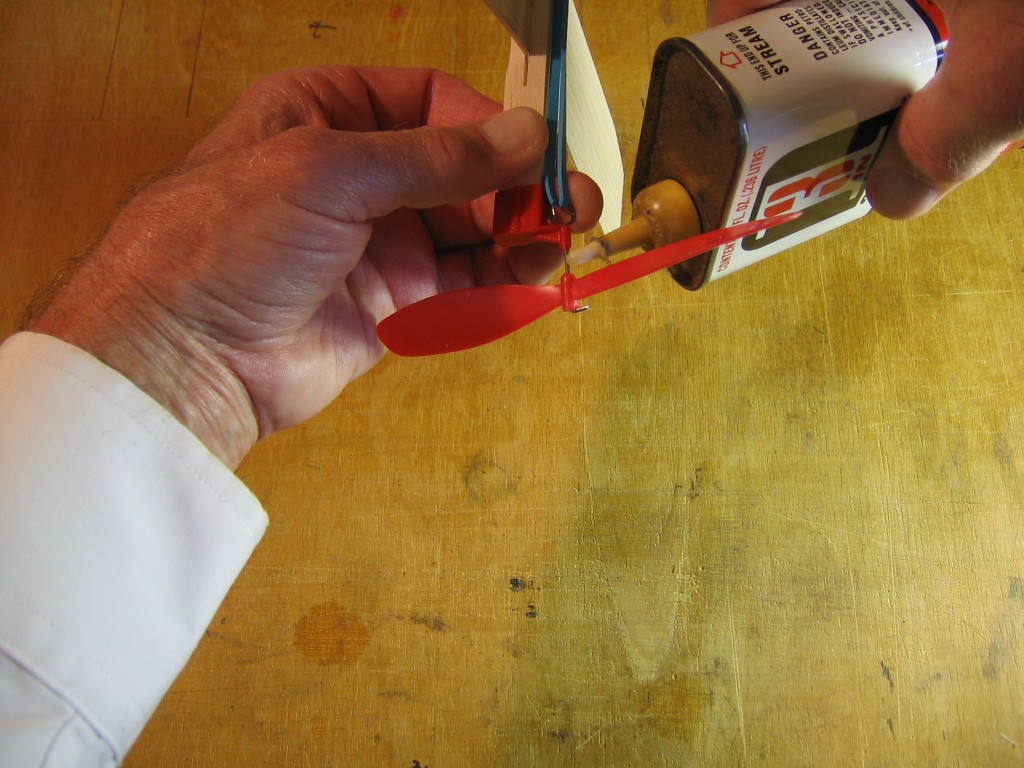
This can be prevented by gluing the motor hook down. CA glue is the fastest way to do it, but any glue will work, as long as you use plenty of glue and give the glue time to dry before putting a motor on the hook.
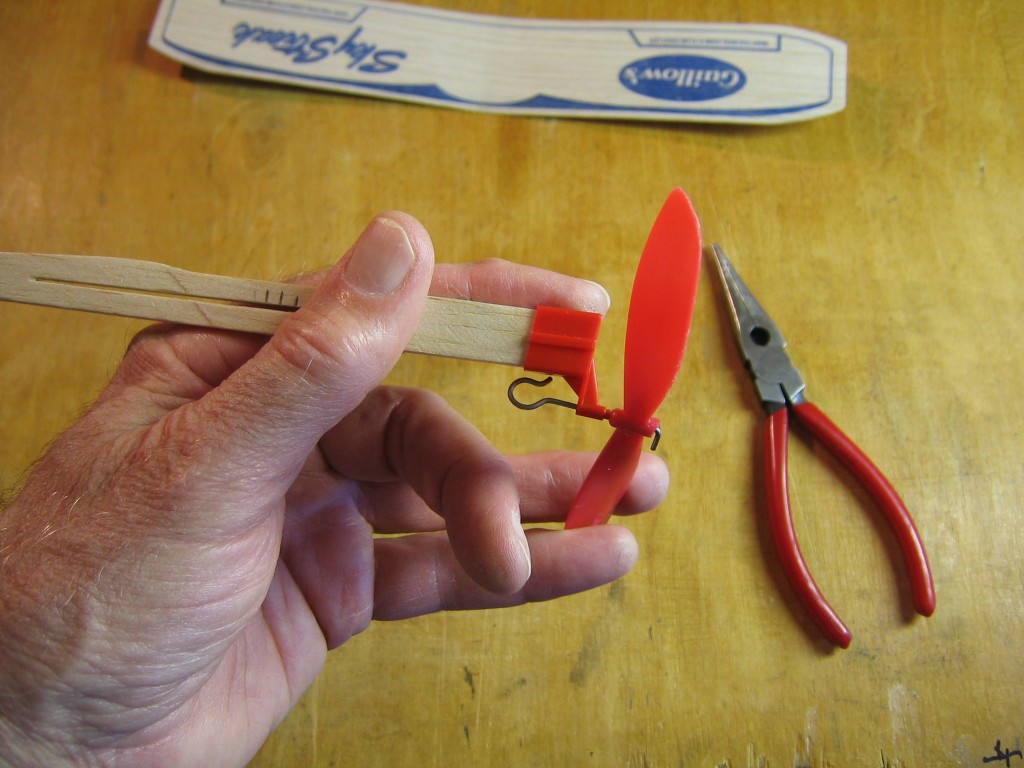
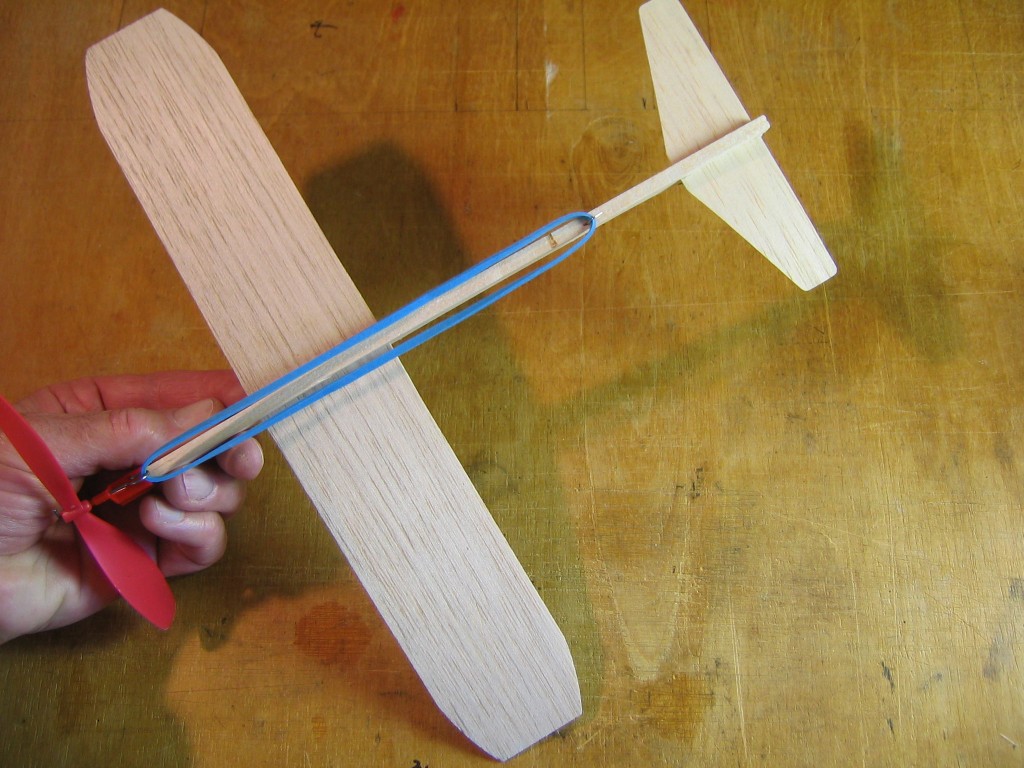
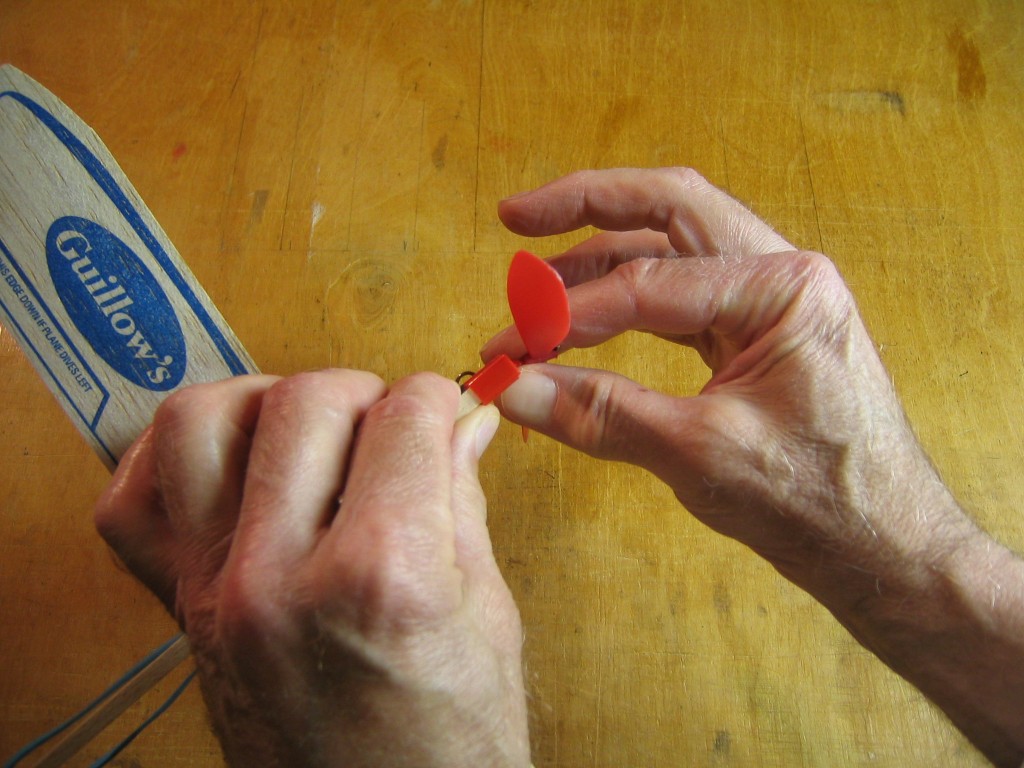
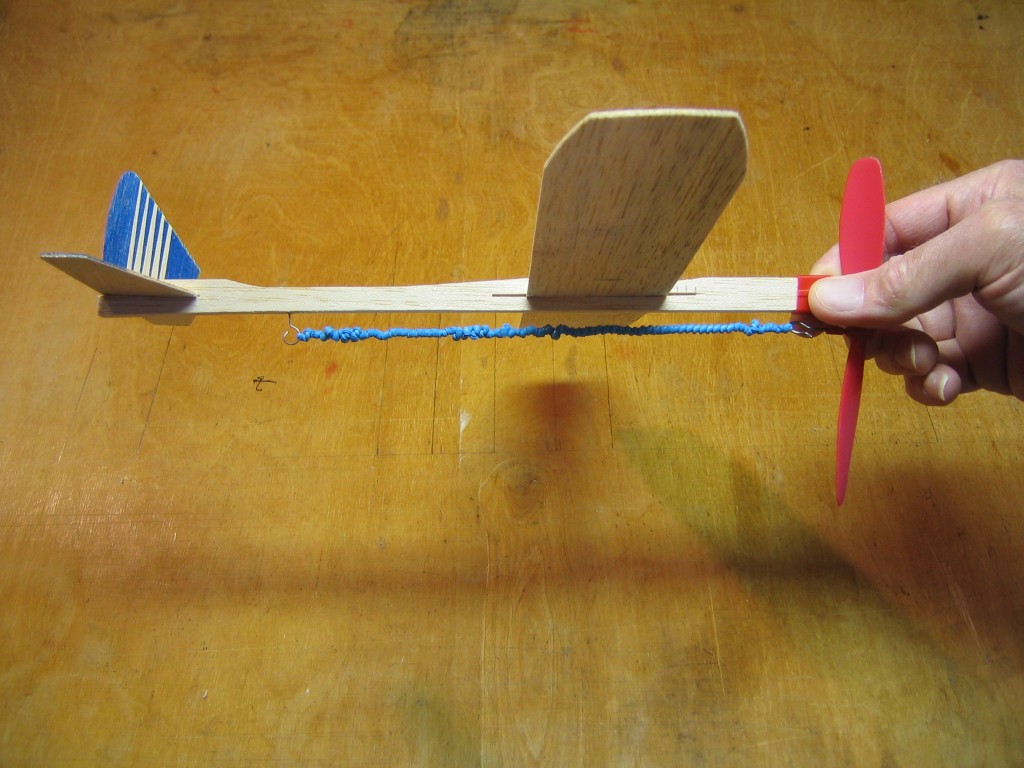
The propeller unit slips over the end of the fuselage. If it is too tight, press the corner edges against the table top to form a slight bevel. Notice that the hook on the propeller shaft goes on the same side of the stick as the wire motor hook at the back end of the stick. The rubber motor will be suspended between these two hooks.
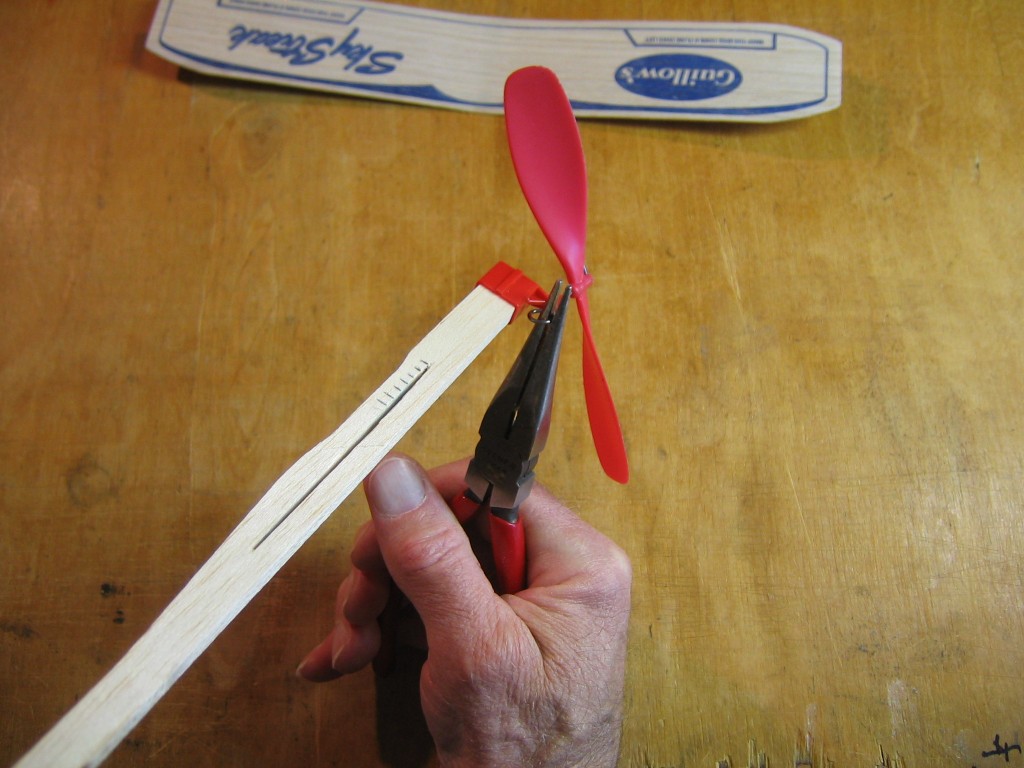
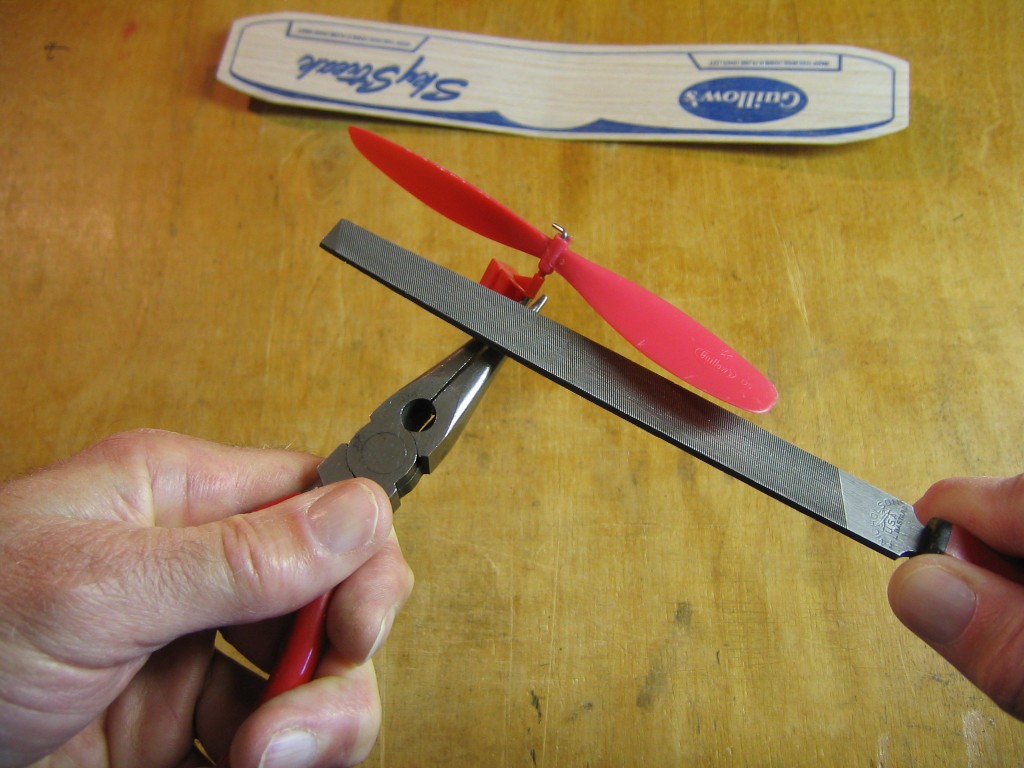
During the flight tests I noticed a clicking sound. On closer inspection I found that the reflexed end of the prop hook was hitting the plastic bearing box. There were scratches on the box. Check yours before putting it on the plane.
The end can be bent closer to the shaft.
Or you can file it down. This is a good time to file off any sharp edges, too.
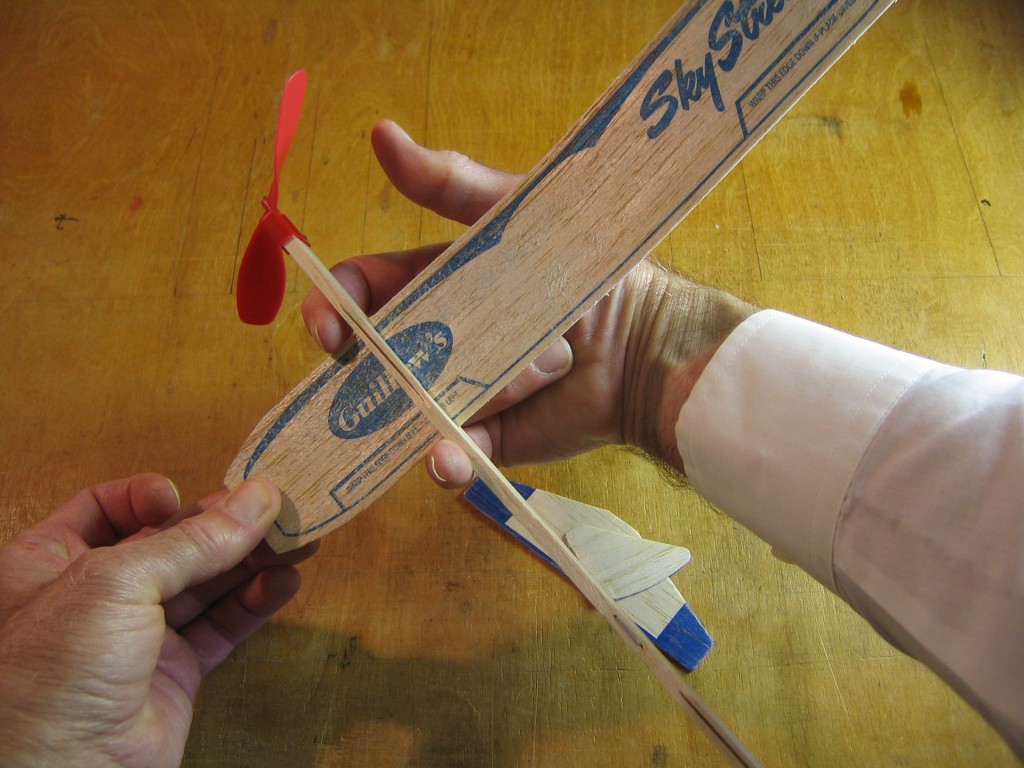
Carefully insert the corner of one wing tip into the slot in the side of the fuselage. Hold the wing close to the fuselage as you work a bit of it clear through the slot. Do not try to push the entire wing through the slot. That could buckle the thin wing and break it.
Instead, hook an index finger and little finger around the fuselage on either end of the slot and PULL the wing through the slot.
Center the wing between the pencil marks. Start with the wing back at the 1/2″ mark on the fuselage slot.
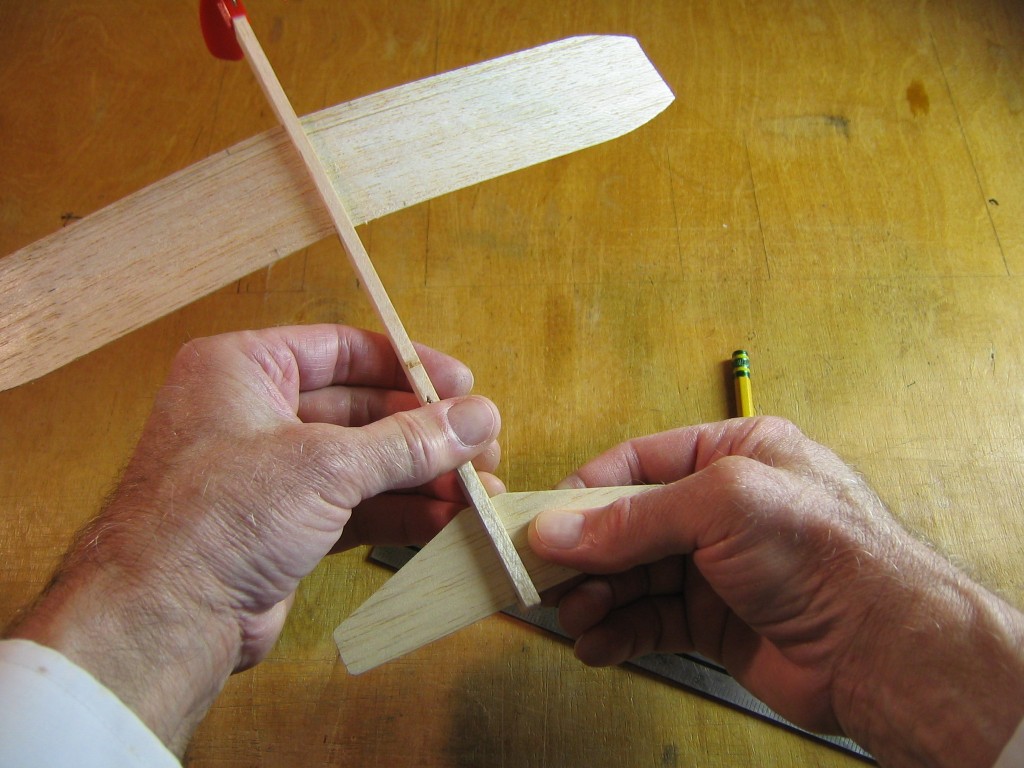
Insert the tailplane into its slot and center it between the pencil marks.
Insert the fin into its slot. Slide it in rather than pushing it straight down. Put the wood grain vertical for strength.
Put the rubber band motor over the prop hook and the motor hook. Look at the plane from the front and from below. Check that everything is symmetrical. That completes the assembly.
Put a tiny bit of light machine oil on the prop shaft and bearing. If you don’t have any, some salad oil will work. Apply a drop with a toothpick.
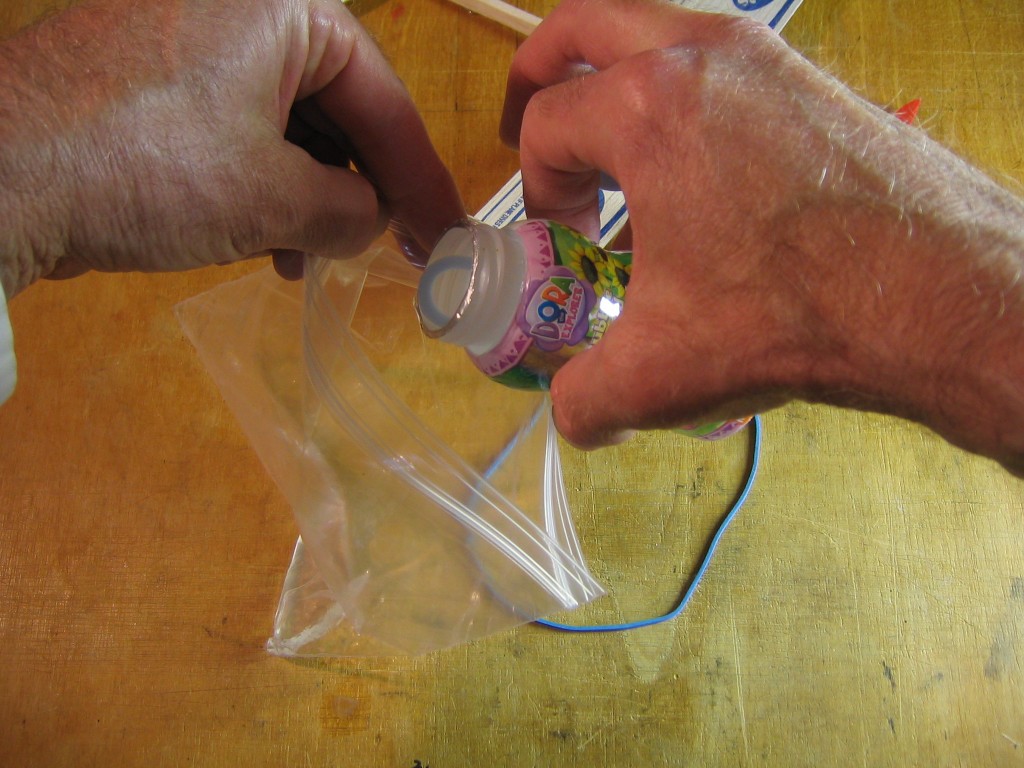
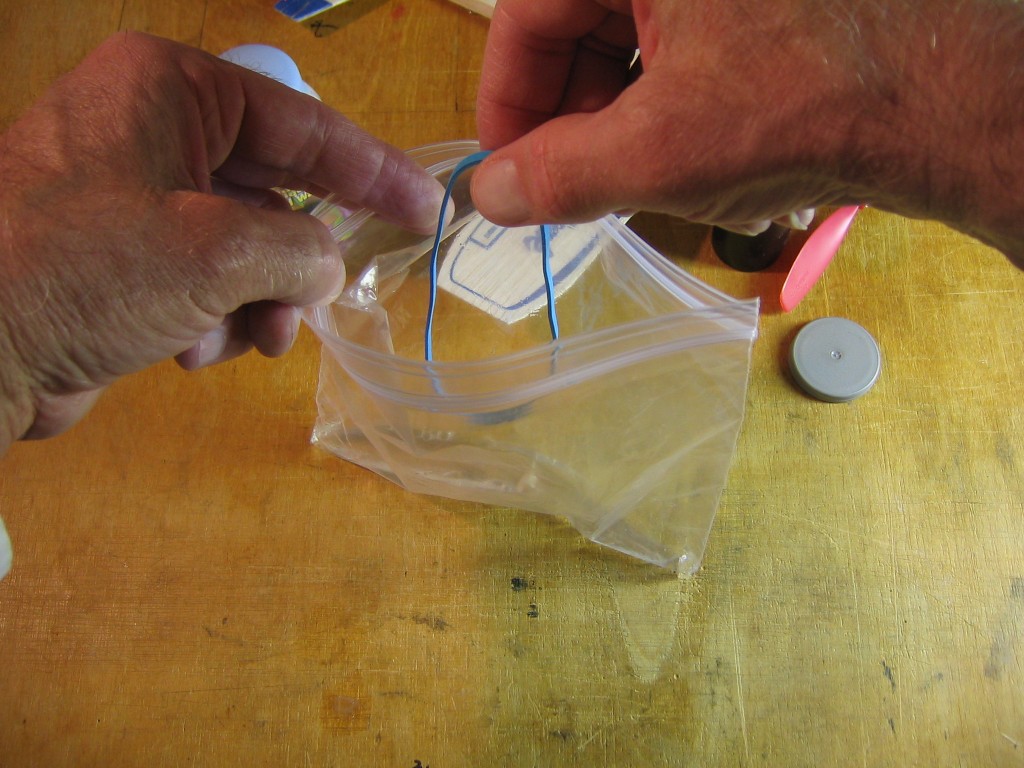
Experienced rubber power modelers know that it is not good to wind up a rubber motor without lubricating it. A dry motor will not take as many turns as a lubed motor and it will abrade itself. It will wear out and break much sooner. The classic motor lube is a mix of equal parts glycerin and green soap. The soap makes it slippery and the glycerin keeps it from drying out. You can get both from your pharmacy. Other liquid soaps may be used, such as Johnson’s Baby Shampoo. I decided to try bubble soap because it is likely available in many of the places where you would find Guillow’s toy planes. I found that it worked without the glycerin, but like all liquid soaps, it dried out quickly. I found that it could be used if it was refreshed before every flight. Mixing in a little glycerin would help. Put a tablespoonful or a capful of lube in a Ziploc bag,
drop the motor into the lube
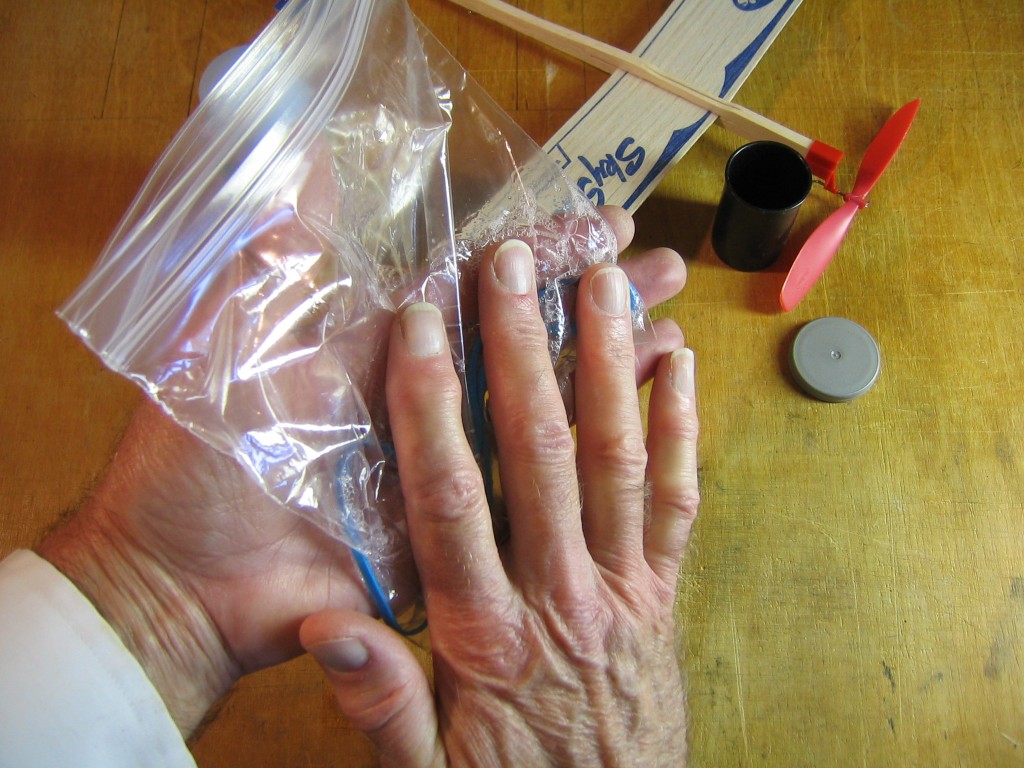
and massage the motor until it is completely coated.
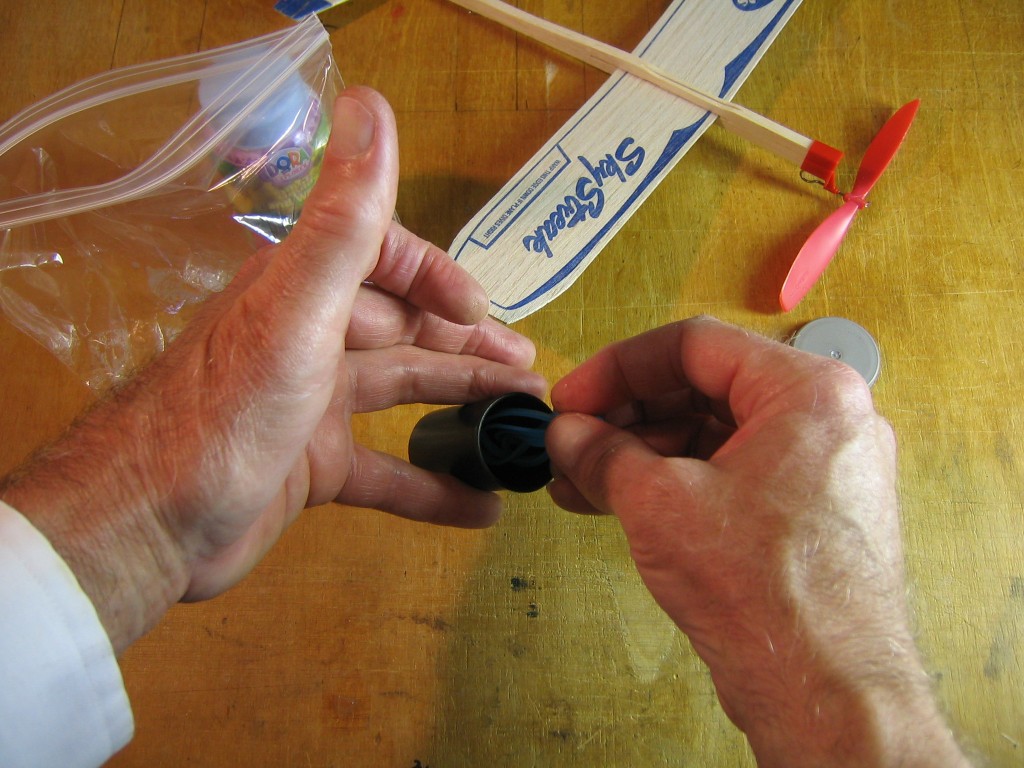
Motors must be protected from light. Sunlight especially deteriorates rubber motors. Putting the motor in a film can is a good way to do it. You can store your motors in plastic baggies if they are kept in a light tight box or tin. You also want to keep your motors clean. Dirt, grit or sand can cut into tightly wound rubber, causing a nick that will eventually break. If a motor gets in dirt, wash and relube it before the next flight.
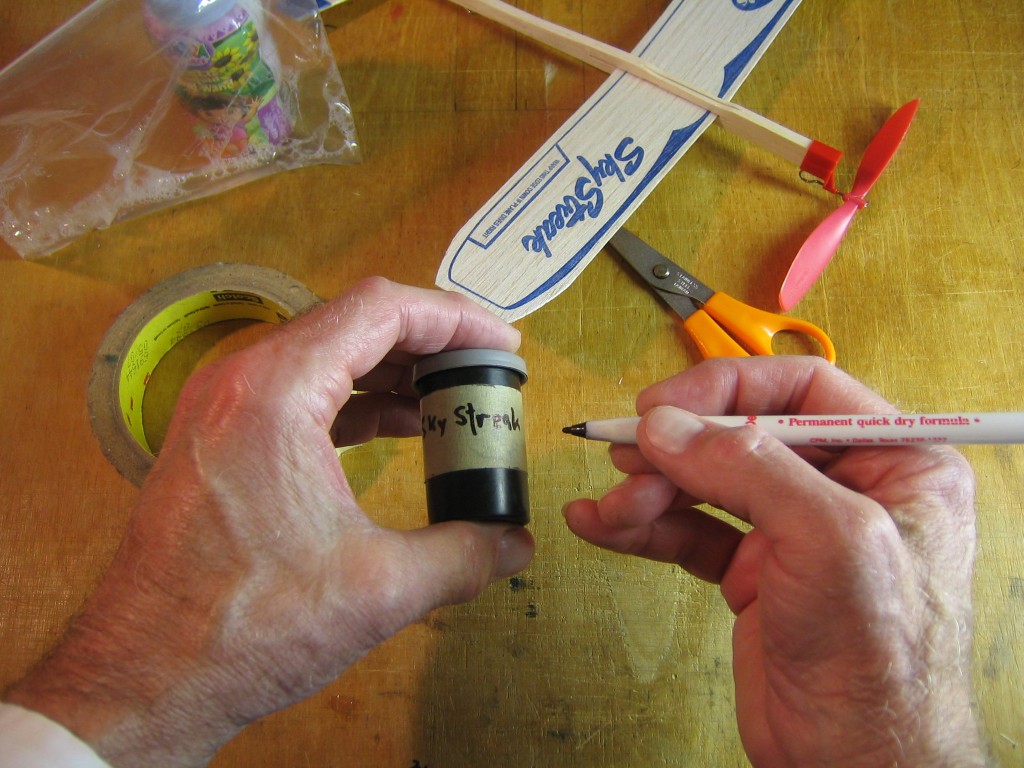
If you have many airplanes, label the motor containers so you can tell what is in them.
I usually write the maximum number of turns it is safe to put into the motor on the label. If you put in too many turns, the motor will break. With lube, I have put up to 400 turns into the kit motor without straining it. I suspect it could take more. But a motor that is wound close to breaking will not last very long. As you put in more turns, the torque of the motor increases. It increases along a curve that goes up gradually at first, then jumps up sharply in a spike, just before the breaking point. If you wind at a steady pace, you can feel the sudden increase in torque. If you stop then, you will get many happy flights out of that motor. If you are looking to win competitions or break records, you will need a good supply of extra motors and good lube, because you will be winding close to the breaking point and motors will not last long. Think of them as fuel that you burn.
Flying the Guillow’s Sky Streak
The plane is now complete and ready for test flights. The first thing to establish is the wing position. The center of gravity must be in the correct place on the wing for the plane to balance properly. The density of the balsa wood parts can vary, making different center of gravity locations and making different wing position settings necessary to achieve proper balance. Start by putting about 150 turns into the motor. Hold the stick near the front end and wind the prop clockwise with a finger. It is convenient to count turns by tens. Count like this: “One, two, three, four, five, six, seven, eight, nine, ONE”, that is your first ten. Continue counting in the same way, “One, two, three, four, five, six, seven, eight, nine, TWO, one, two, three, four, five, six, seven, eight, nine, THREE, one, two, three, four, five, six, seven, eight, nine, FOUR, … , one, two, three, four, five, six, seven, eight, nine, FIFTEEN.” That is fifteen tens, or 150 turns. You are now ready to launch the plane.
To launch, hold the plane shoulder high or over your head, with the stick and wings level. Hold one tip of the prop straight below the nose with one hand and hold the stick right behind the wing with the other. The motor has plenty of power to fly the plane, it does not need to be thrown hard. A hard throw will result in a zooming, nose up stall and a fall. Step forward, moving your arms forward for a gentle push, releasing the propeller first and then immediately releasing the airplane. After you have seen it fly a few times, you will have a better idea how fast to release it. The launch needs to get it only up to flying speed. The motor and propeller will take it from there.
After each flight, some things may need to be put back in place. That is why it is important to have pencil markings on the wings and fuselage slot. Once you have figured out the right place for the wing, you want to be able to get it back there again. Check that everything is in the correct place before each flight.
With 150 turns in the motor, the plane should climb slightly and circle to the left with the wings banked slightly down to the left. If the plane does not climb at all, move the wing forward closer to the propeller. If the nose goes up, the plane slows and tumbles, move the wing back, away from the propeller. Eventually you will find a wing position that gives a steady flight. Now you can add more turns to get longer, higher flights. Increase the number of turns by 50 on each flight. I have worked up to as many as 400 turns. Don’t forget the lube. Lube makes it noticeably easier to put in more turns and the motor will last much longer. Lube is even more important if you want to put in many turns.
As you increase the turns and torque of the motor, you will begin to see the plane climbing less, not more. What is happening is that the increasing torque of the motor is banking the plane to the left. With the left wingtip down, the plane slips downward to the left. As it slips to the left, the airflow strikes more on the left side of the fin. This causes the plane to turn even more to the left. Since the plane is banked to the left, a left turn is a downward turn. You are putting more turns and energy into the motor and getting shorter flights! We must counteract the left bank and left turn. There are several things that may be done. It is good to know about all of them.
This can be especially bad with an unlubed motor. Lube relieves the internal stresses in the motor, allowing many more turns without excess torque. A lubed motor does not develop as much torque at the same number of turns, so it produces less of a left roll. You can get many more turns into the motor before you see the left rolling dive.
The AMA breaks the wings and bends the tips up to increase the tip dihedral. This increases the roll stability and resists the roll to the left. The left sideslip produces more lift under the angled left wingtip, countering the left torque roll before it goes too far. If you do this, you can’t take the wing off and you can’t add camber for more lift, as I show you later.
You can cant the wing, putting the left wing forward of the right wing. This angles the left wing more into the airflow, so it gets more lift and counters the left torque roll.
You can also slide the wing a bit to the left. The problem with this is that the right roll will remain after the motor torque goes down. Then you may have a roll to the right.
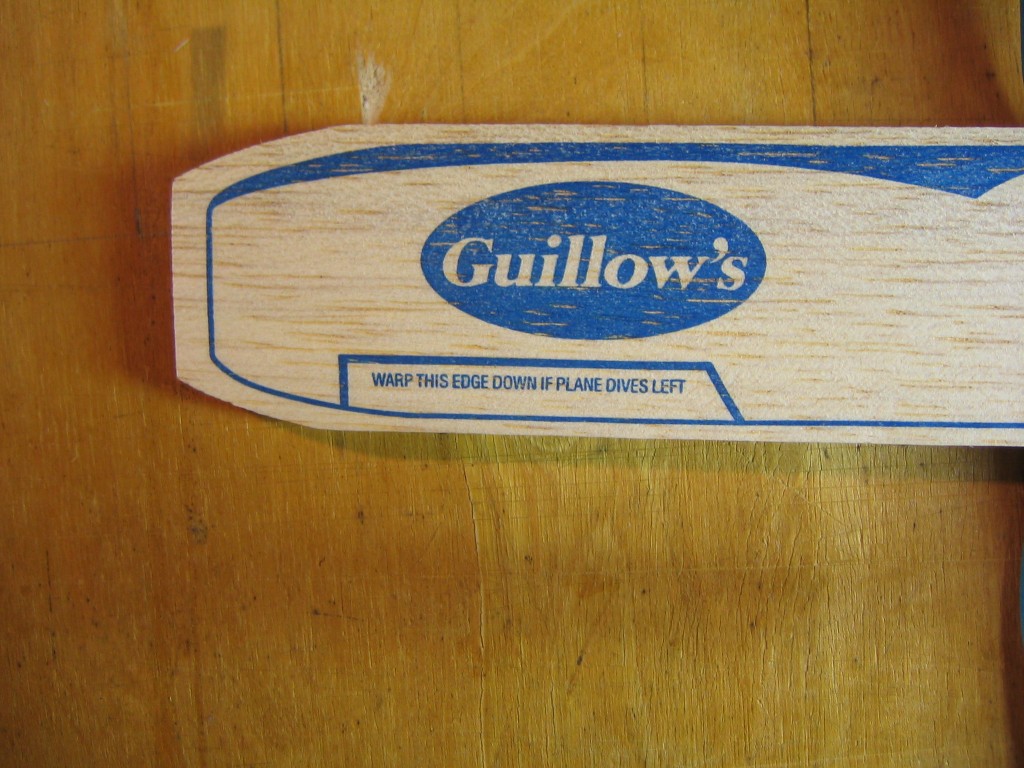
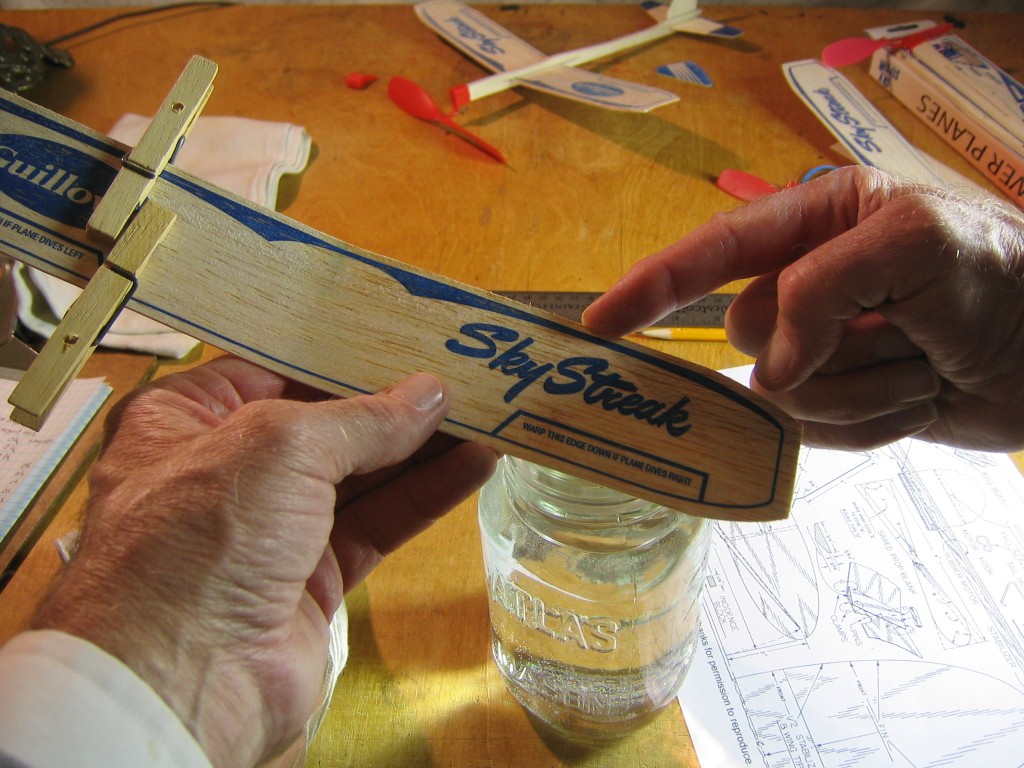
The wing has a note on it WARP THIS EDGE DOWN IF PLANE DIVES LEFT. I advise dampening the last 1/2″ of the wing if you try that. Twisting the whole wing can have the same effect. It is unlikely to dive right. If it does that, something is unsymmetrical. Take a close look from the front and top.
Maybe the simplest way the left turn can be decreased by bending the prop hanger slightly to the right. Then the propeller will pull the airplane to the right. Simply grab the prop hub and the nose and bend the hanger so the prop shaft points to the right. I say slightly because the Sky Streak is a fairly heavy airplane that must fly fast to stay up. A fast airplane also responds strongly to any control inputs. Too much right thrust and you will have the opposite problem, the plane will dive to the right into the ground. You want just enough to overcome the left dive. The plastic prop hanger will eventually return to its original position. You will need to check and retwist the hanger occasionally. The nice thing about this correction is that it works in proportion to the torque of the motor, the thing we are trying to correct.
With an amount of right thrust to exactly balance left turn, the plane will zoom straight up into a stall and tumble down.
With a little more right thrust, you will be able to make the plane climb in a right circle. Because it is the thrust of the propeller that is causing this right turn, when the motor winds down, the right turn will disappear and the plane will descend in a left circle, making an overall figure 8. A figure 8 is hard to fit on a small flying field. You don’t know where the second circle is going to come out. Unless you have a very big flying field, it is preferable to have the plane circle the same way on the way up and on the way down.
With even more right thrust, you can make the plane dive in to the right.
Make Right Rudder
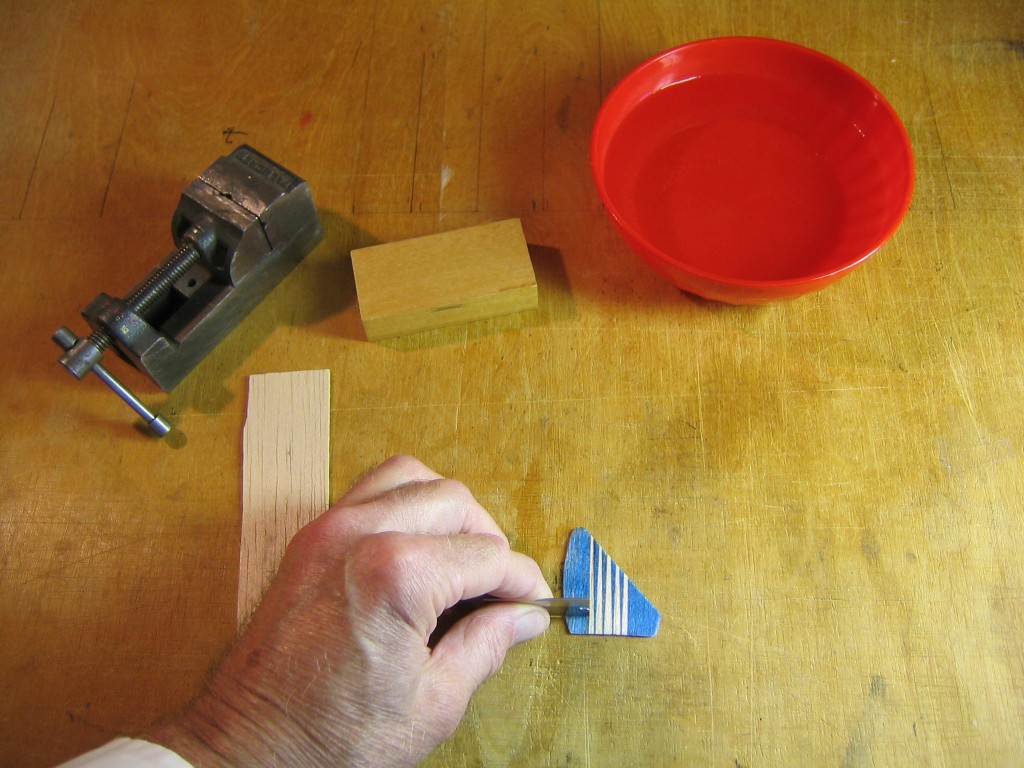
You can also use the fin to reduce the left turn or produce a right turn. You can moisten the wood and finger form camber into the fin to pull to the left, turning the nose to the right. Bend the fin convex side to the left. Be careful, very little camber will do it. Or you can wet bend the trailing edge of the fin a bit to the right, to act like a rudder. Or you can cut the balsa to make a separate rudder. First make a 1/4″ cut into the trailing edge of the fin, just a bit above where it comes out of the slot in the stick, to make the rudder separation.
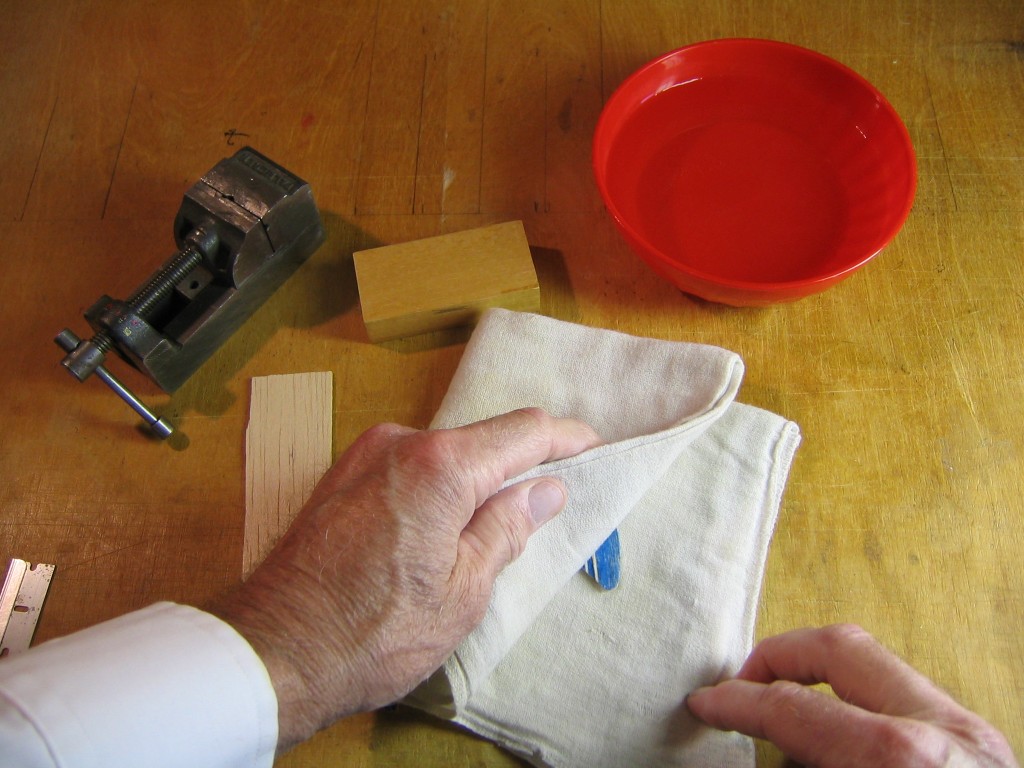
The trailing edge of the fin is soaked in water until the wood is flexible.
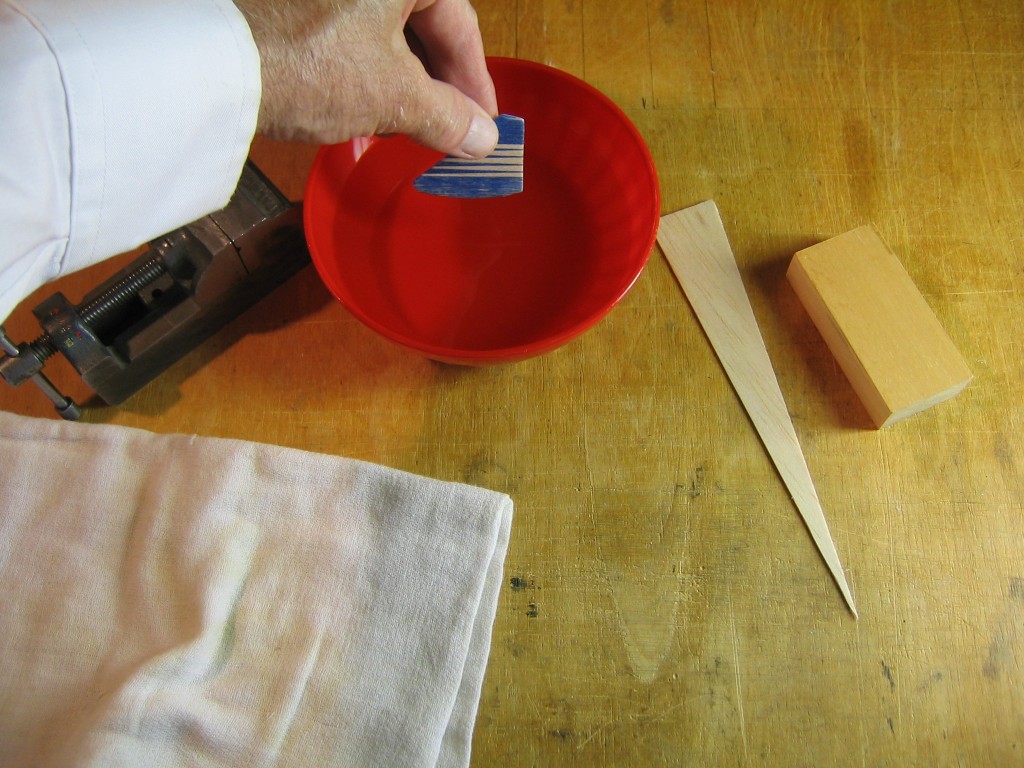
Blot it dry.
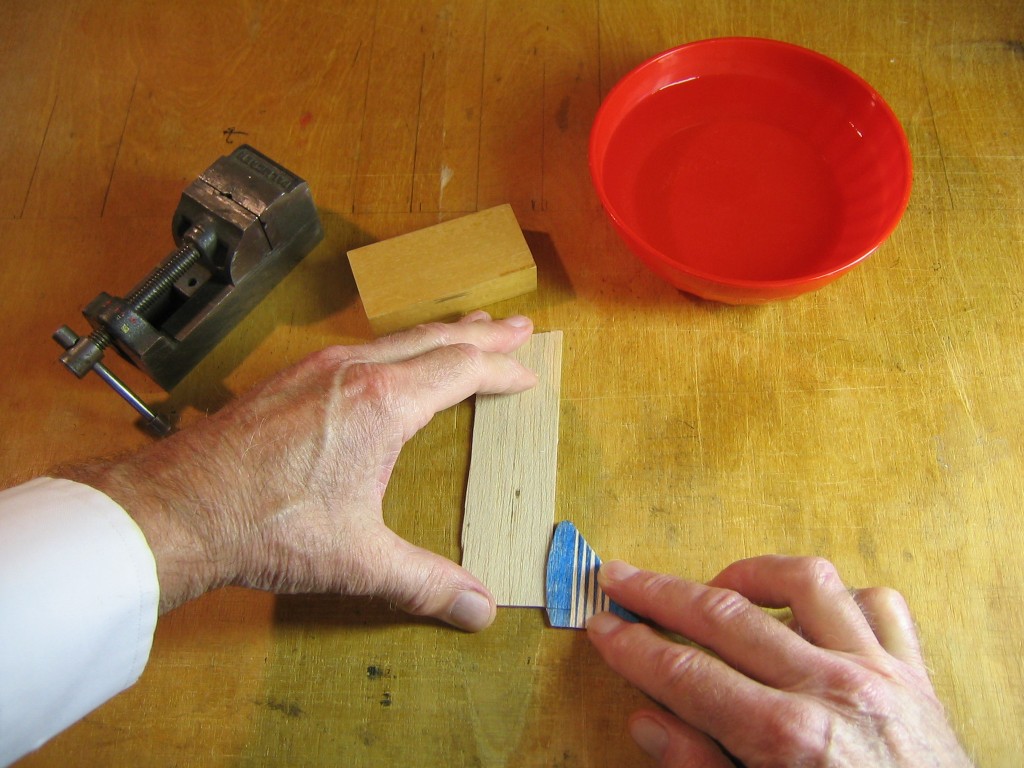
Place the trailing edge of the rudder on top of a shim to space it up off the table by the amount you want the rudder to be deflected. 1/32″ is a good amount. Place it so the rudder is deflected to the right, since we want a right turn.
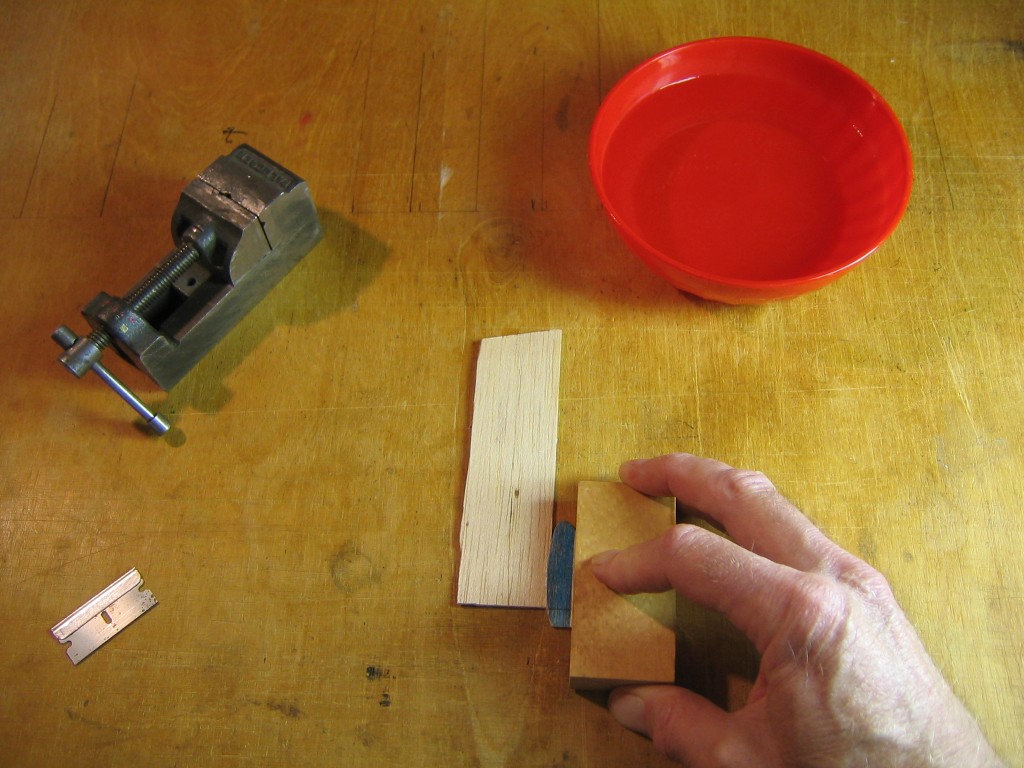
Place a block of wood on the main portion of the fin to keep it flat on the table.
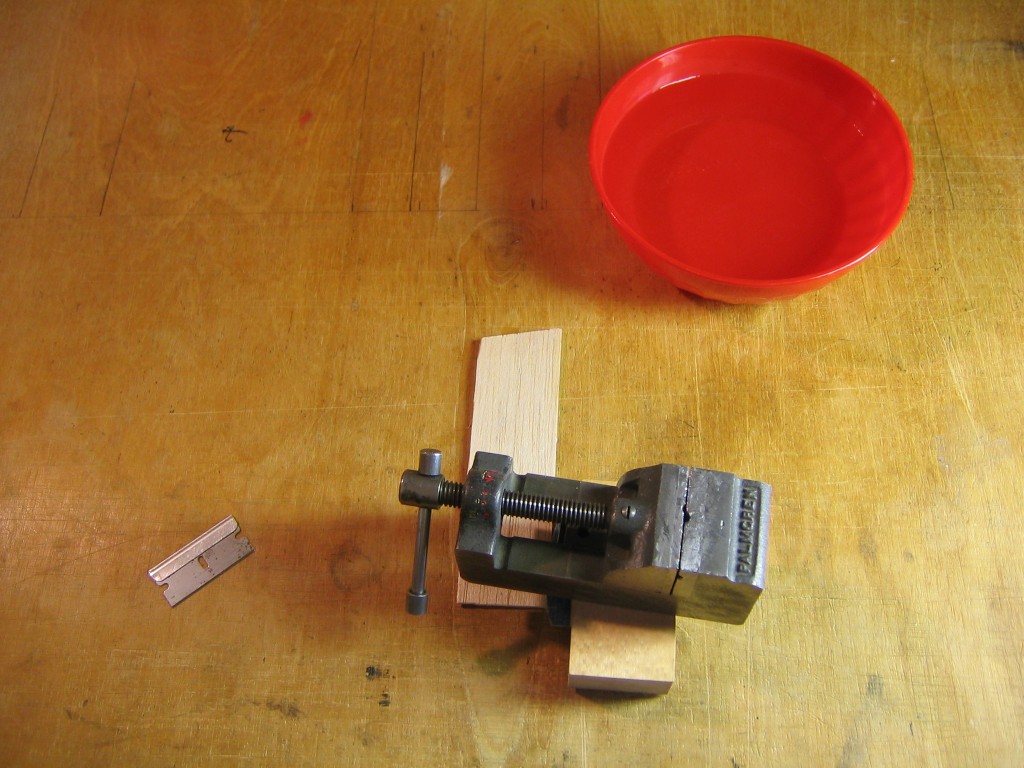
Place a weight on the block to keep it flat. Leave it until the balsa dries out. It will keep its shape once it dries out. You can shift it slightly with your fingers.
The wrong amount of right rudder can have the same effect as the wrong amount of right thrust; the plane will arc to the right into the ground, or it may zoom straight up into a stall. Right rudder works whether the motor is turning the prop or not. Set the rudder to just overcome the excess left turn and maintain a left circle. Or set a little more right rudder to give the size of right circle you want in the glide and adjust the thrustline setting to give the same right circle in the climb. This will allow a consistent right circle. When flying on a small field, consistent circle direction is preferred, whether left-left or right-right. You will find that different combinations of side thrust and rudder can accomplish similar or different flight patterns. Remember that side thrust is most effective at high torque, but not at all when the motor has unwound and rudder is most effective at high speed, but retains effectiveness at gliding speed.
A right-right flight pattern can be accomplished with a bit of right thrust for right turn in the climb and a bit of right rudder to maintain right turn in the glide.
A right-left or left-right pattern is very tricky. The transition from one to the other can produce a stall if it takes place too early on the power curve. If the plane is going straight forward under excess power, it will nose up and the wing will lose lift.
We can also make a rudder with flexible wire hinges. You can use the thin wire that comes in some bread bag or vegetable ties. Soak it to remove the paper, or cut the plastic off with a razor blade. Scrub it clean with steel wool. Thin electrical wire is a second choice because copper is softer and won’t hold the bend as well.
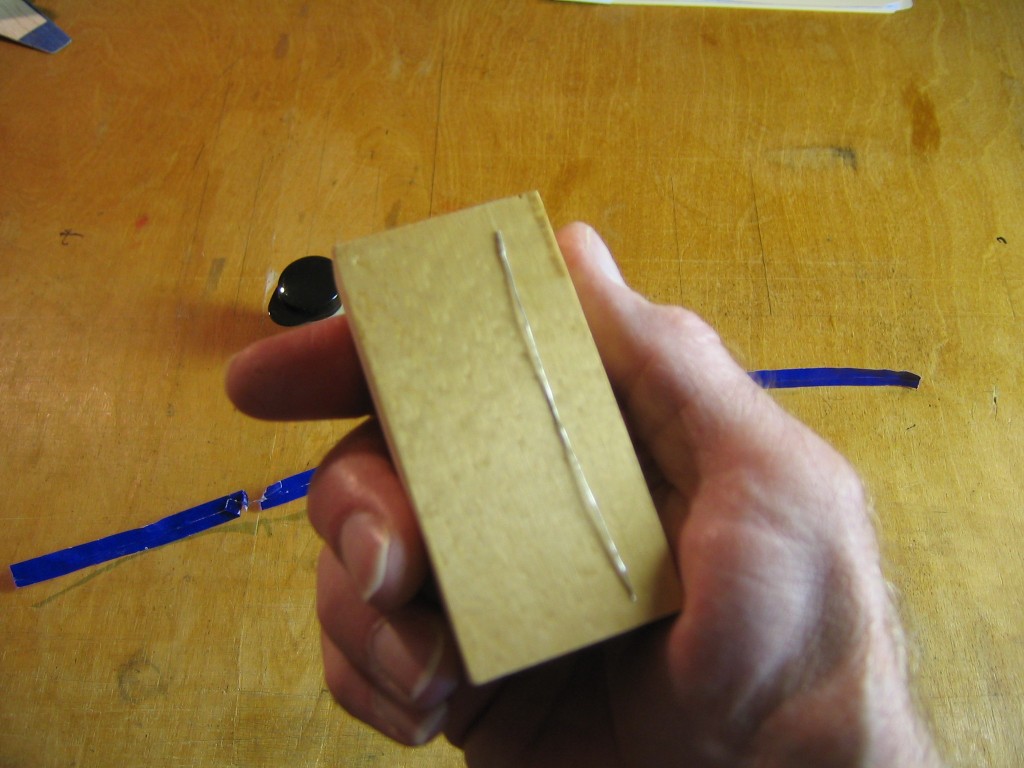
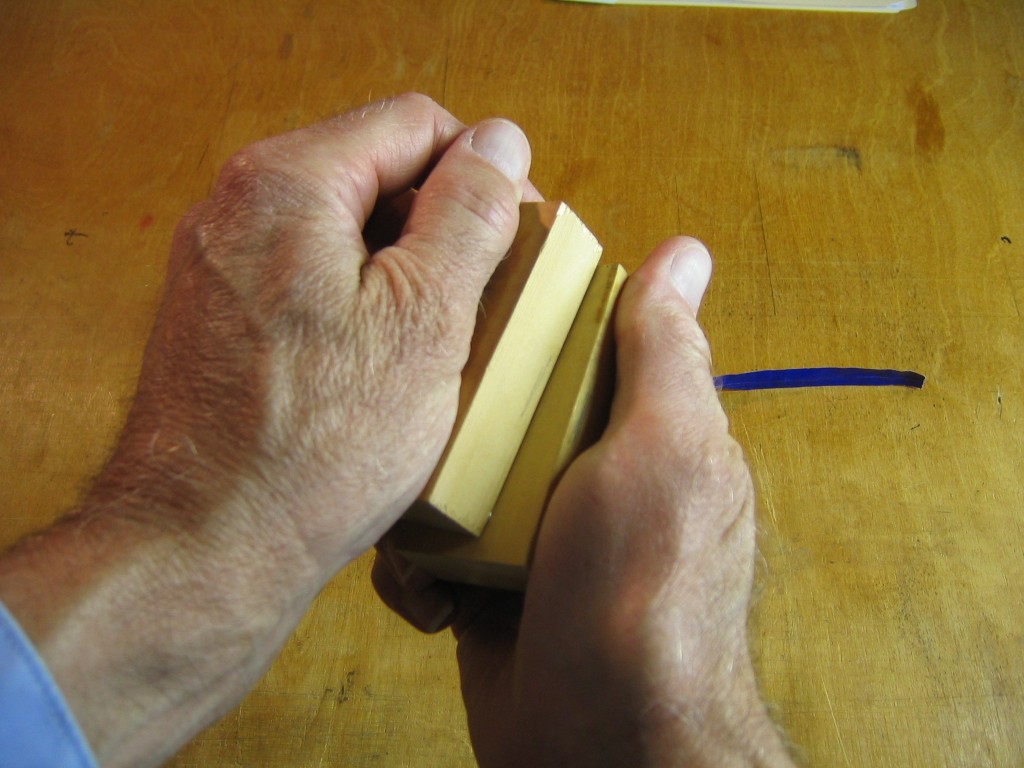
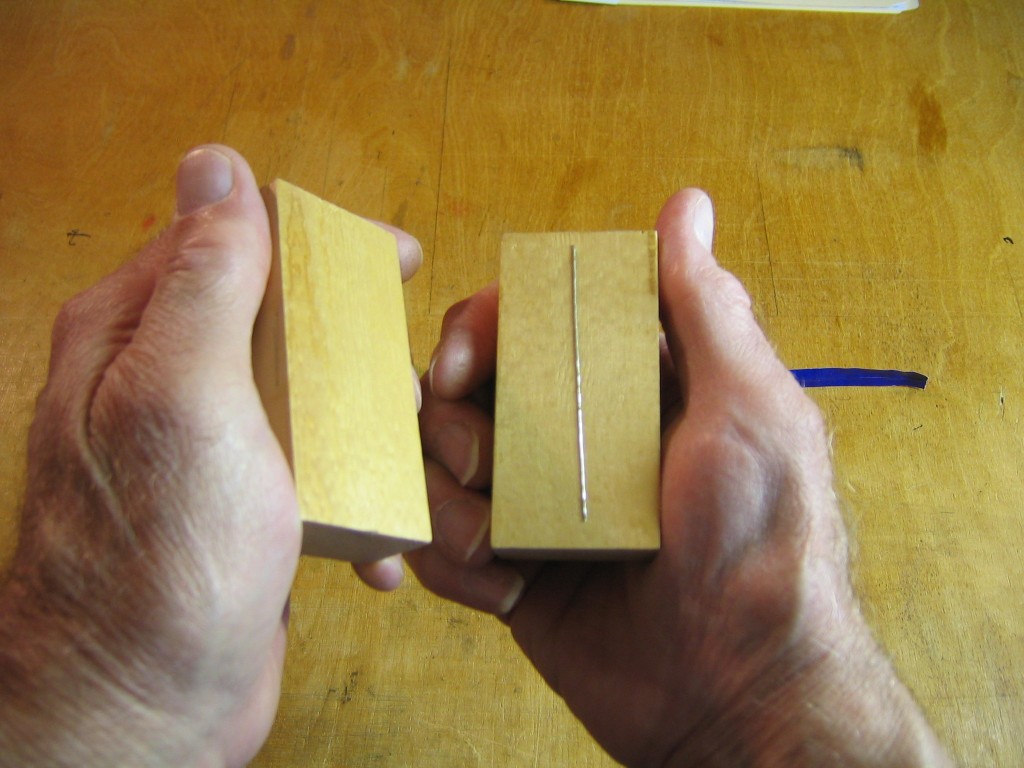
Roll the wire between blocks to straighten it.
That’s straight enough.
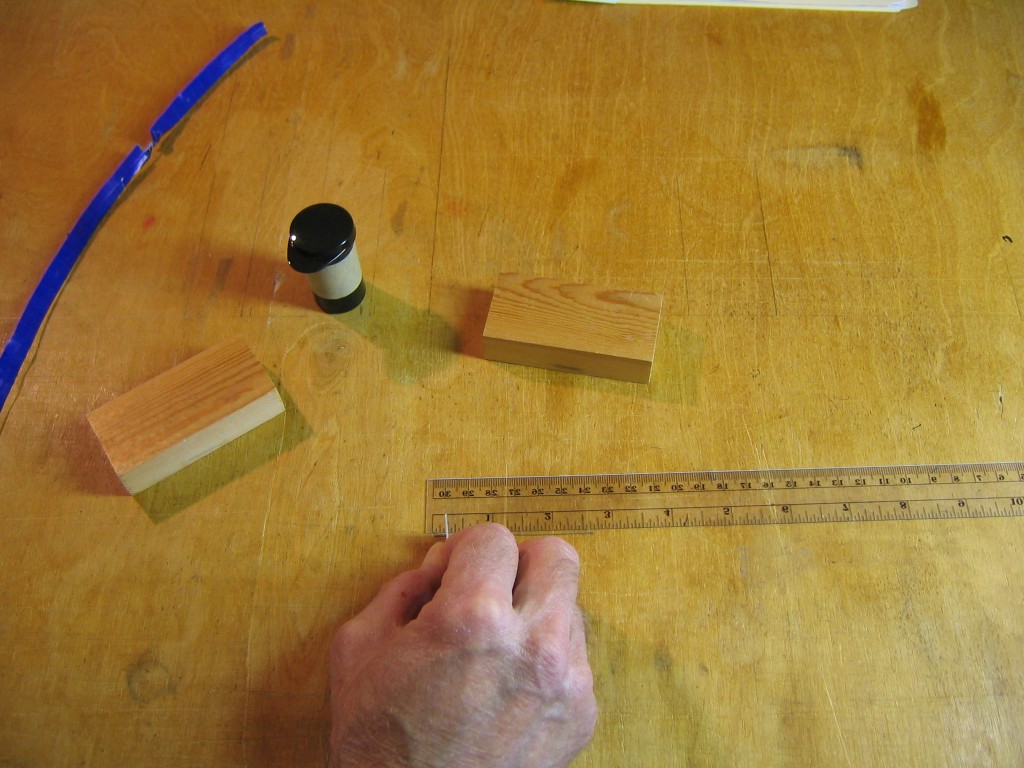
Cut 1/4″ pieces by rolling the wire under the razor blade. You can also use scissors on this thin, soft wire.
We need only two. Save the others for other projects.
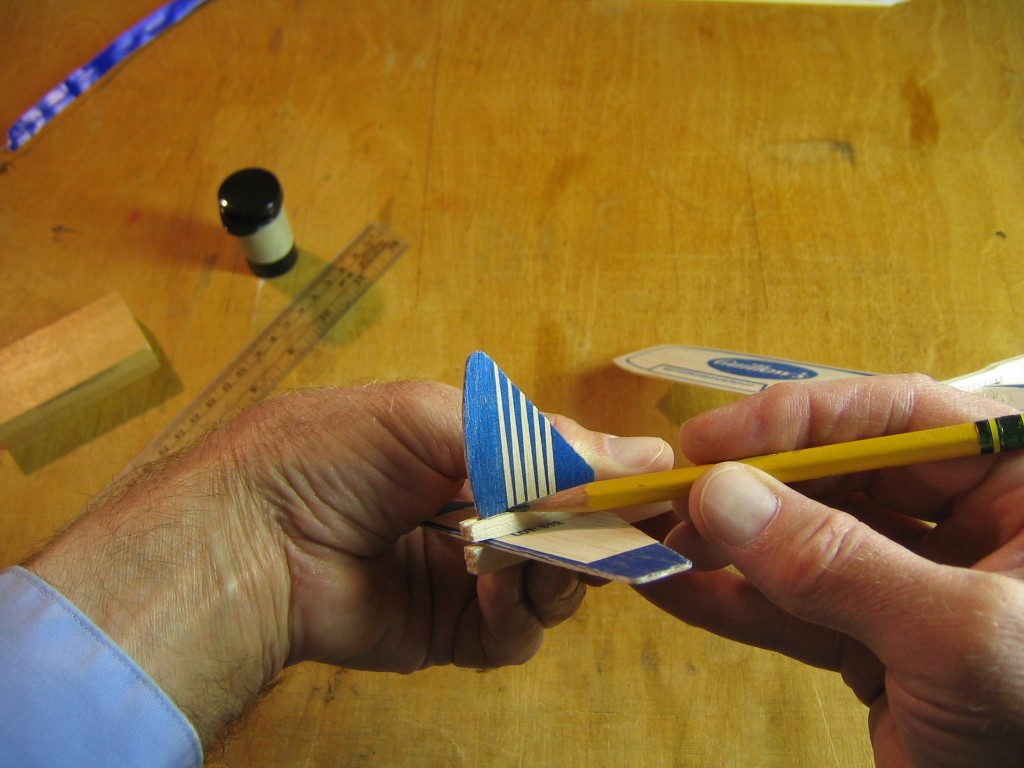
Mark where the fin comes out of the fuselage.
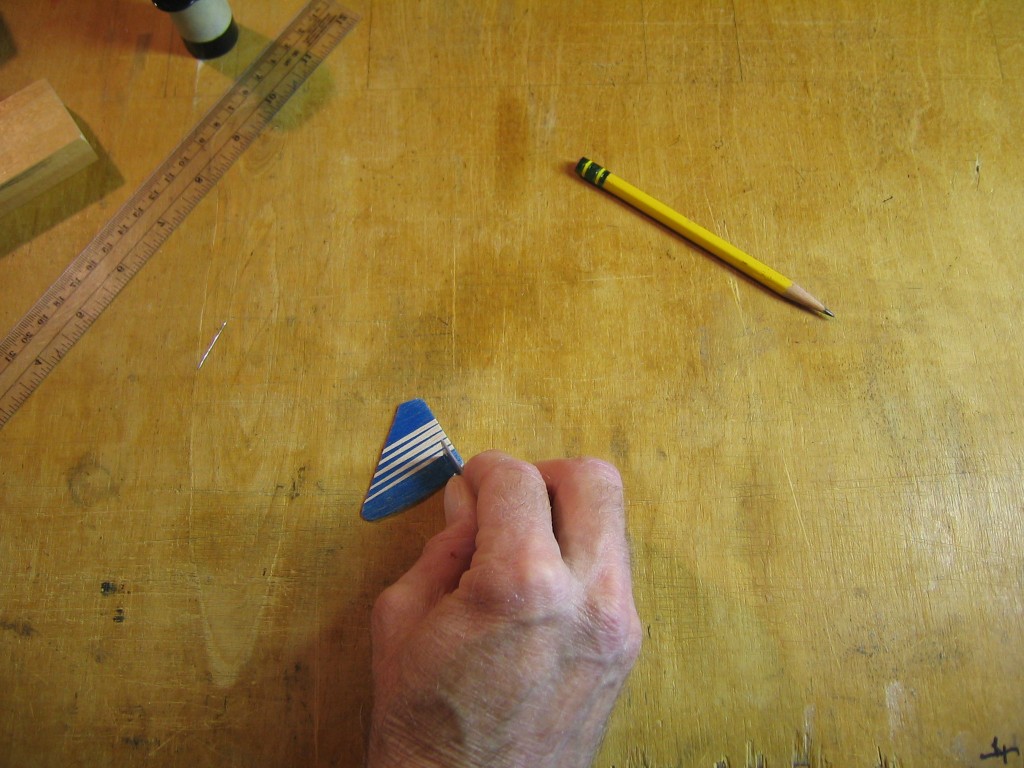
Make a 1/4″ long cut just above that line to form the bottom edge of the rudder.
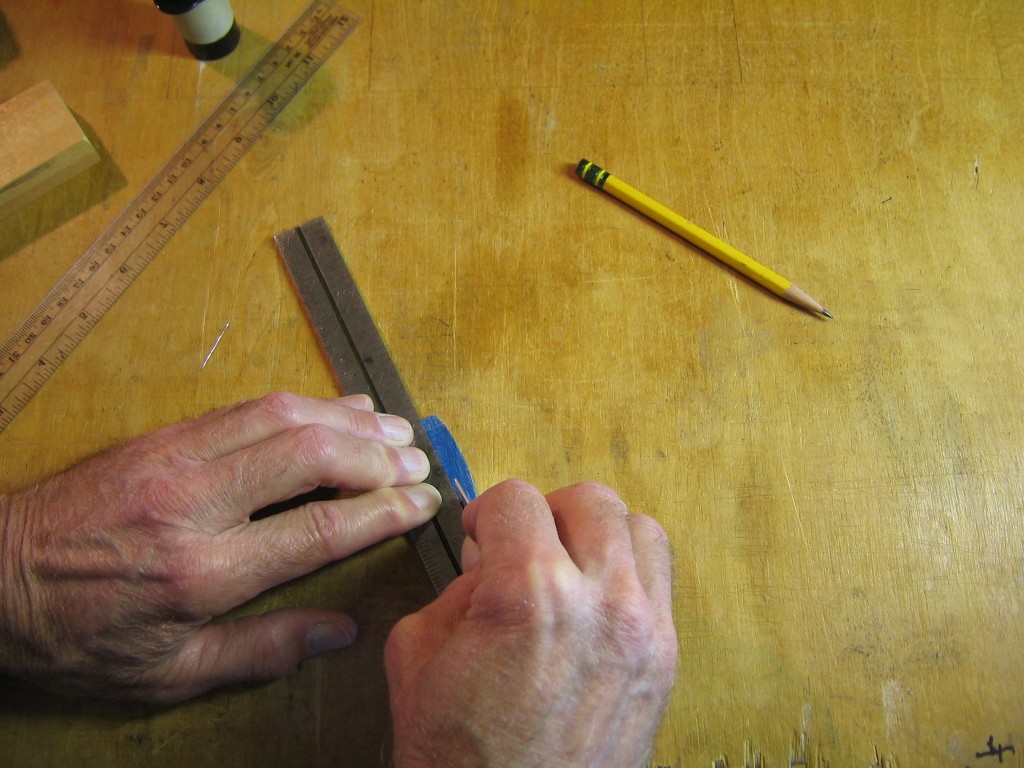
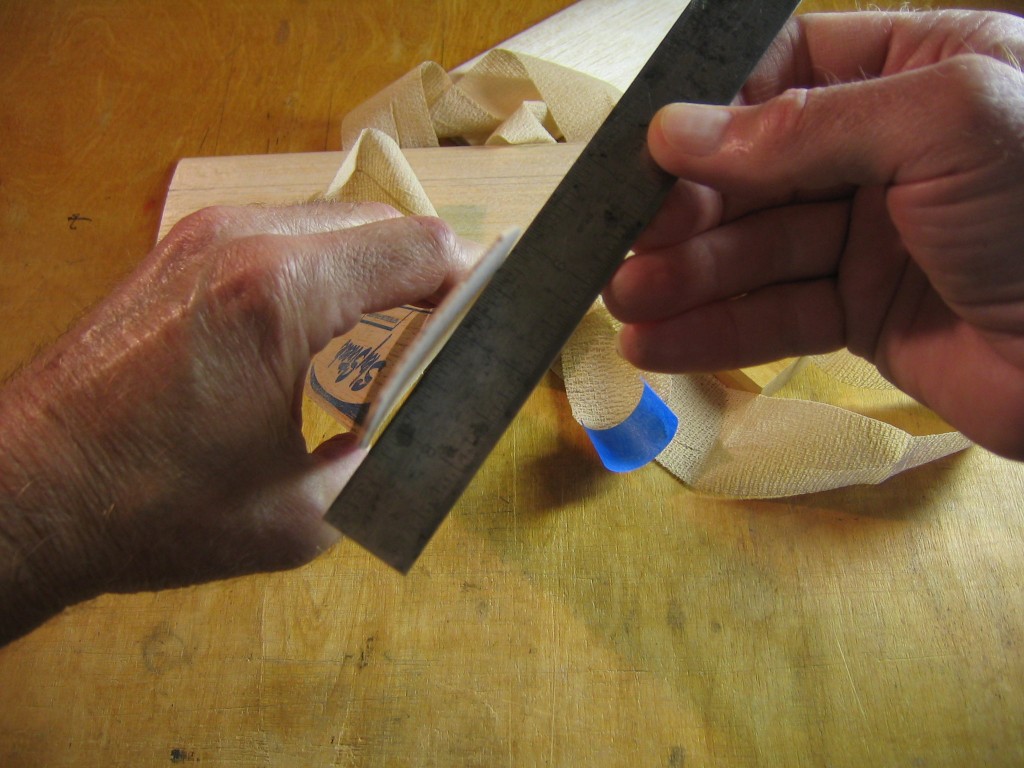
Align the steel rule along the edge of the rudder and cut with the razor blade.
The rudder is now separate from the fin.
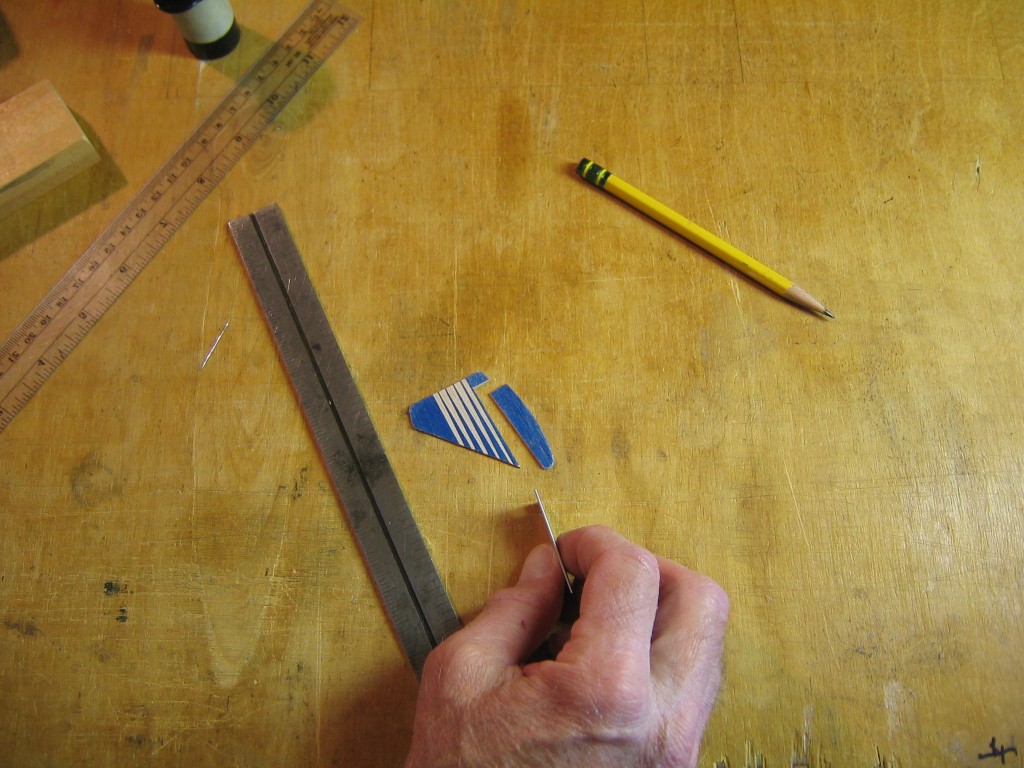
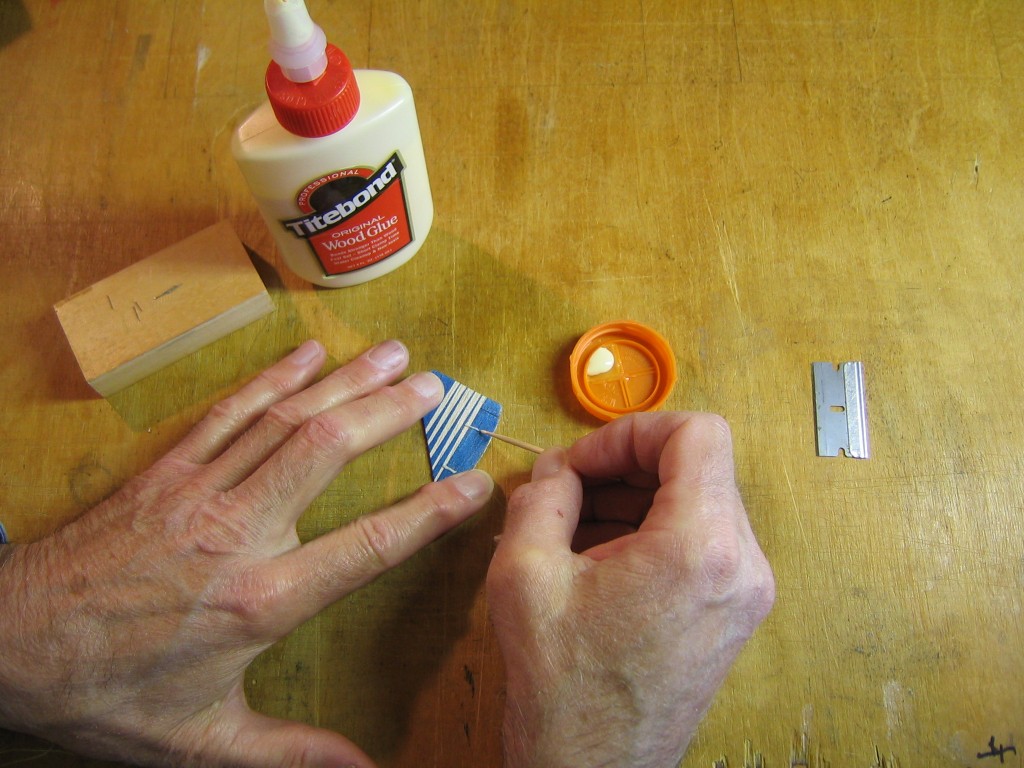
Put the rudder and fin back together, mark 1/4 and 3/4 along the rudder separation line. Draw a thin line of glue across the hinge line at those marked places with a sharp pointed stick. Put the hinge wires on the right side of the fin to bend right for a right turn.
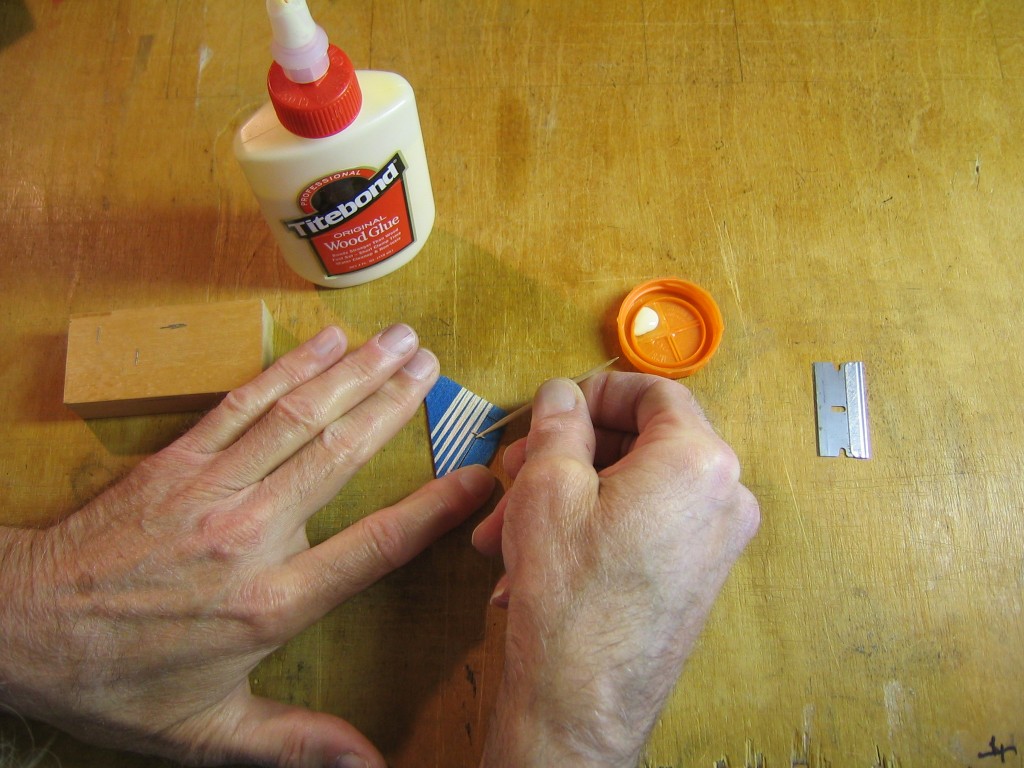
Place the wire in the glue and position it carefully.
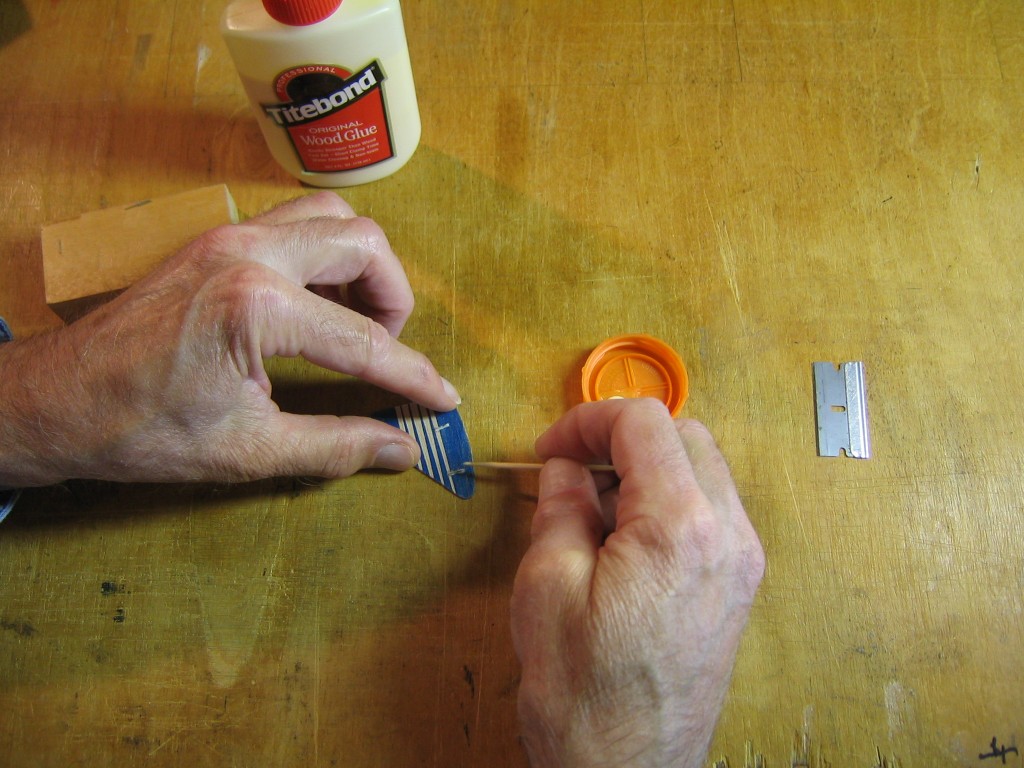
Coat the wire with glue and set it aside to dry.
It does not take much bend in the rudder to make this fast plane turn. The rudder can be offset by about half the thickness of the wood sheet.
Camber the Wing
Now that we have got successful flights out of our Sky Streak, we want to find ways to get longer flights. One thing we can do is improve the lift and efficiency of the wing by giving it a cambered airfoil. This wing is flat. Not only will the cambered airfoil have a higher lift coefficient slope, the trailing edge will slant up, increasing the attack angle of the wing, also increasing the lift.
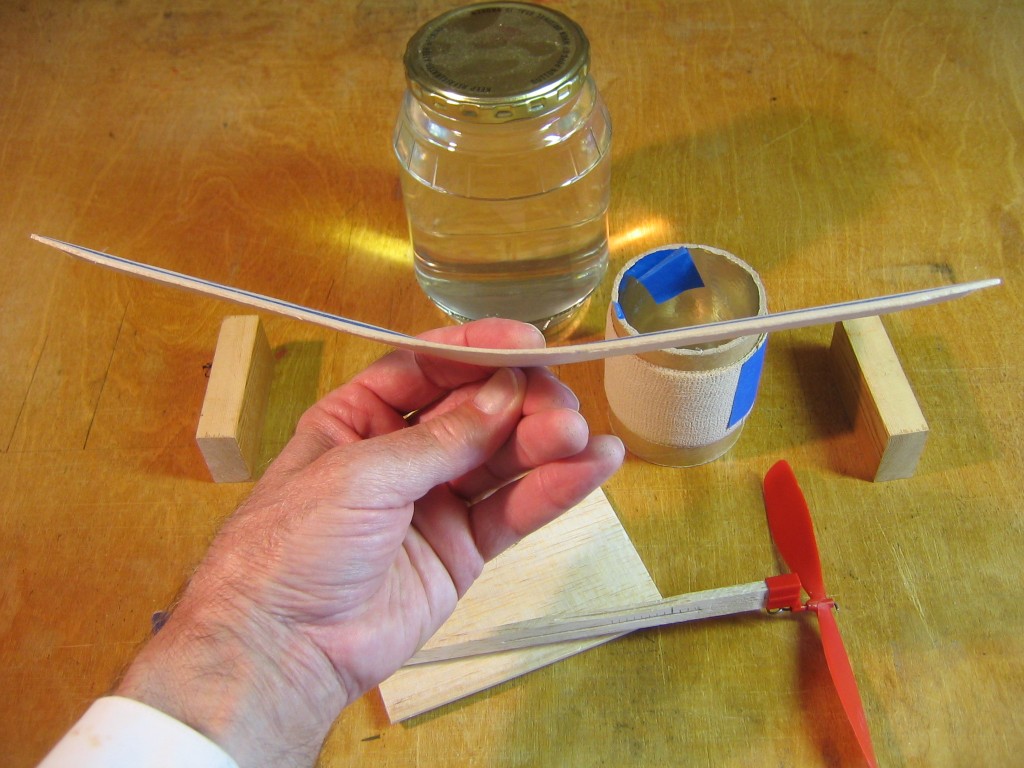
My first cambered wing was made with forms. That is the best way to do it. The outer wing panel was soaked in water to soften the wood, then it was strapped onto a curved form with an Ace bandage to shape the curve, and allowed to dry. It occurred to me that most kids would not have easy access to preformed balsa airfoil forms or the ability to make their own forms. I decided to try forming the curve with my fingers. This requires a little more care and attention, but can produce equally good results.
I will first explain how to form camber in the wings with fingers. We want to leave the center 2″ of the wing alone for now. We want to leave the dihedral curve as is. We can’t bend balsa sheet in two opposite ways at once, so the center of the wing must remain straight across the middle to maintain the bend upward to the tips. Start by putting a mark 5″ in from each wingtip.
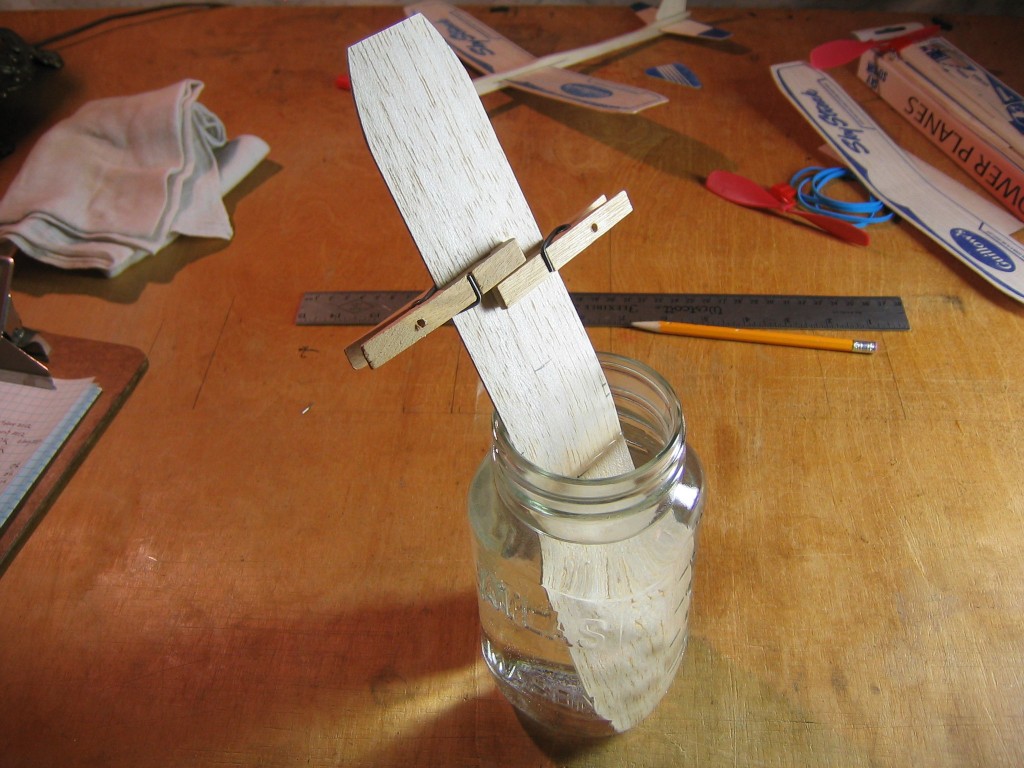
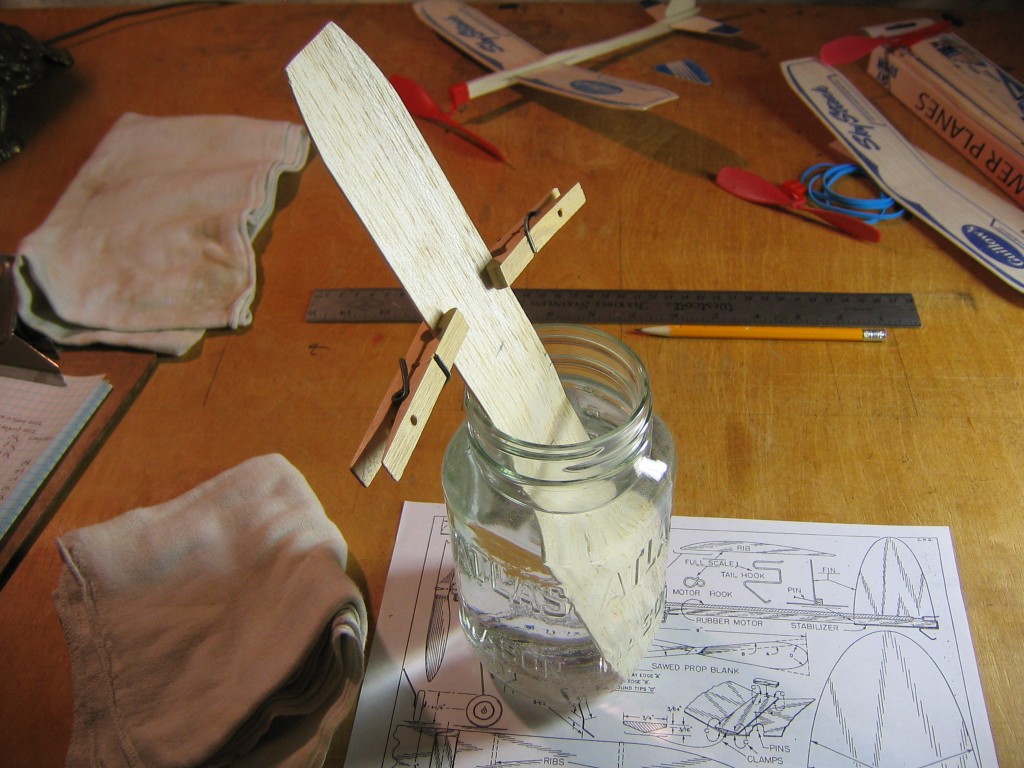
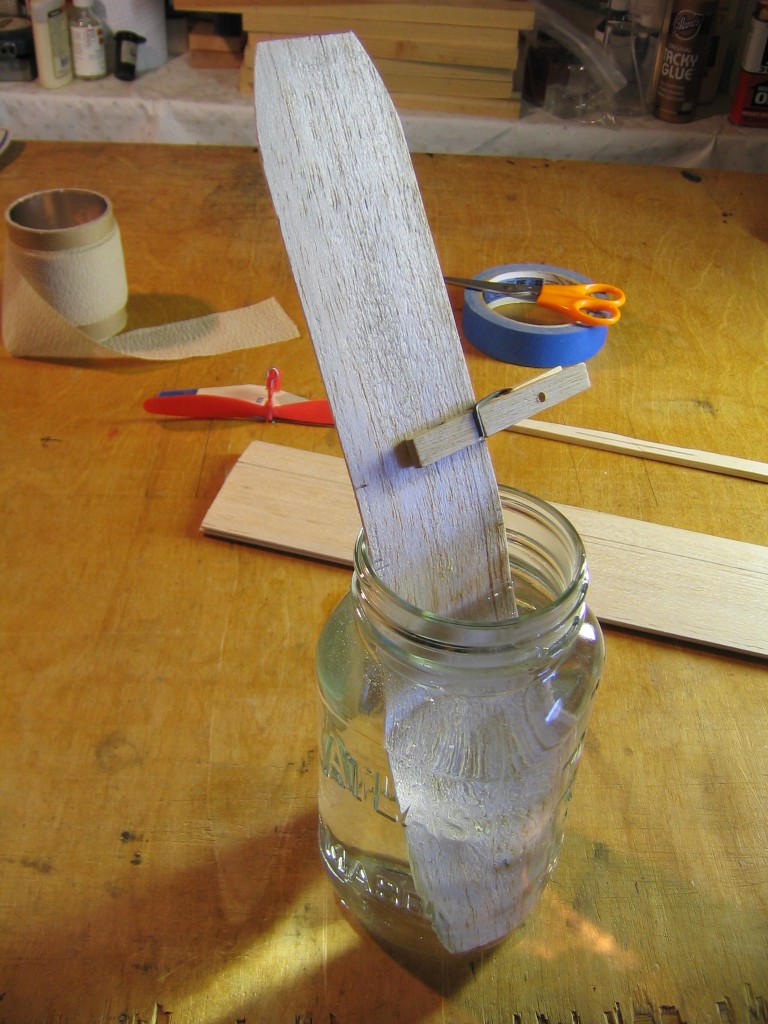
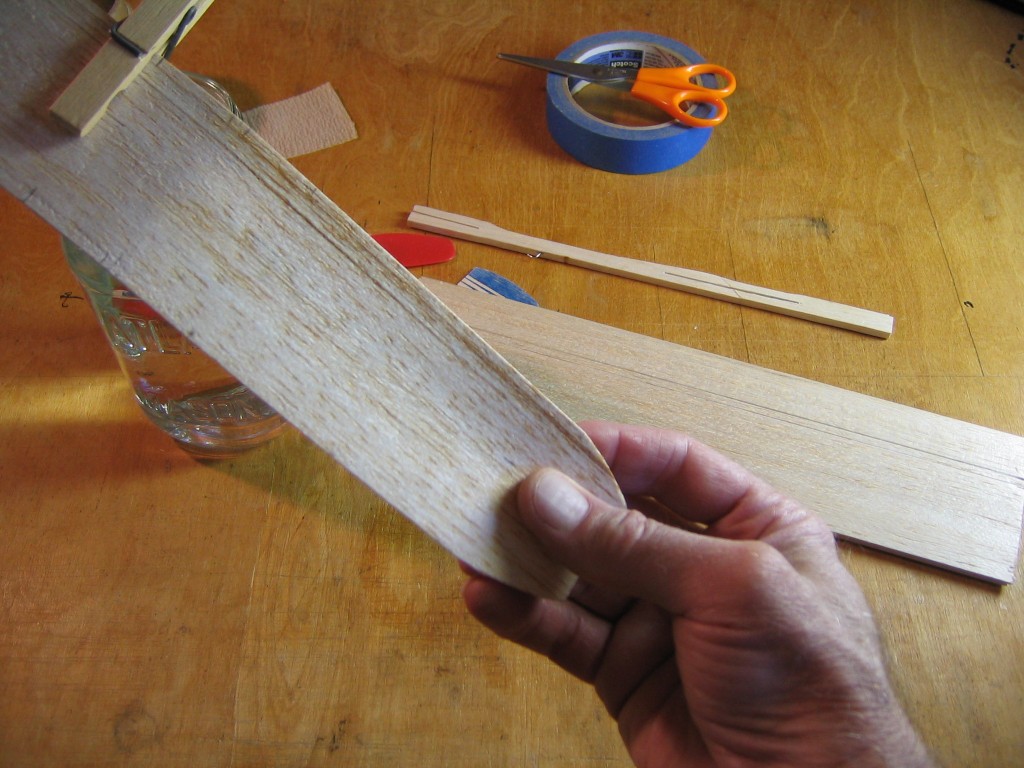
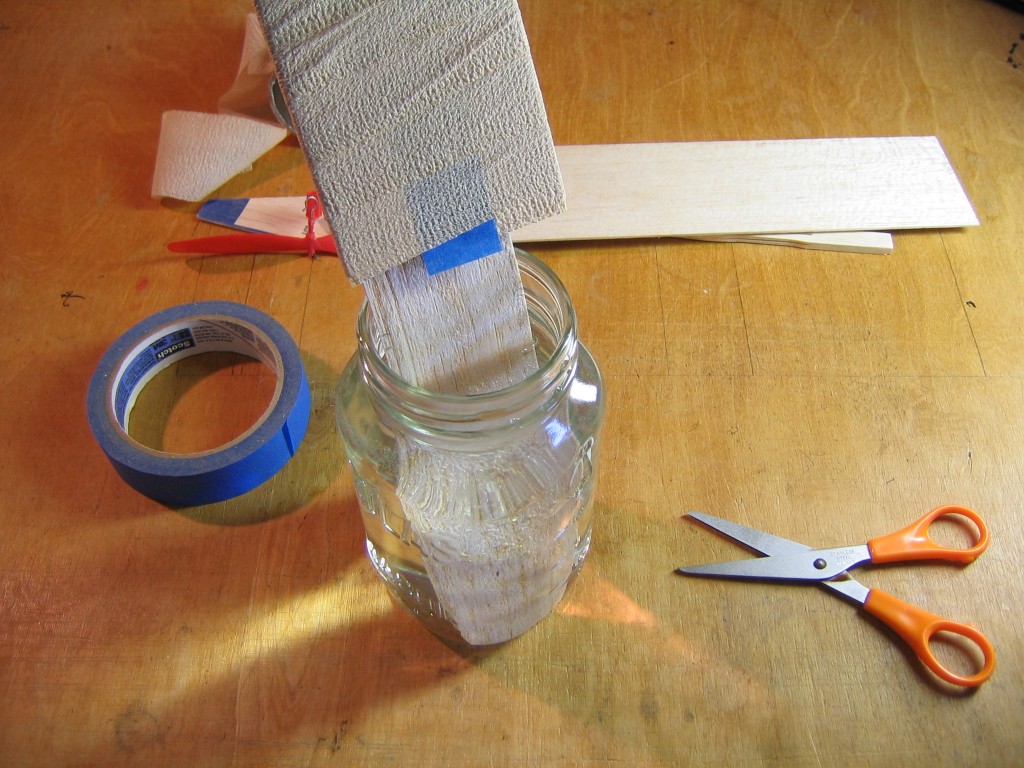
Fill a jar 5″ deep with water. Put one end of the wing into the water. Weight it with clothespins to keep it from floating up. Let it soak until the wood becomes flexible, 10 or 15 minutes. Take it out every few minutes and try gently bending it to see how it is coming. You will notice a change at first, but after a while you will not notice any further change. At that time, it is done. This one happened to be a fairly stiff piece of balsa. Softer wood would have allowed more curve in the wing.
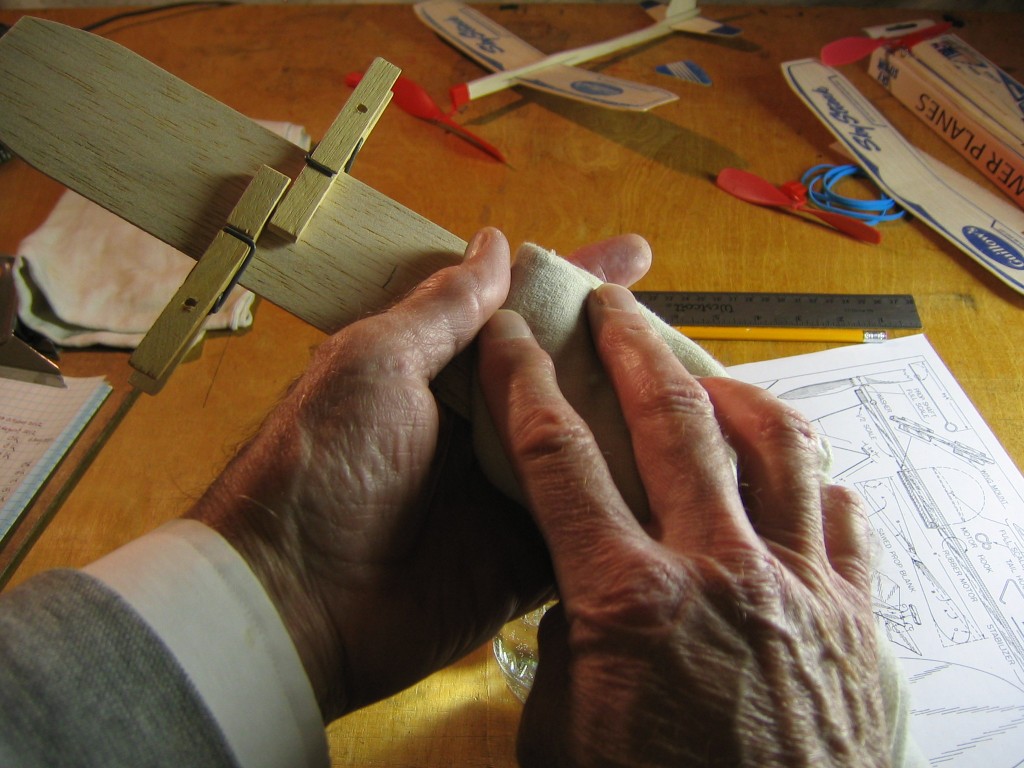
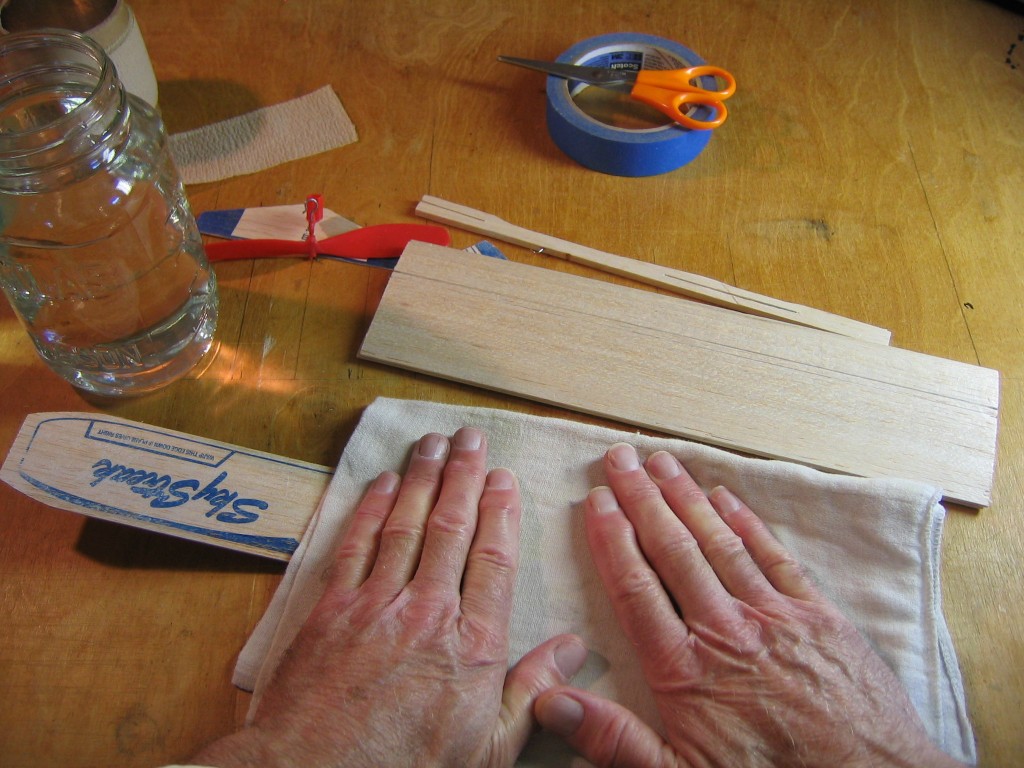
Blot the water off the wing.
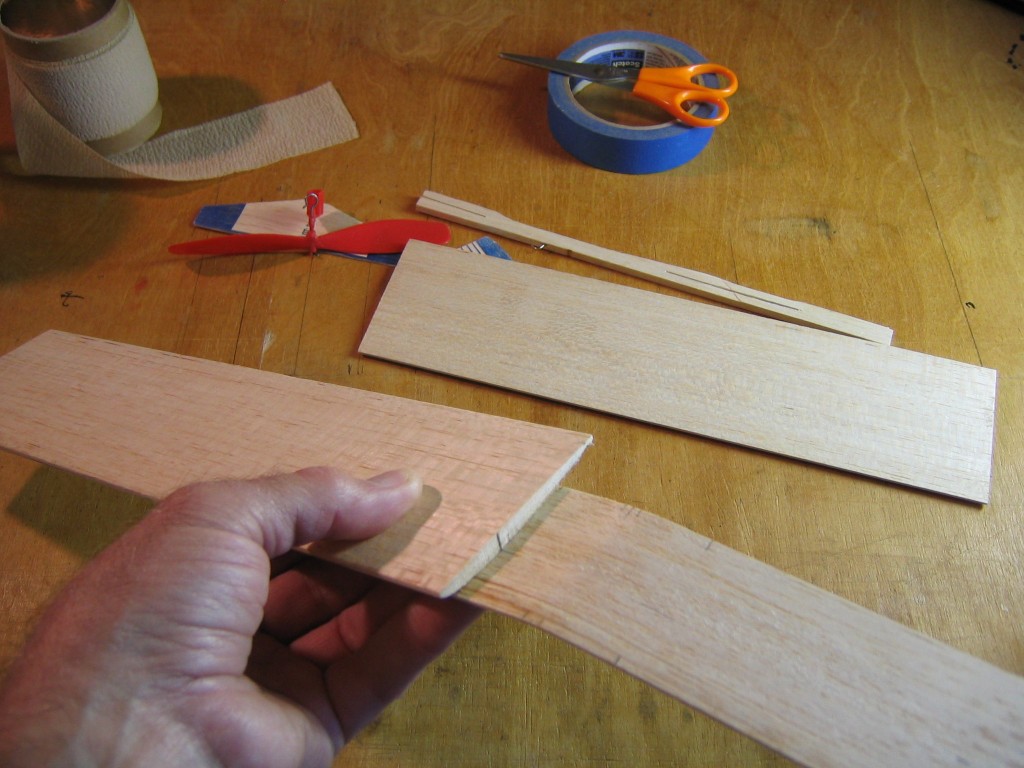
Identify the leading edge. Refer to any model plan showing a wing rib. Notice that there is more curvature near the leading edge. Near the trailing edge, it is almost straight. We want the high point to be at about 40% across the wing from the leading edge.
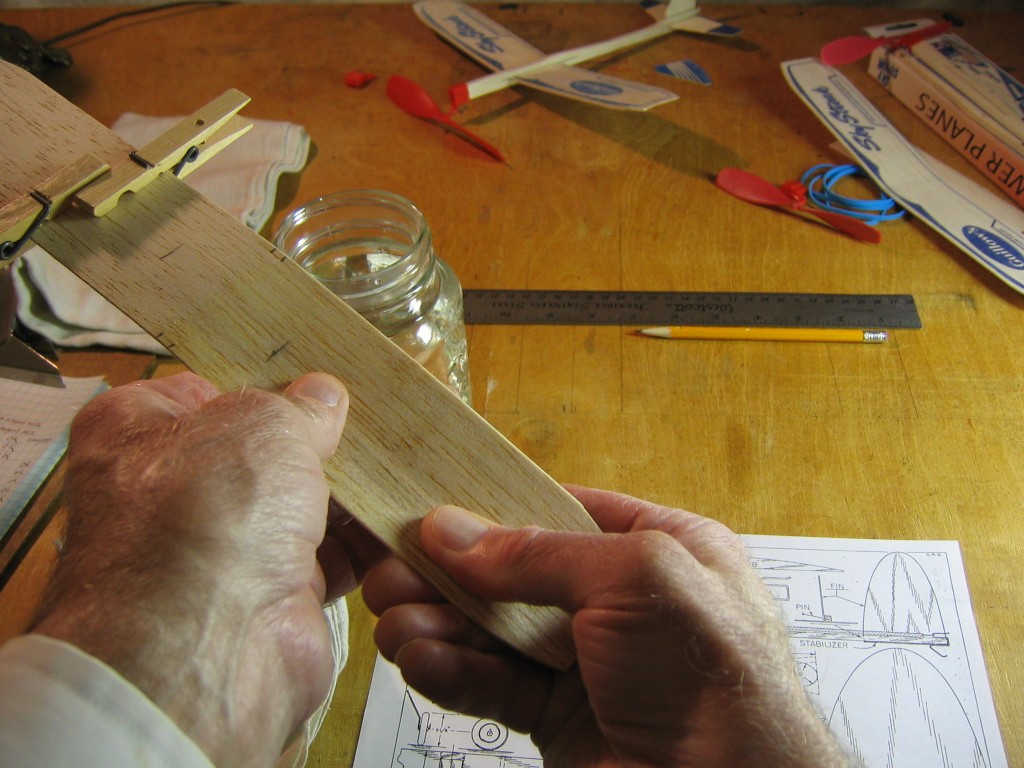
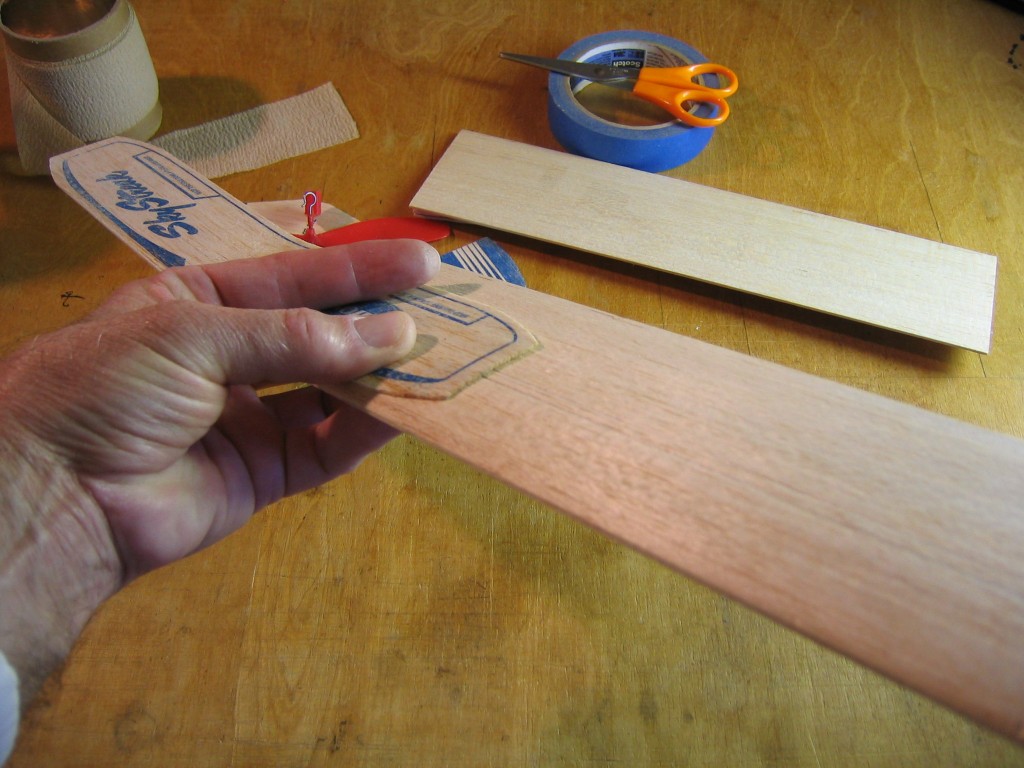
Wrap your fingers around the top of the wing and press your thumbs into the bottom of the wing, more toward the leading edge, and form a curve in the wing. The stiffness of the balsa will force the curve to be gradual. You won’t be able to get much curve near the center. It will be easier to curve the airfoil shape near the tip. The airfoil curve will not be uniform, but this is the best we can do with this type of wing construction.
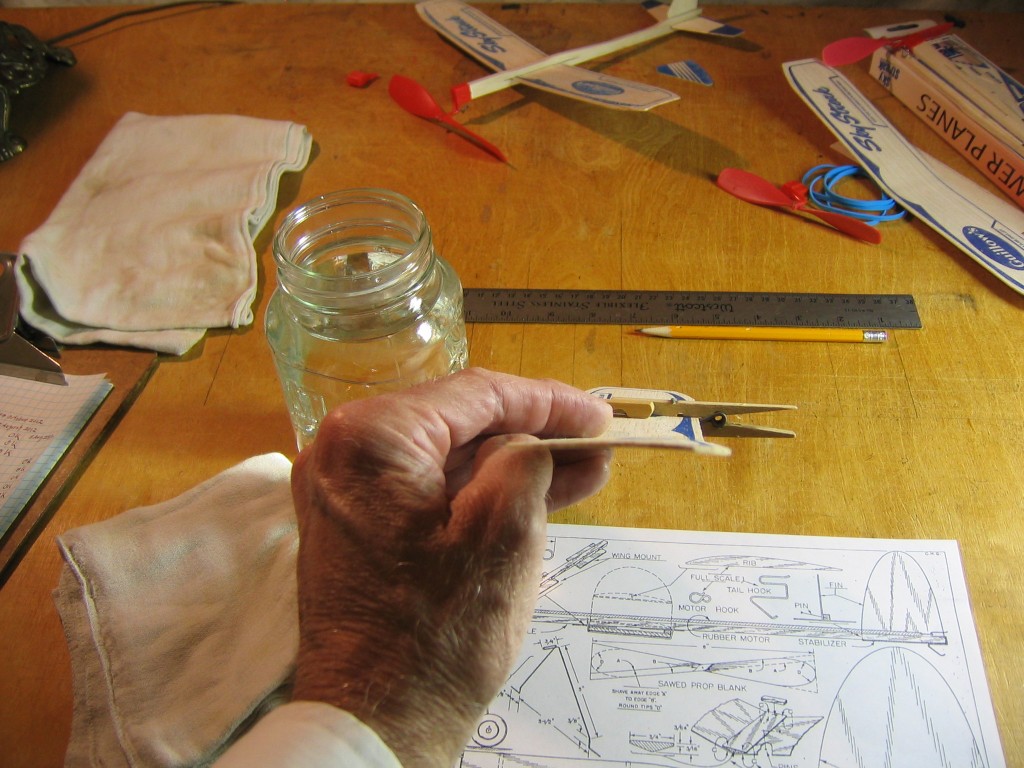
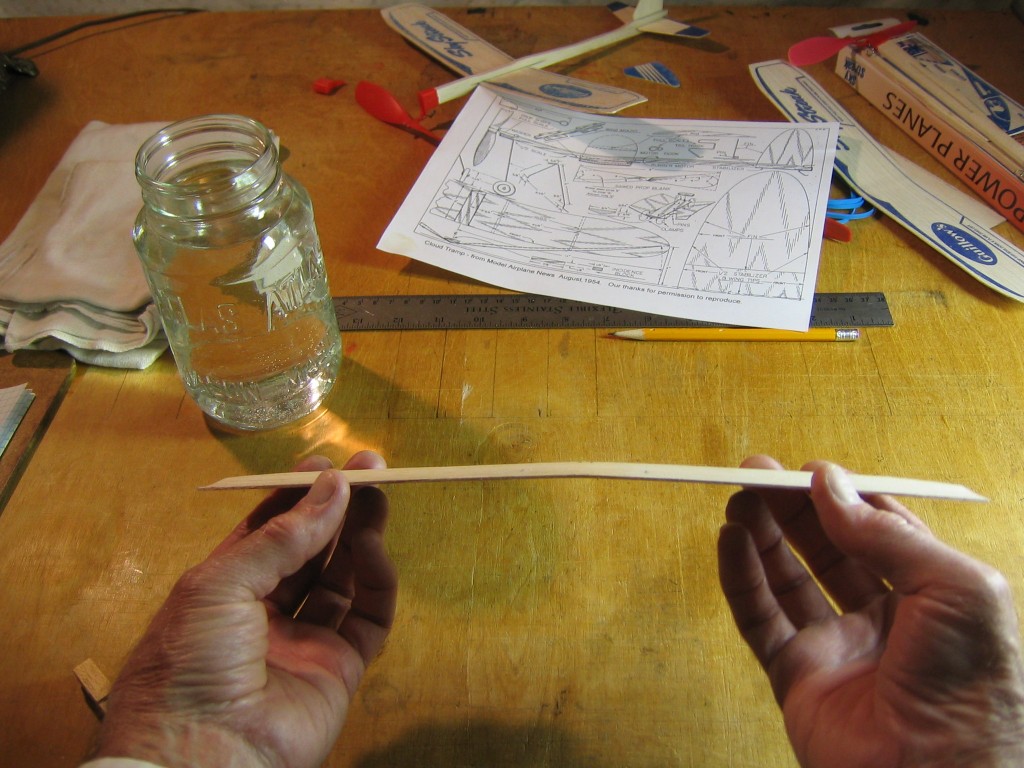
Look at the wing from the end to see how the curve is coming along. I would prefer more depth to the curve, but that’s about all that can be had with this stiff piece of wood. Also look at the wing from the front. Line your eye up with the center line of the wing and look straight across it, then look out along the wing to the tip and make sure it is not twisted. Work out any twist now. Once the wood is dry, it is hard to untwist. (Some day you will want to deliberately twist wings. But you will need to know what you are doing.)
When you are satisfied with the shape of this wing, put the other end in the water and shape that wing. (You can see the wing rib on the Cloud Tramp drawing under the jar.)
Check that this wing is untwisted and matches the first wing. Redampen and rework as needed until they match as closely as you can get them. A bright light shining on the underside of the wing will help you judge the match. Tilt the wing until you can look straight across both edges. The bright surface should disappear from view at the same time on both wings as you rotate it.
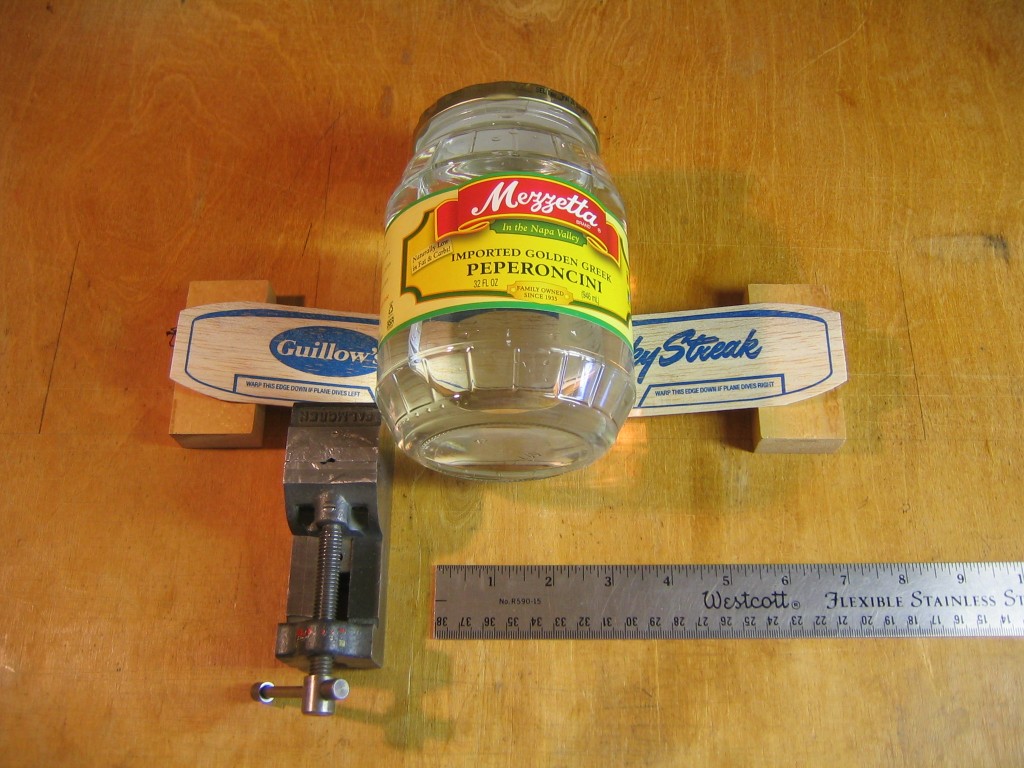
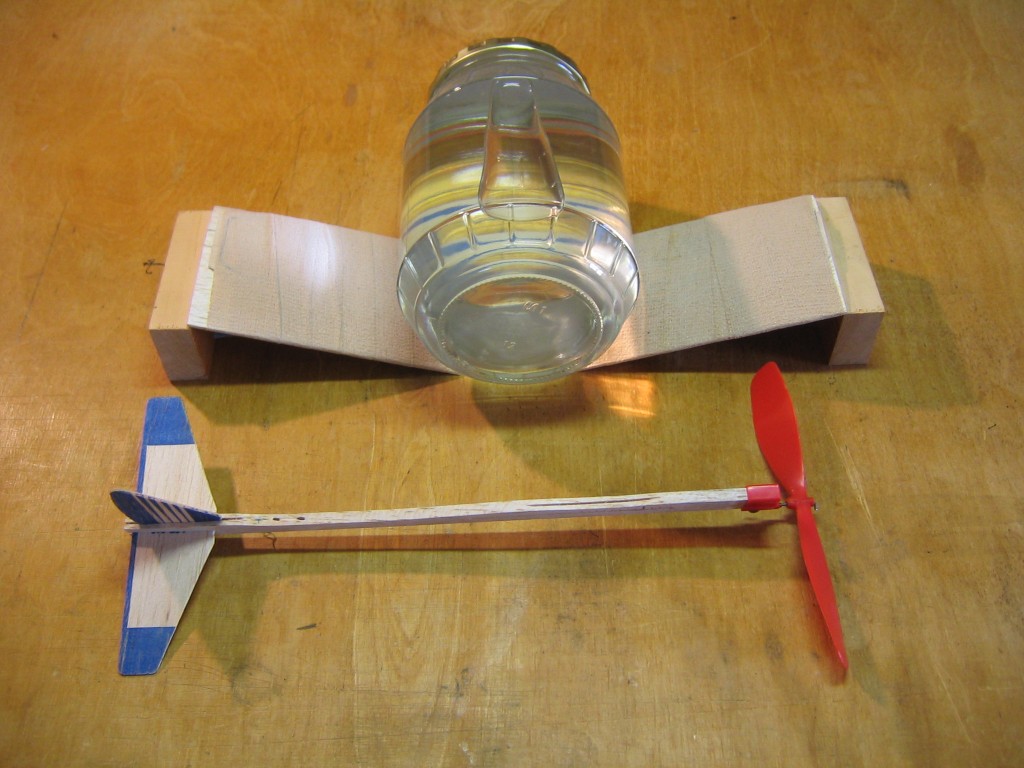
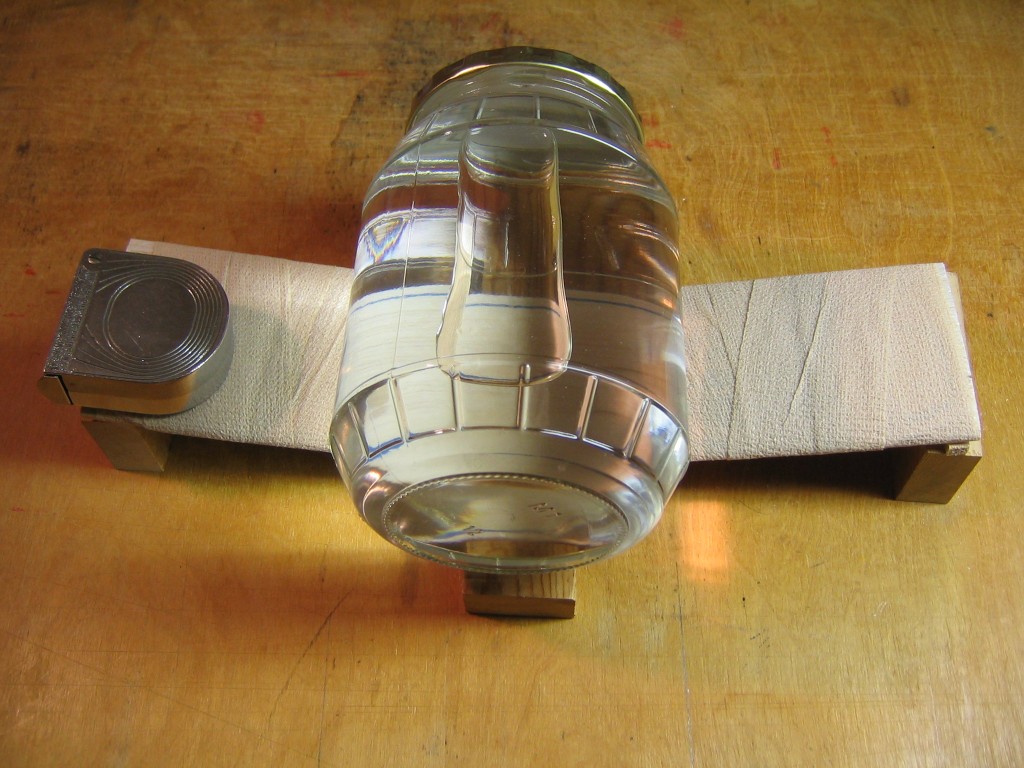
You could see in the last picture that I lost a little of the dihedral. I decided to put it back in, and a little extra. I did that after the wing had completely dried out. Then I ran hot water from the faucet over only the center 2″ of the wing, blotted it dry, put the wing up on blocks and put a jar full of water (in a class, use a plastic jar full of sand) on the center of the wing. Put the blocks and the jar exactly the same distance from each end. The jar must be exactly perpendicular to the wing span, unless you want a little built in roll. Let it dry out completely before moving it.
Now I will show you how to wet form wing camber using a form. We need to put pencil marks on the wing to align the wing with the form. (Later I figured out how to do this without making all the pencil marks. I will tell you about that later.) First put marks along one edge of the wing 5″ in from each tip. Also mark the exact center of the wing and 3/32″ on either side of that, as we did before.
Transfer those marks to the opposite edge of the wing.
Mark the position of the high point of the camber near each end. We want the high point 40% back from the leading edge on a 2″ wing, so that is 0.8″ or approximately 13/16″.
Mark the position of the high point just inside the marks 5″ from each tip.
Mark the position of the high points at each tip.
Extend the mark to the edge of the wingtip.
Put 5″ of water in a jar and soak one end of the wing in the water. Don’t get water on the central 2″ of the wing.
Every few minutes check the wood for flexibility.
When it is soft enough to form, blot the surface dry.
Note just beyond my fingertips is one of the two form boards. This is a 12″ length of Sig airfoil balsa. It is 3″ wide. I have drawn a line along the high points on top of the airfoil and extended the line onto the ends. (If you prefer, you can carve a form of your own. A form board for this wing would be 2″ x 5″. It would be better to have a bit more camber in the wing. The greatest camber would be 1/6″, approximately 5/32″, located 0.8″, approximately 13/16″, from the leading edge. You will want two of them.)
Align the inboard end of the form with the marks 5″ from the tip and align the high point mark on the form with the high point mark on the wing.
Align the high point mark on the wingtip with the high point line on the form.
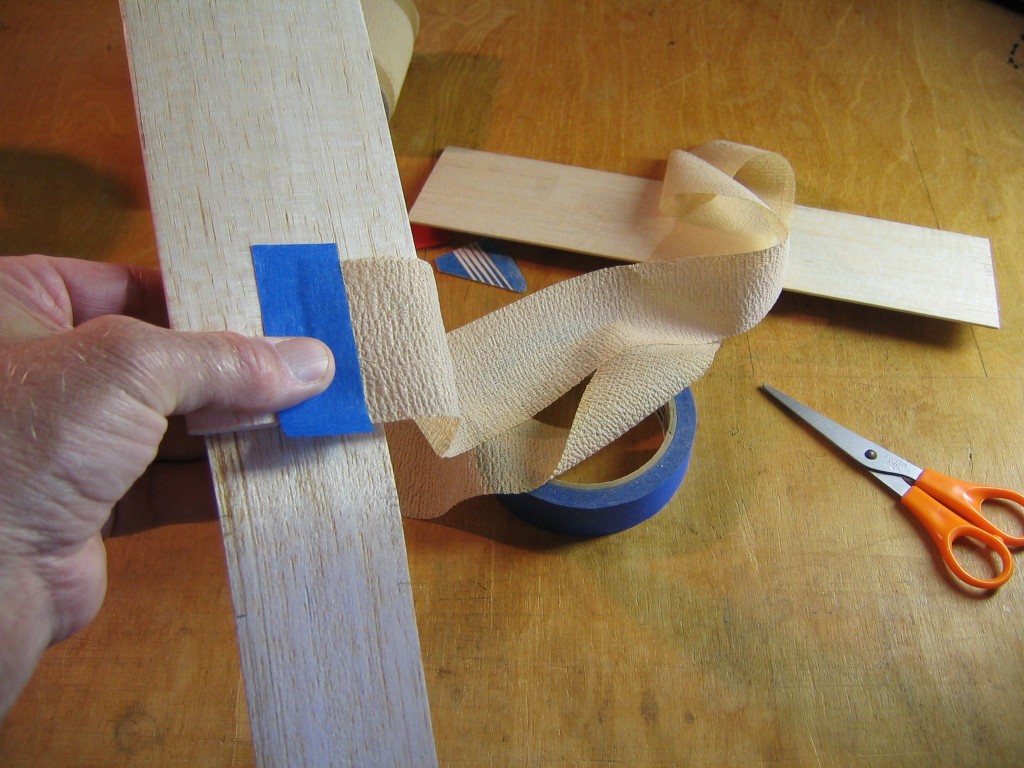
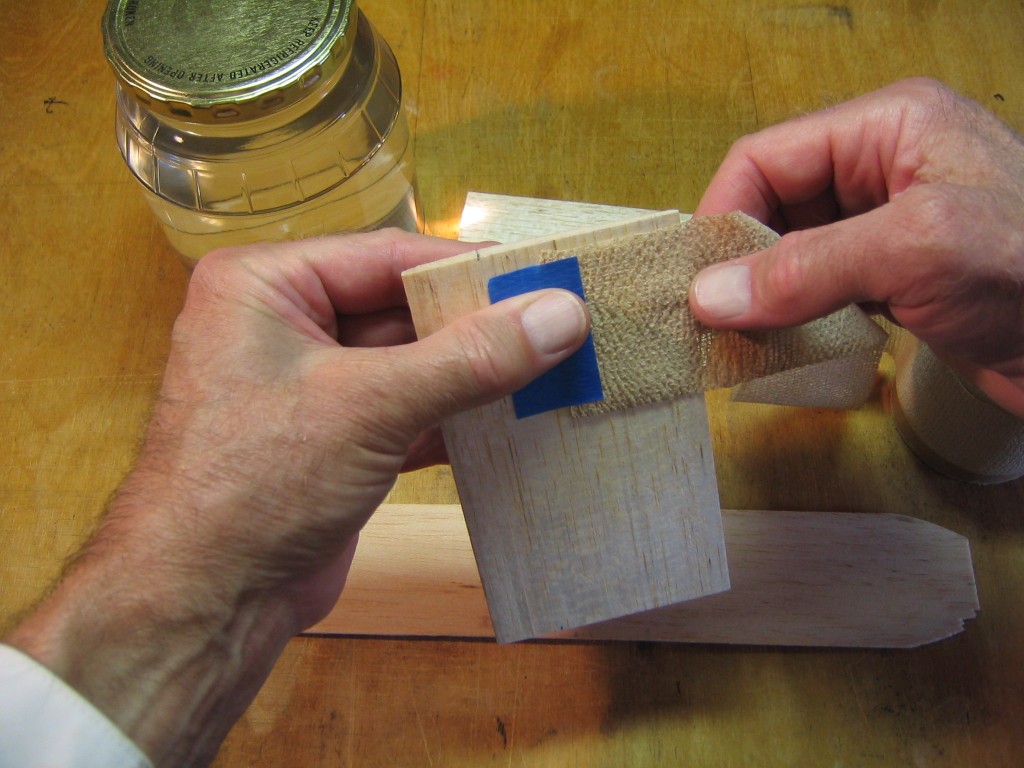
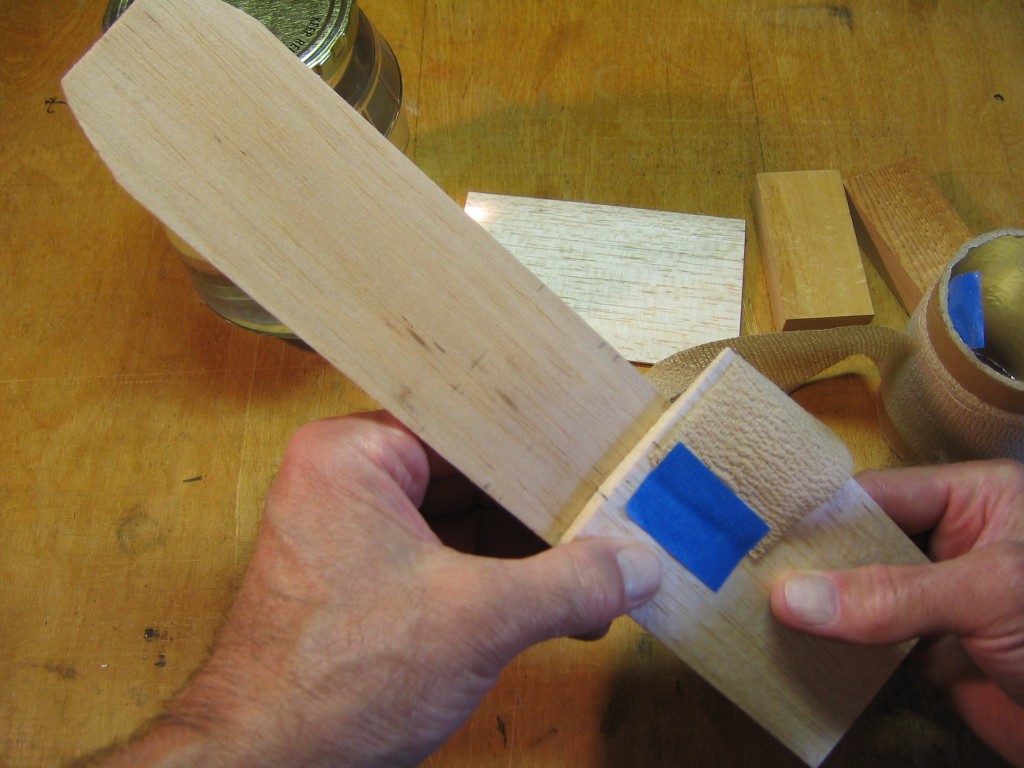
Tape the end of the Ace bandage to the back of the form, extending off the trailing edge.
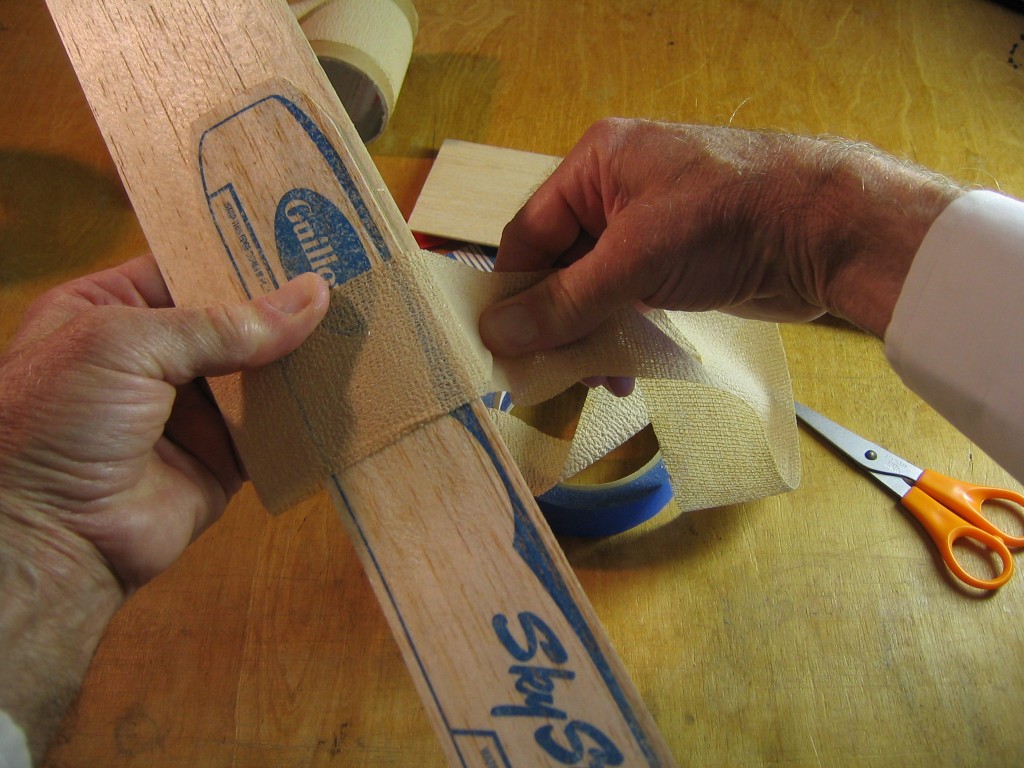
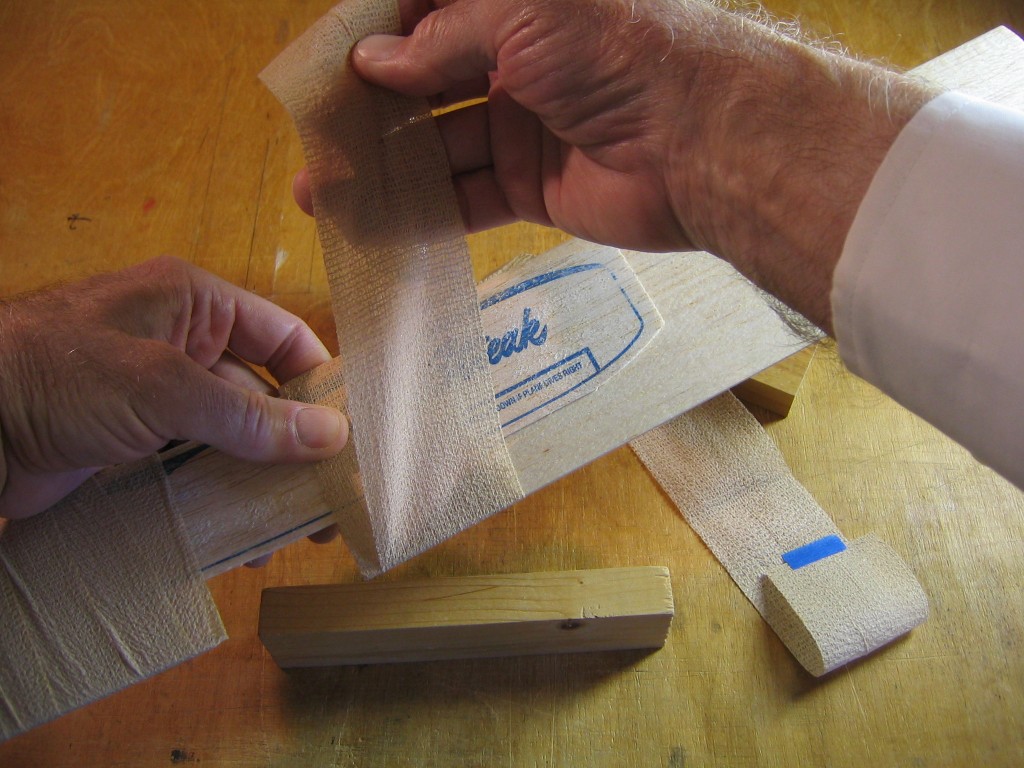
Wrap the Ace bandage tightly around the wing, moving outward with each wrap, all the way past the wing tip.
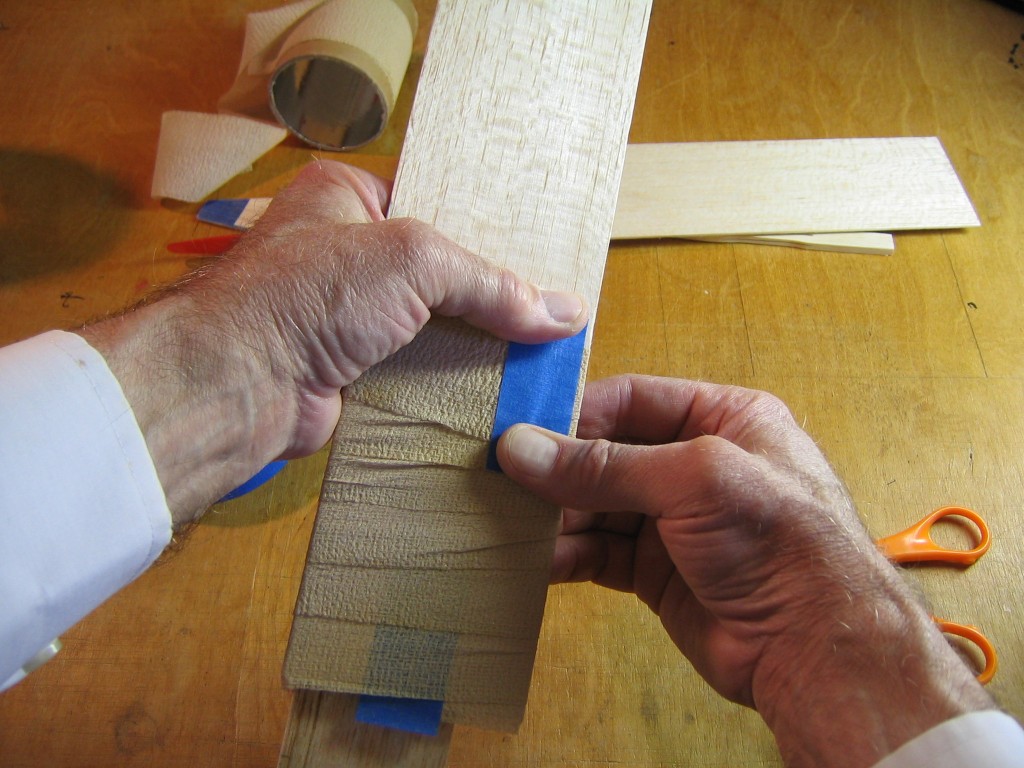
Tape the other end of the Ace bandage in place.
Soak the other half of the wing and repeat the process with it.
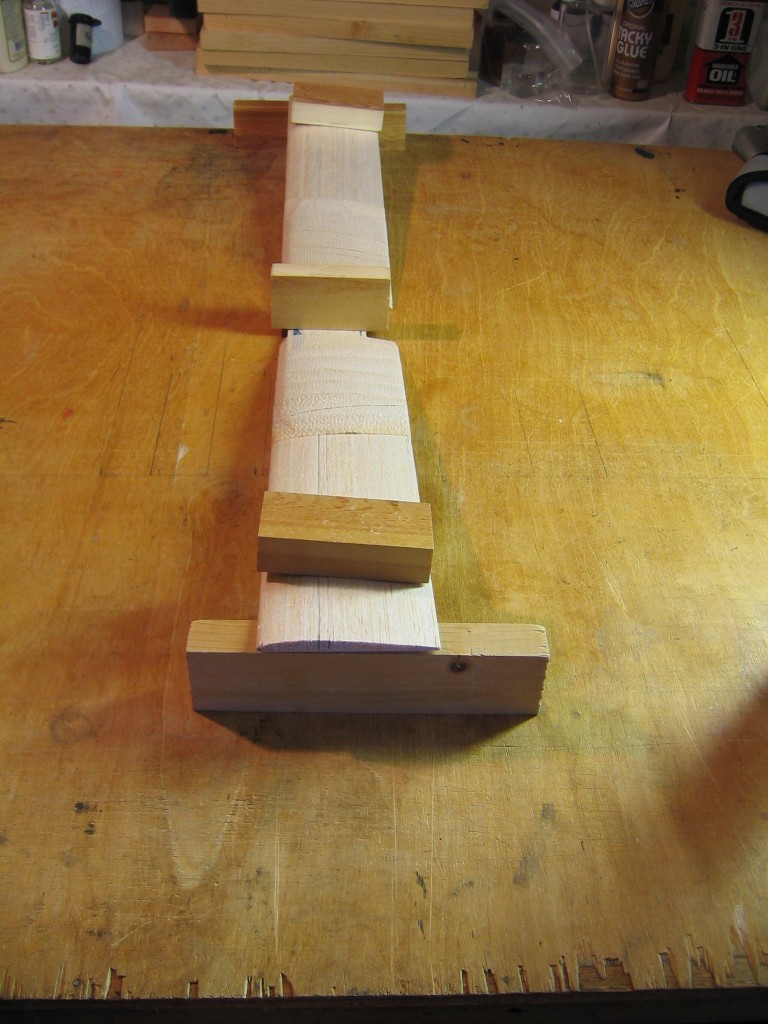
Place the whole thing on blocks to dry. The inside ends of the boards are held flat to the table top with a little weight. The blocks at the ends insure that both tips are held flat to the support blocks that are parallel with each other and the center. This helps insure that the wing is not twisted.
When the wood is completely dry, unwrap the Ace bandage.
Check the camber. Also check that the wing is not twisted.
The wing can be pulled through the fuselage slot without damaging the camber.
Once having seen this done with all the measurements and marking, you can see that there is an easier way to do it. Simply cut the form board 5″ long and align the end of the board with the wingtip. When I figured out this easier way to do it I also decided to soak the entire wing and form greater dihedral at the same time as forming the camber. Greater dihedral improves roll stability. It makes it easier to overcome the torque roll of the wound motor. It takes less rudder or sidethrust to correct the torque roll. Greater stability makes it easier to get a good launch.
You will need two 5″ long form boards, two 2′ long pieces of 2″ Ace bandage, some tape, two 1 1/2″ tall blocks and a jar of water about 4 11/16″ in diameter.
Soak the whole wing in water until it becomes soft and flexible. For soft wood, holding it under the faucet for a couple minutes will be sufficient.
Start by taping a two foot length of 2″ Ace bandage to the flat side of the form, leading off the trailing edge.
Place the wing against the board, with the leading edge of the wing along the leading edge of the form, closest to the greatest curvature, and the tip of the wing at the tip of the form. (I put marks 5″ from the wingtip, not necessary.)
Place the leading edges of the wing and form flat on the table top to align them.
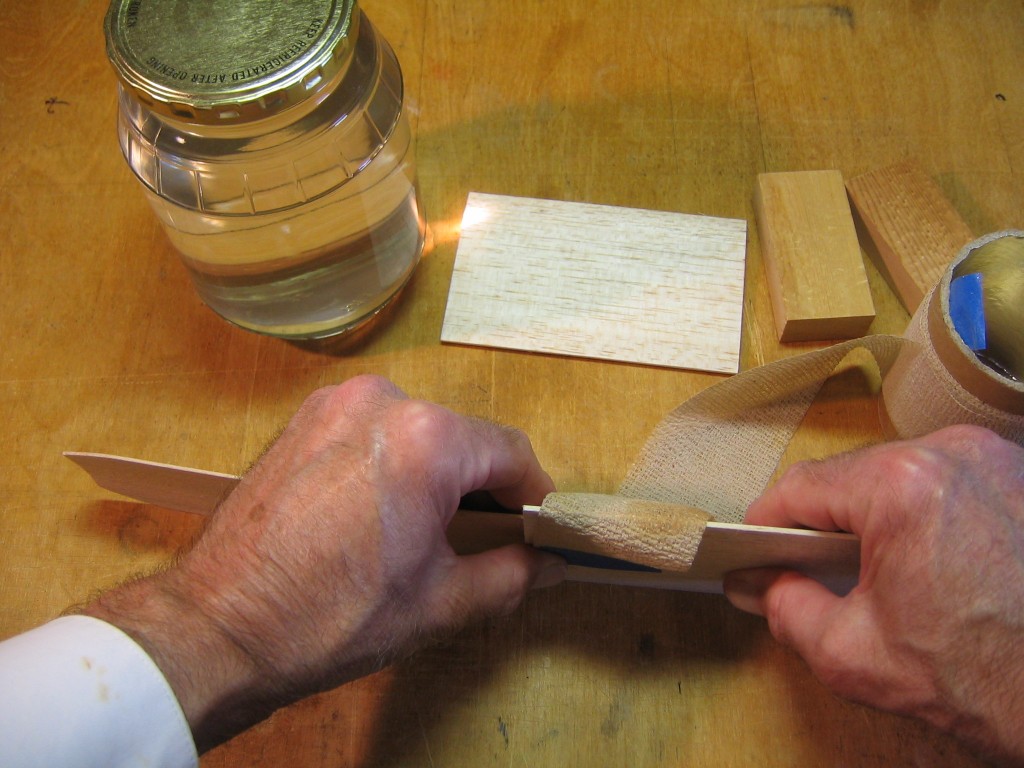
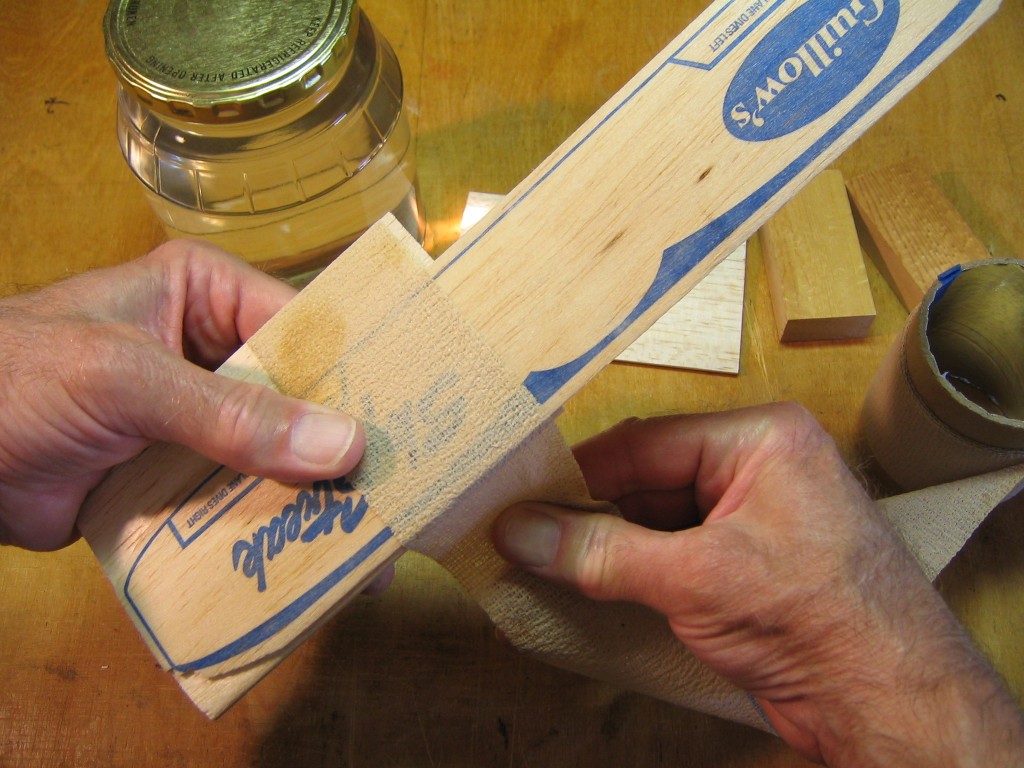
Hold the wing against the form as you wind the Ace bandage tightly around the wing and form.
Wind the Ace bandage at an angle to the board.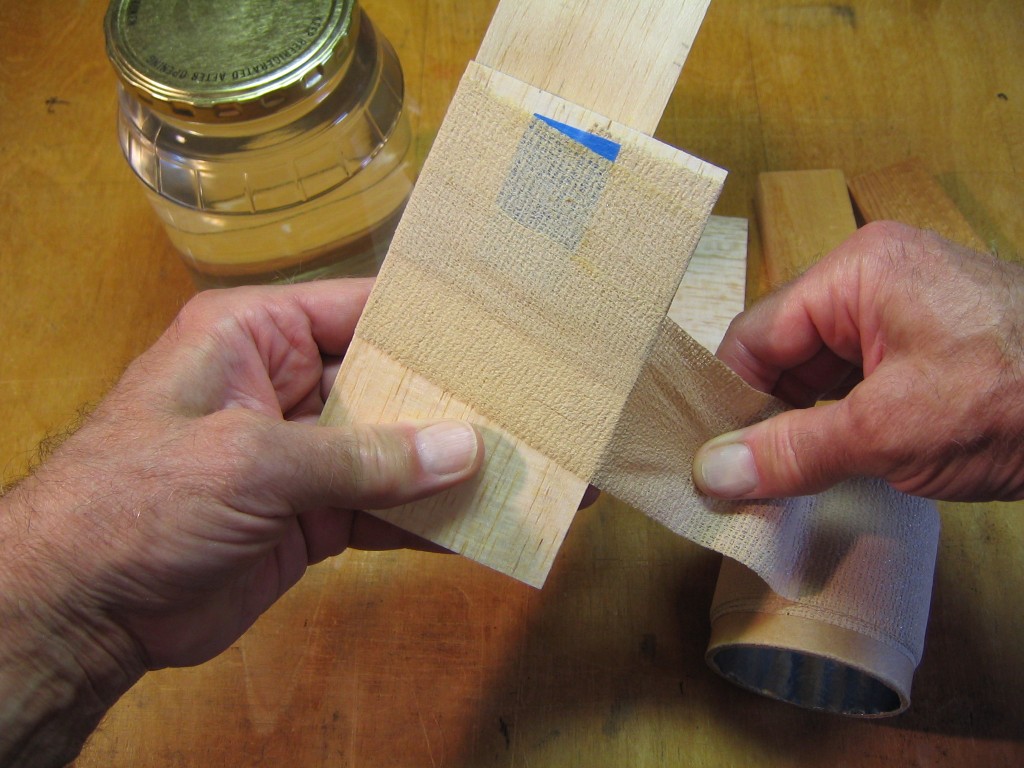
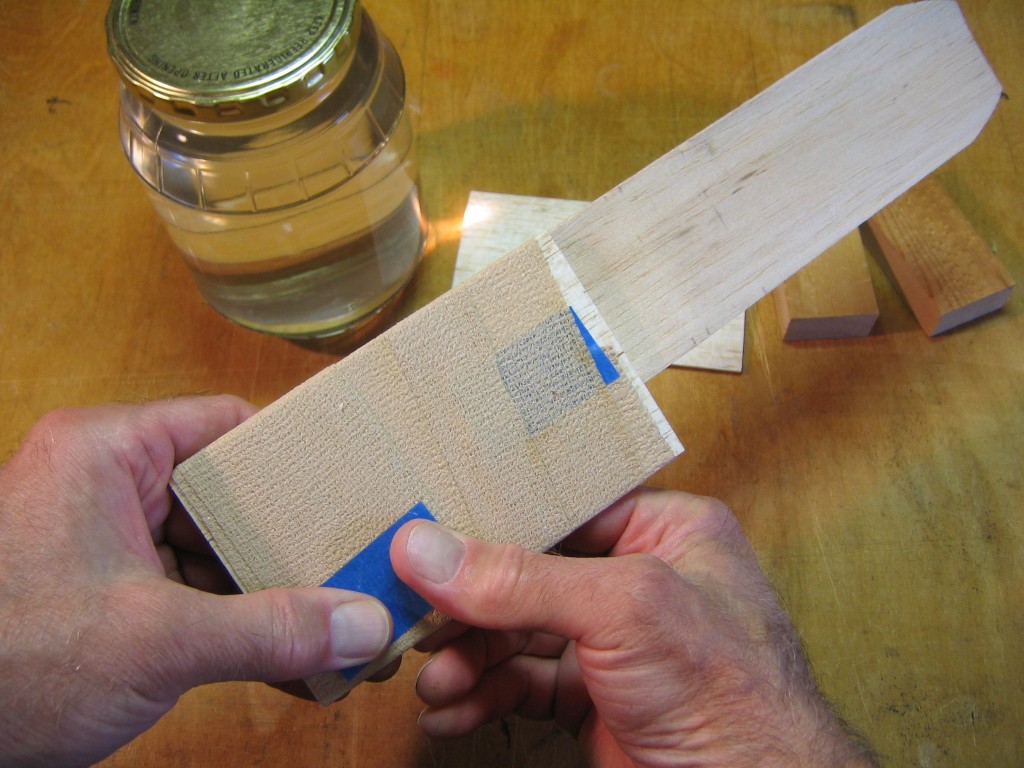
Tape the other end down. Do the same with the other wing and form. Be careful that both wings have the same leading edge.
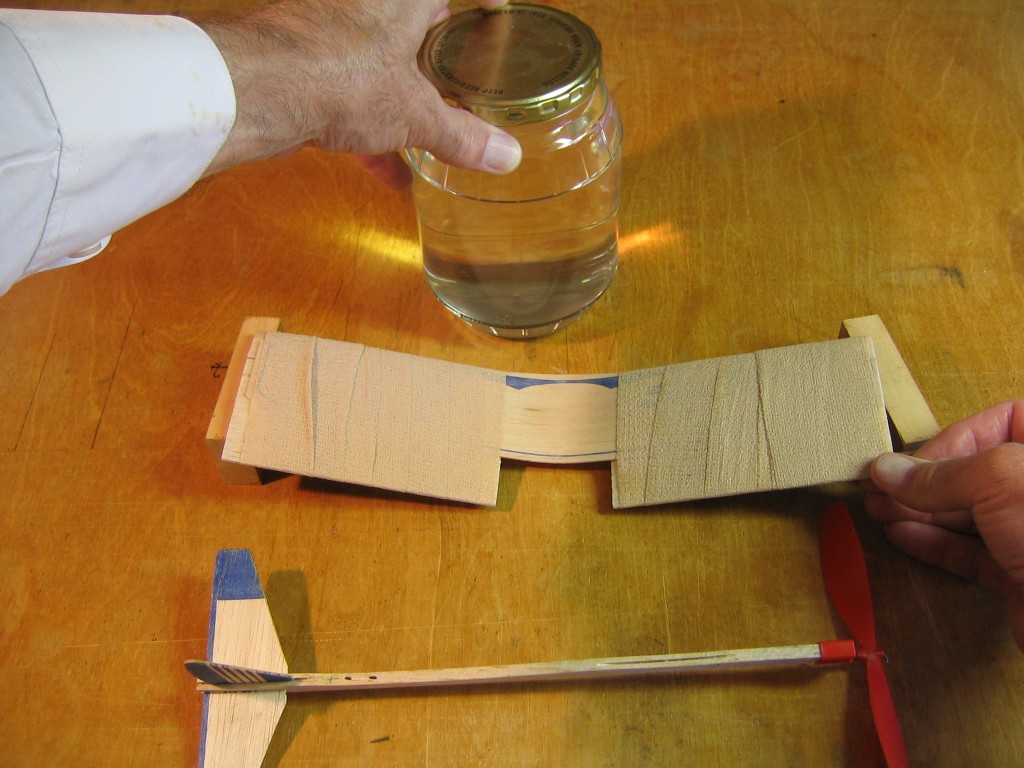
Place the tip ends of the form boards on the 1 1/2″ blocks and place the jar of water on the center of the wing. Adjust everything to be straight and symmetrical. Let the wing dry completely.
If you are teaching a class, use a plastic jar full of sand or gravel. Mayonnaise, coffee, sports drinks, nuts and other things come in plastic jars of about the same size as the one shown in the picture.
After the wing has completely dried, lift the jar of water off the wing.
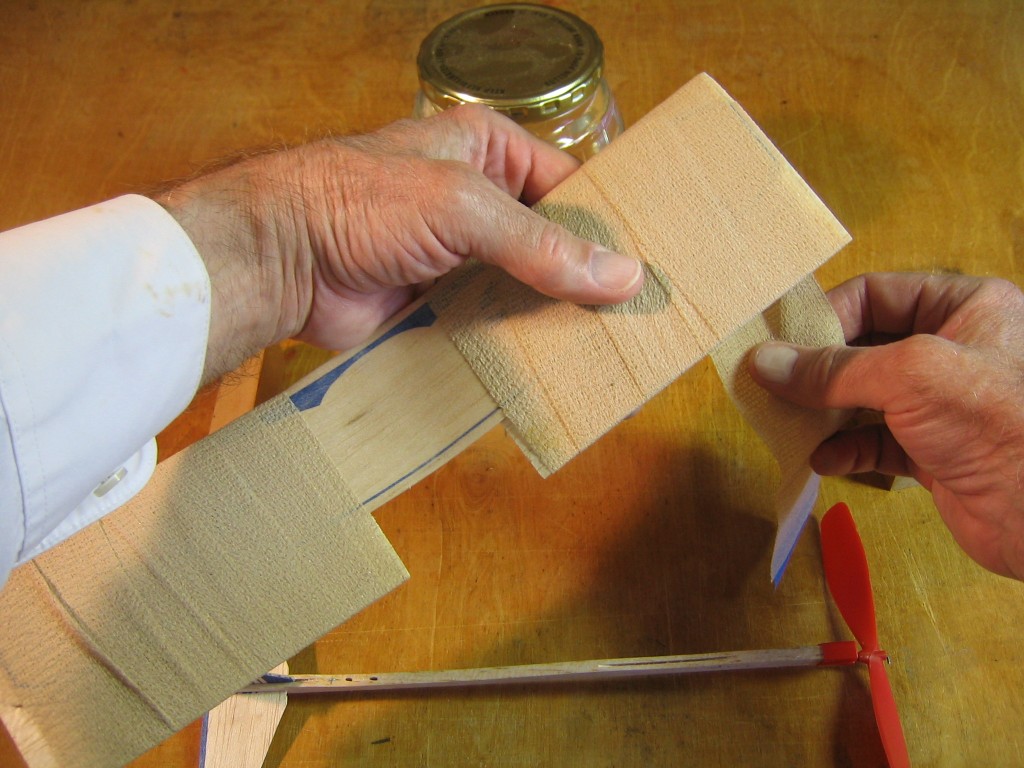
Unwrap the Ace bandage from both wings.
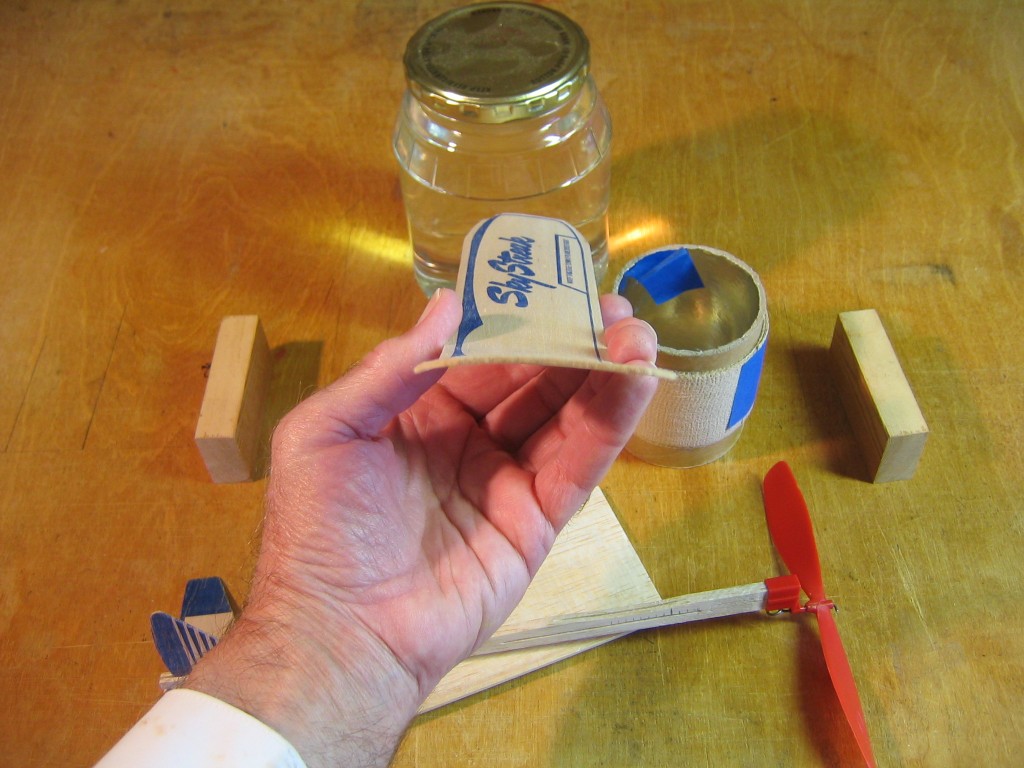
You now have a nice airfoil in the wing to give more lift.
And more dihedral to provide more roll stability.
This is the preferred way to wet form the wing. It gets camber and dihedral at the same time and does not need all the measuring and marking. This is how I would teach it in a class.
Use a Larger Propeller
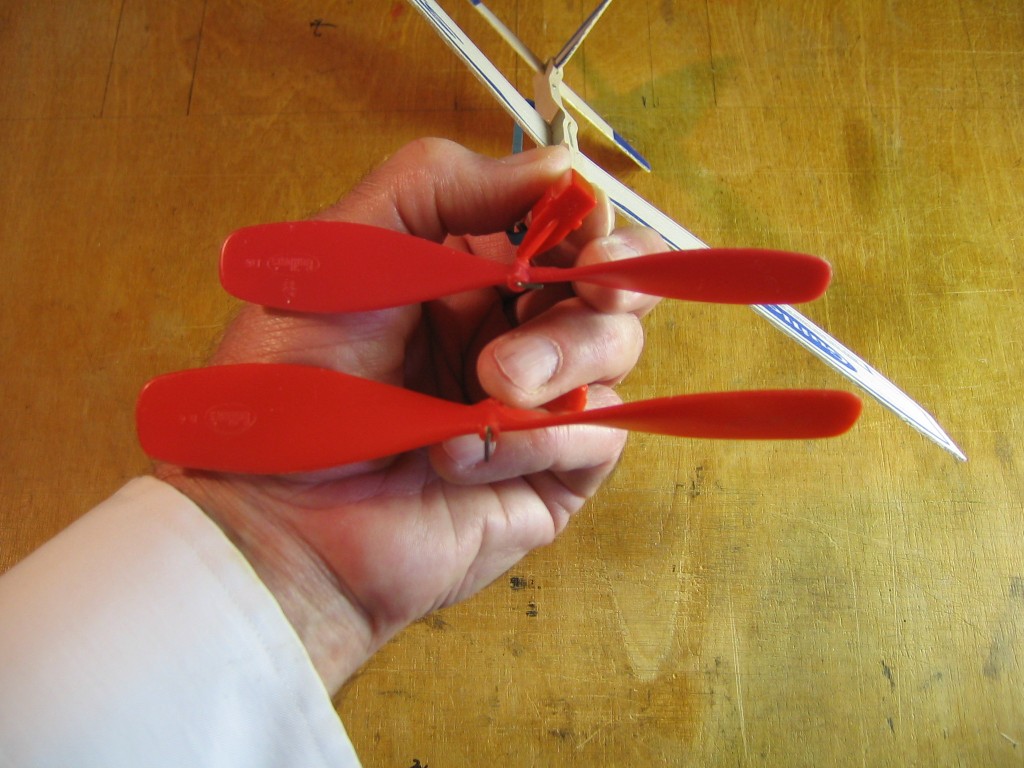
A larger propeller accelerates a larger volume of air by a lesser amount and is more efficient. It turns more slowly, lengthening the motor run. The Sky Streak uses the Guillow’s D5 propeller, which is 5″ in diameter. This prop size is too small for the wing area. You can replace it with a Guillow’s D6 propeller which is 6″ in diameter. The D5 propeller unit weighs 3.5 grams and the D6 prop unit weighs 5.0 grams. This weight difference is actually a small percentage of the total airplane weight of 10.1 grams. The heavier prop will require the wing to be moved forward. You will need to scavenge a D6 propeller assembly or remove your D5 propeller from its hanger and replace it with a D6. That will require cutting the prop shaft and making a new one. The prop shaft is made from 0.045″ diameter steel wire. You can’t rebend a removed shaft, the wire will likely break. You can get steel wire at your hobby or craft shop, or order online. Paperclip wire may be used, but it is too soft and will get bent.
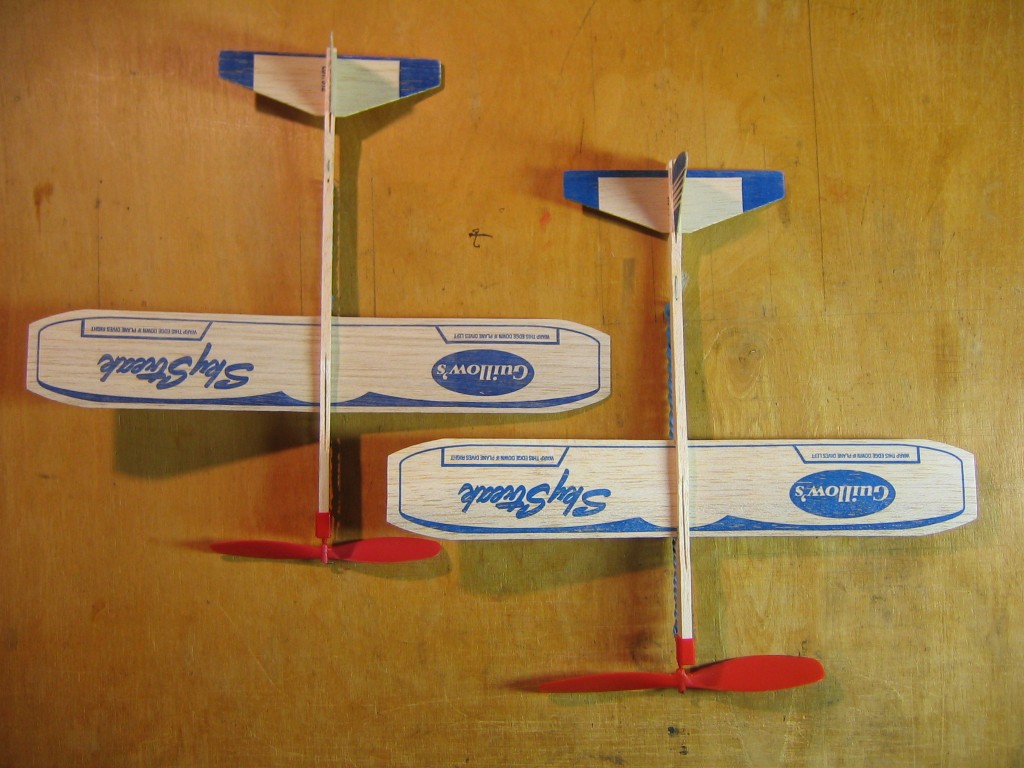
Here are two planes with the different size props.
The cambered wing will help lift the extra weight of the larger prop.
Make a New Motor Hook
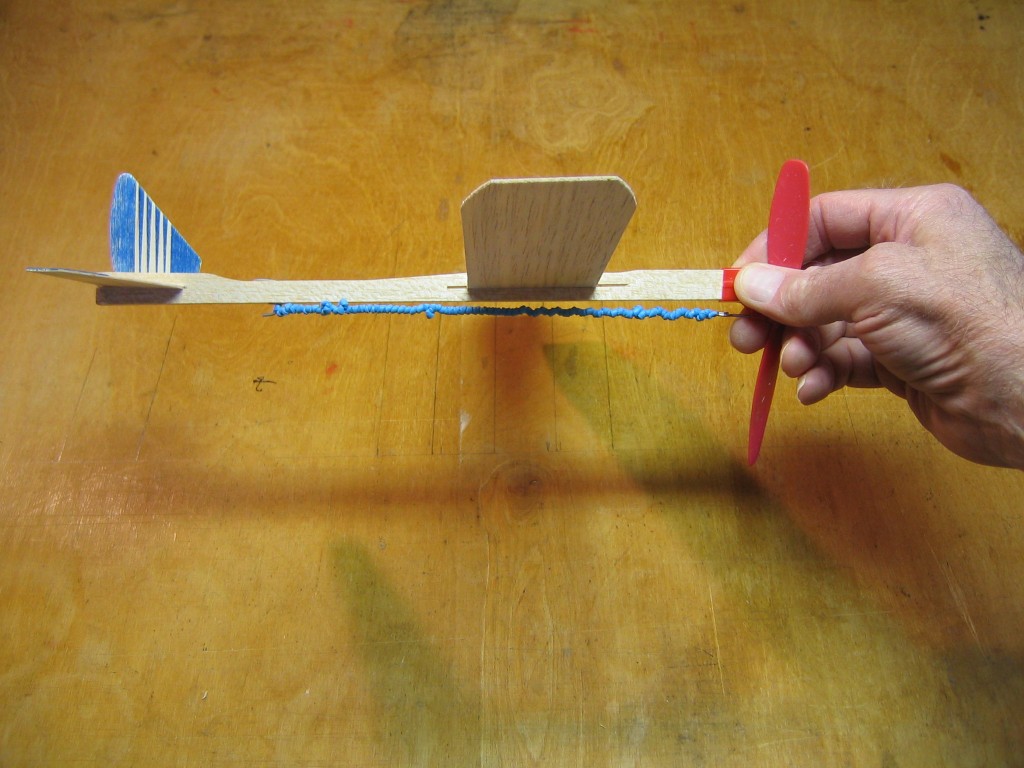
The single most important thing you can do to get longer flights is to use a longer motor. But before we do that, we should make a new motor hook. The one on the plane is so close to the stick that the knots rub on the stick. There will be even more and bigger knots on the longer motor.
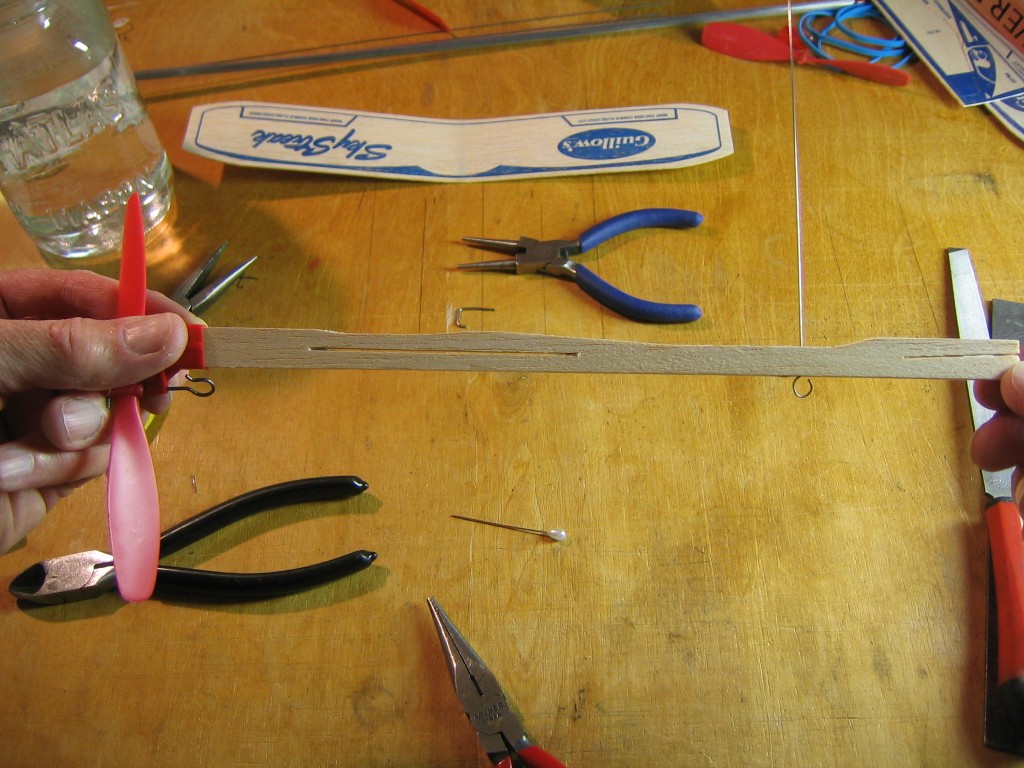
We want the motor to be free to unwind without rubbing on the stick, so we must make a hook that holds the motor farther from the stick. The new hook looks like this. (Except I made it a tiny bit longer than it needs to be.)
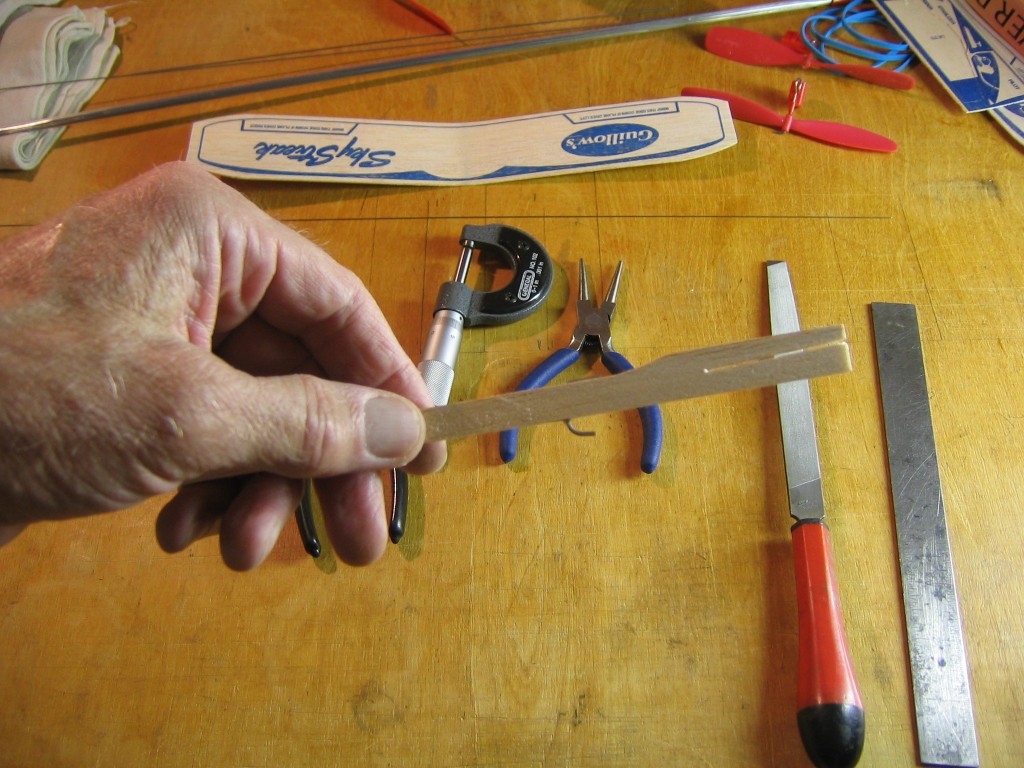
Recent kits come with a very heavy hook. It is just as well to get rid of this excess weight. If you have an older kit with thin wire, you may reuse the wire. Straighten it and remove it entirely from the wood. Rebend it according to the following directions.
Start by straightening the hook.
Push it straight up and pull it out of the wood.
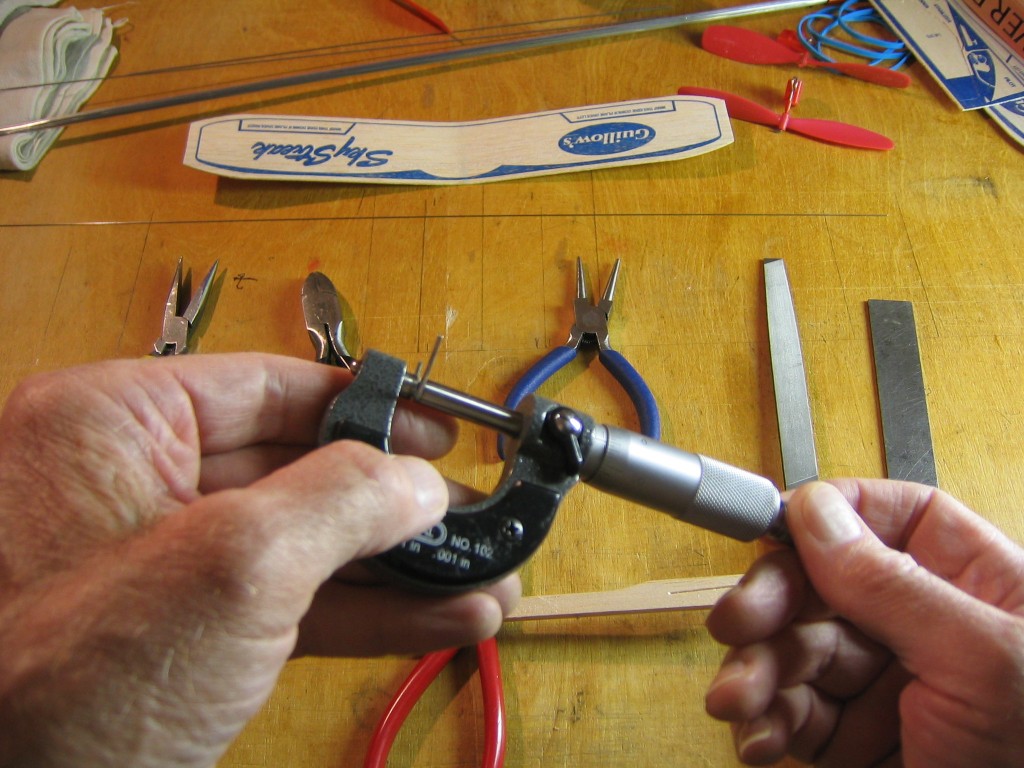
The micrometer says this is 0.049″ in diameter. About twice what it needs to be.
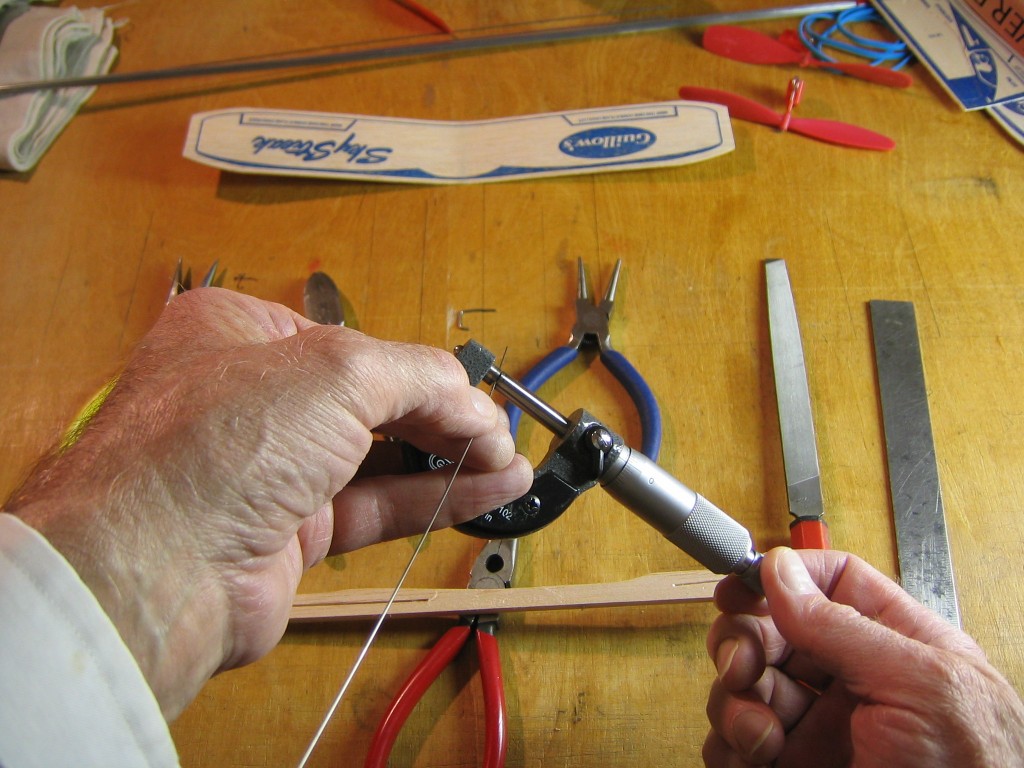
Let’s get some 0.025″ diameter steel wire at the hobby shop. You can also use a sewing pin, after cutting the head off. Start by filing the cut sharp end off the wire, as usual. File it round.
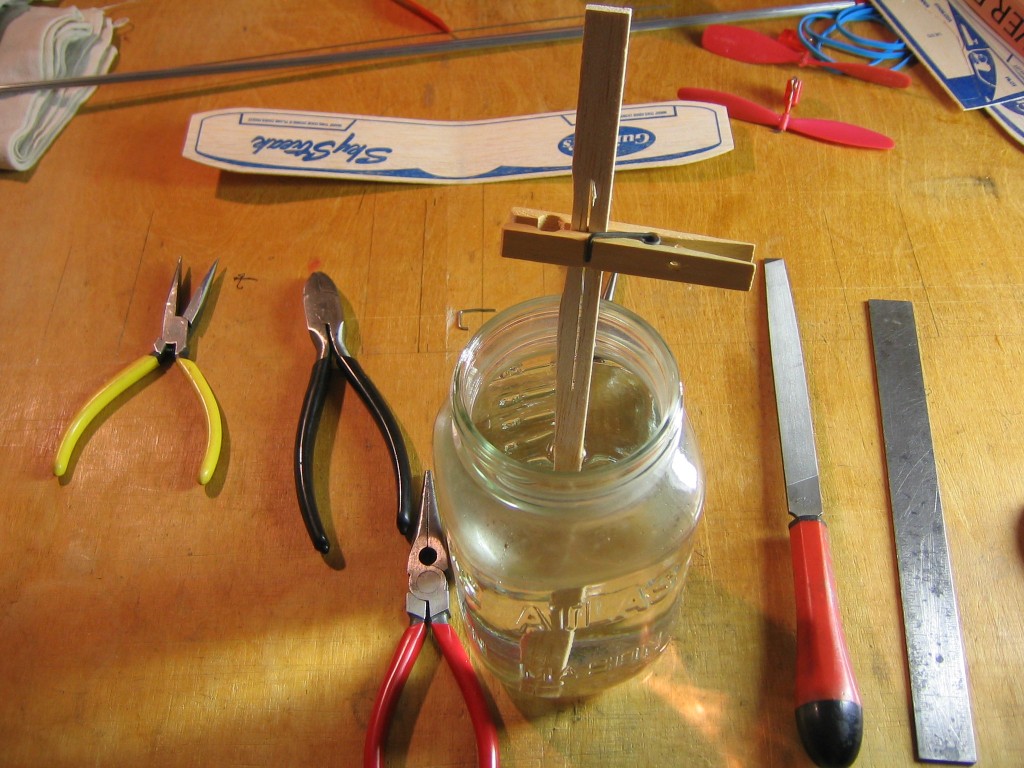
I also soaked the stick in water, hoping that the crushed wood in the holes would expand and fill them in.
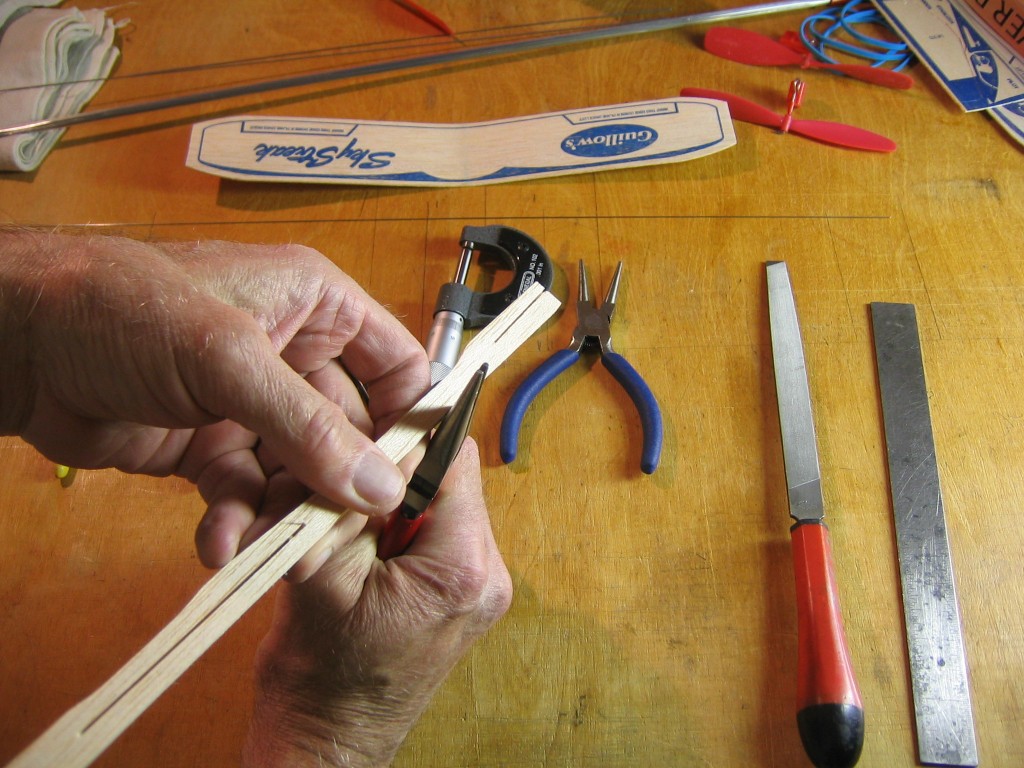
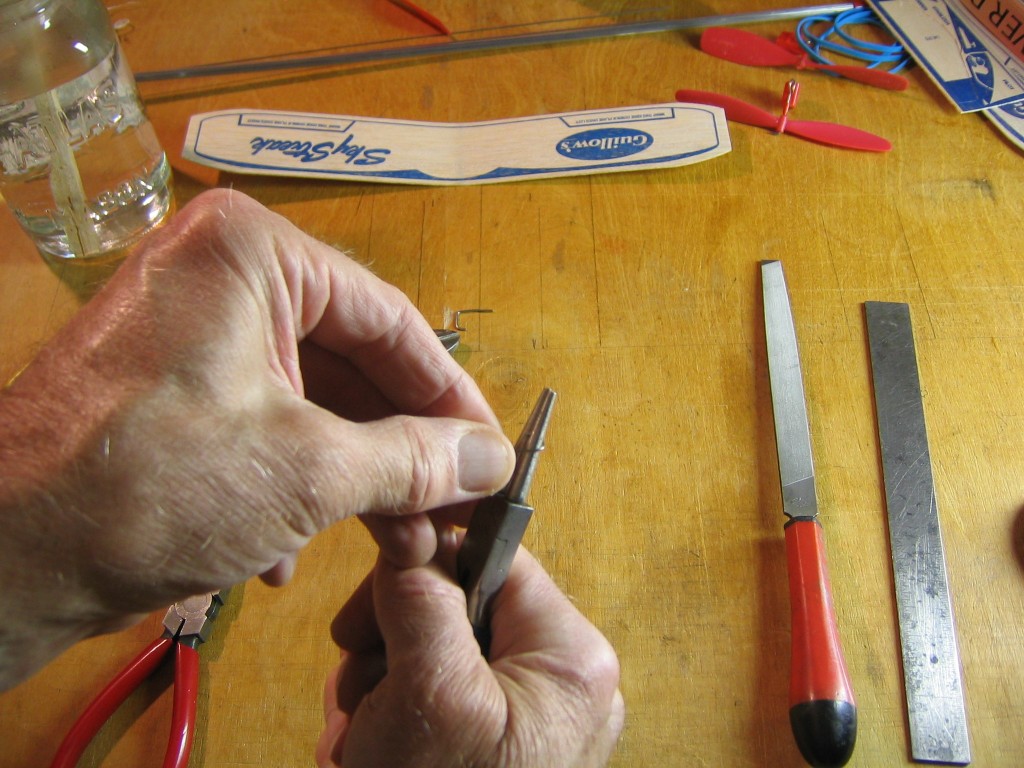
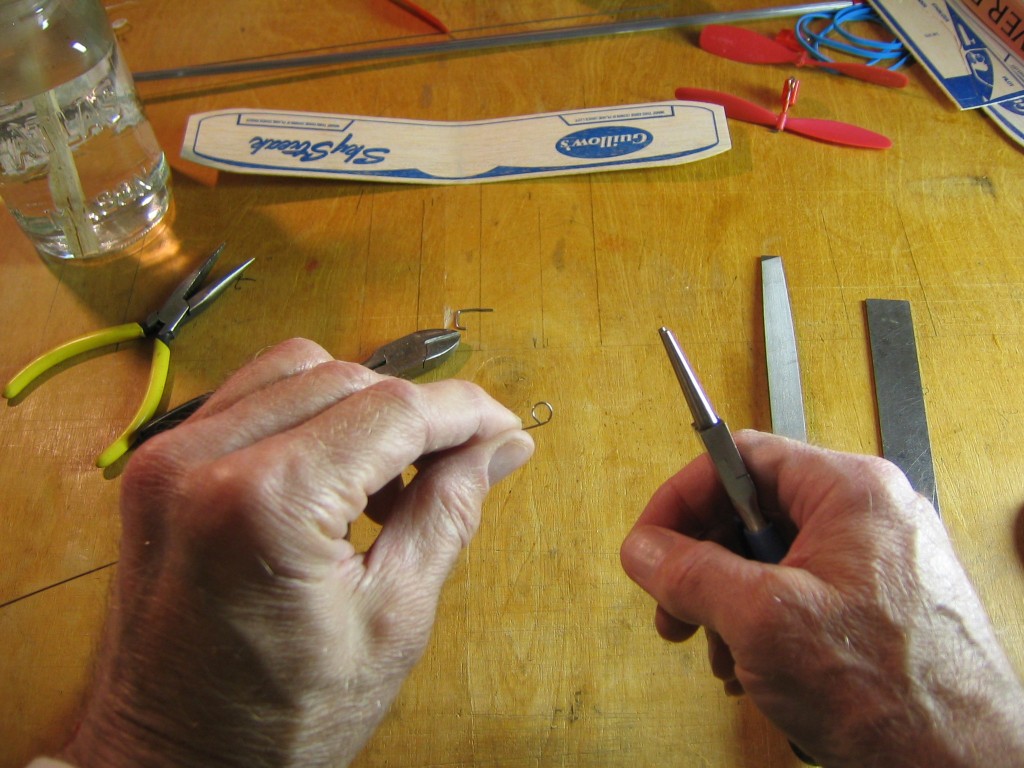
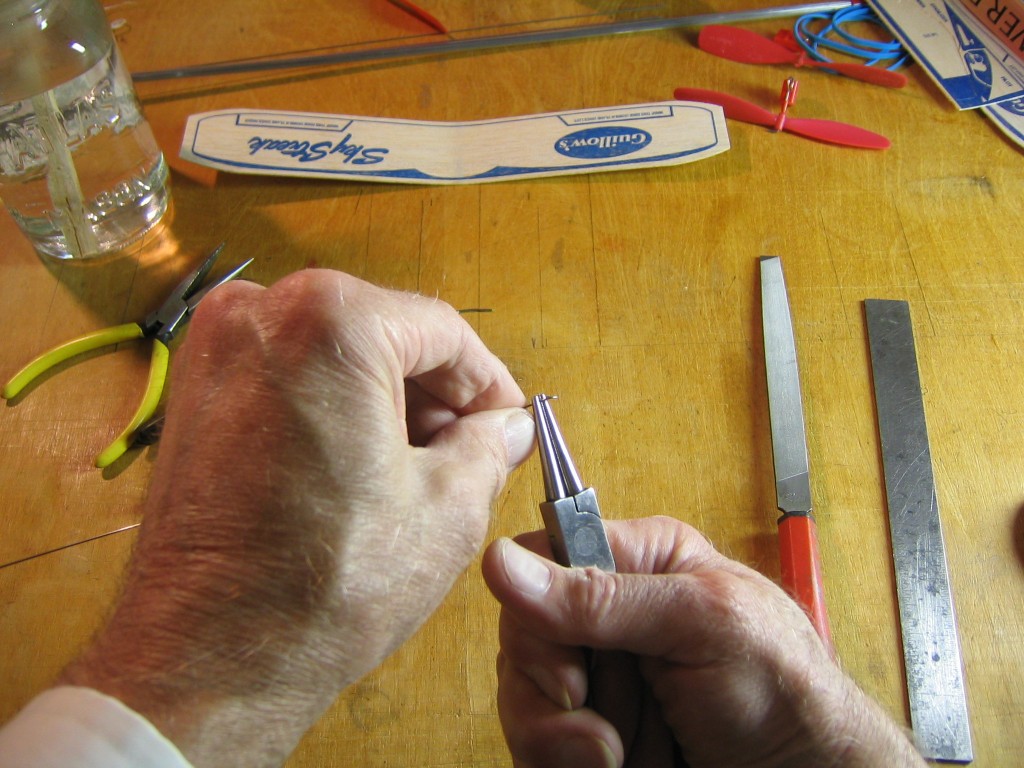
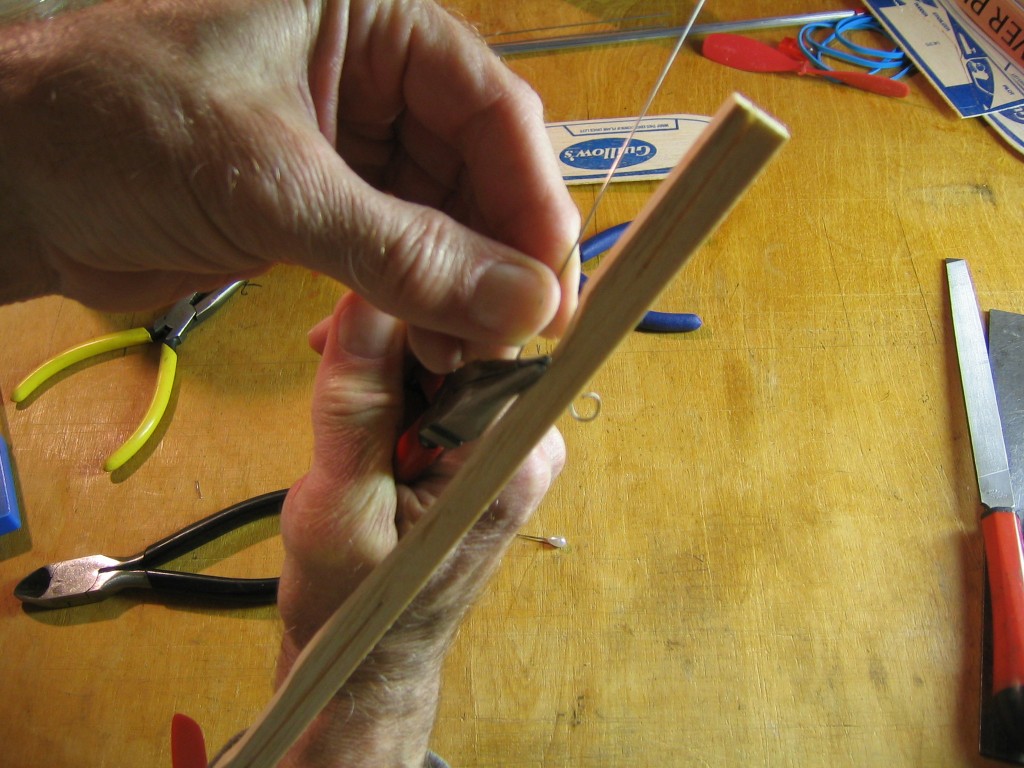
Start making the new hook by bending a full circle right handed helix with a tiny bit of straight overlapping at the end. The circle can be about the same diameter as the hook on the propeller shaft.
Here is what it looks like when we are done. Having a full circle with a slight overlap reduces the chance of the motor coming off the hook.
Now bend the straight piece out from the circle around a small radius. The straight piece should project straight across the center of the circle.
The right hand helix starts on the circle just opposite the straight piece and comes out just enough to clear the O-ring that will be used on the longer motor.
The water soak did not fill in the holes in the wood. We won’t use the same holes for the new hook.
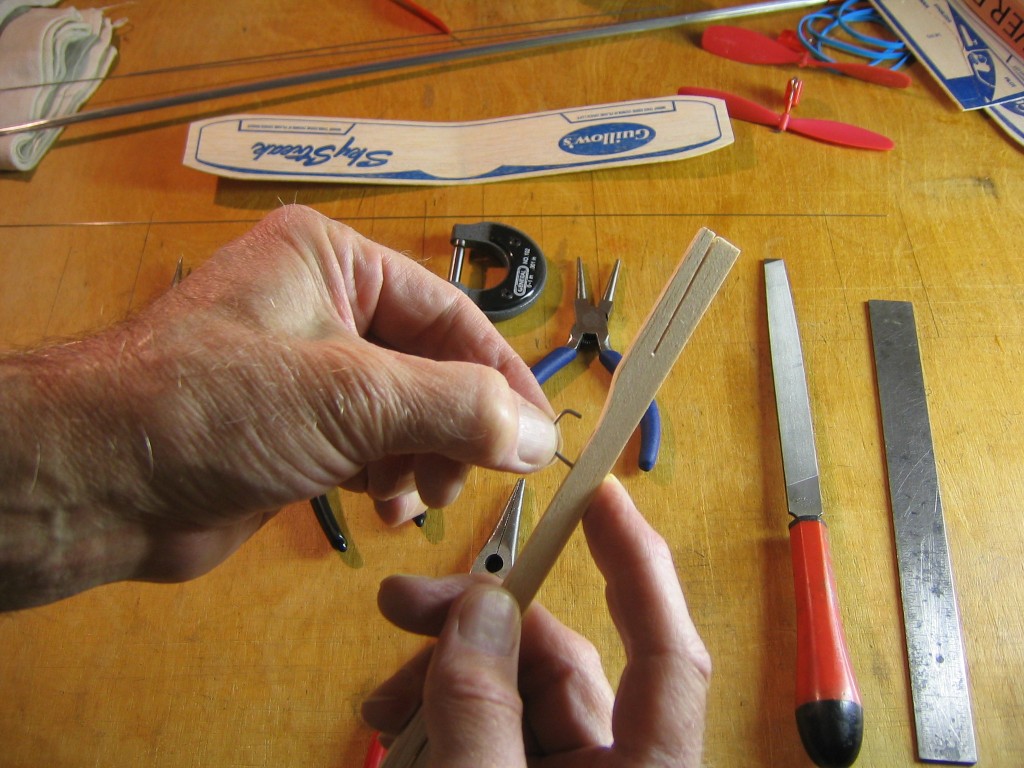
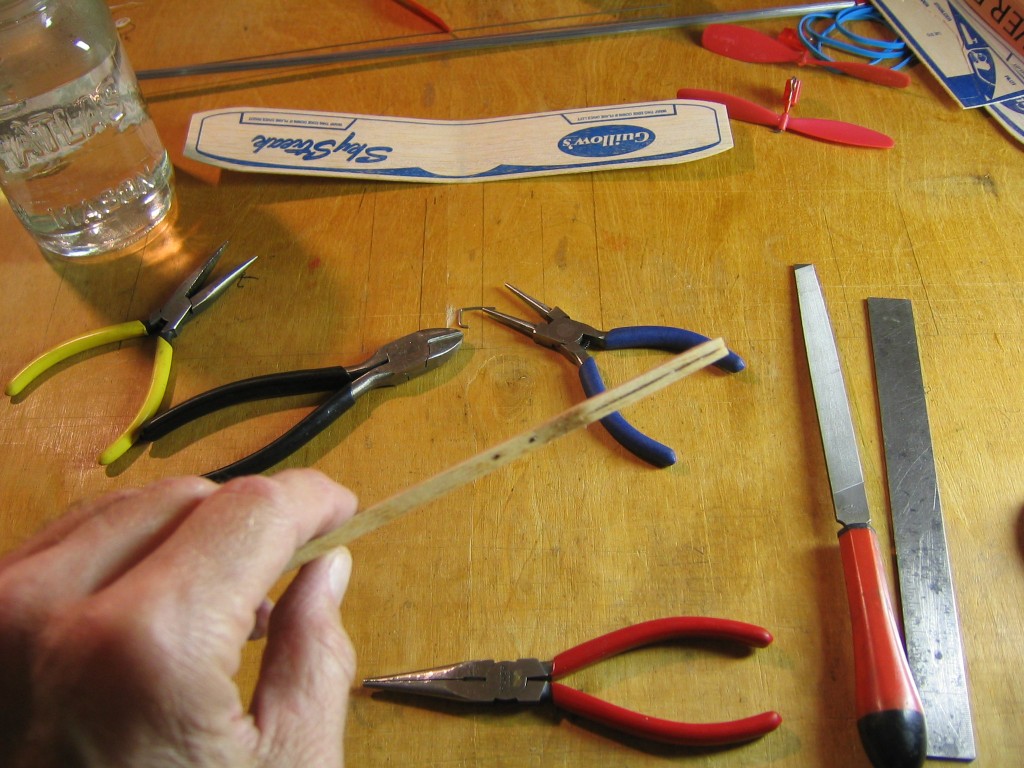
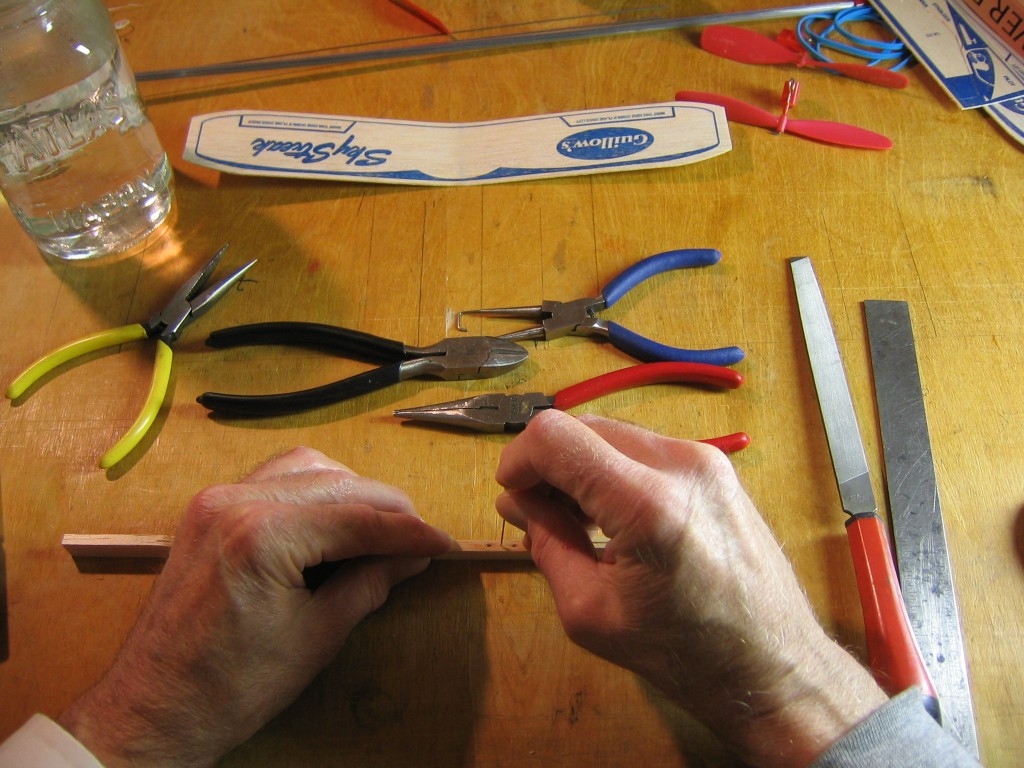
Push something like a hat pin into the bottom of the stick where you want the hook. Make sure it is centered and square. This will make the pilot hole for the hook wire.
Push the pin all the way through the stick.
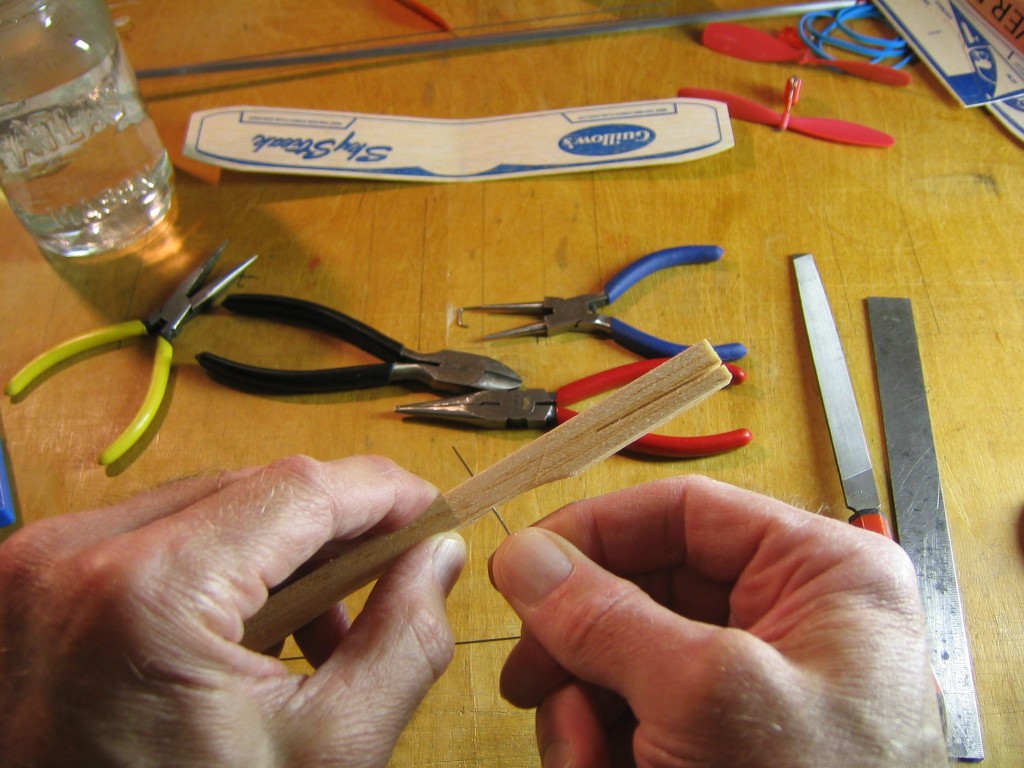
Now start pushing the far end of the wire with the hook in it through the wood.
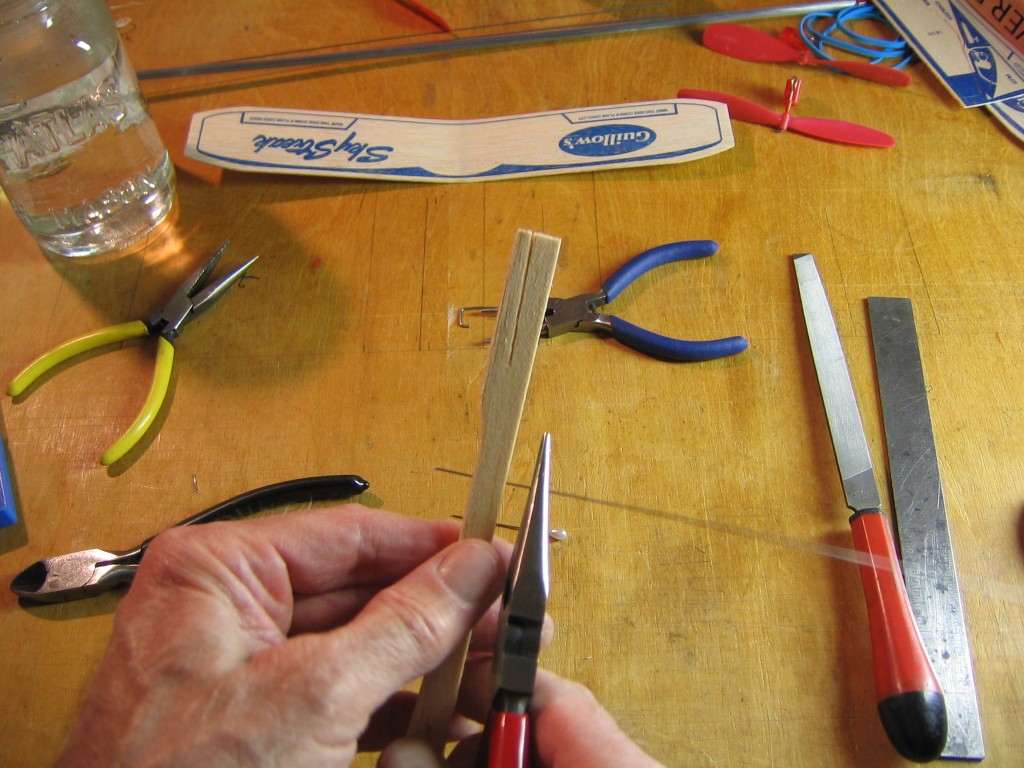
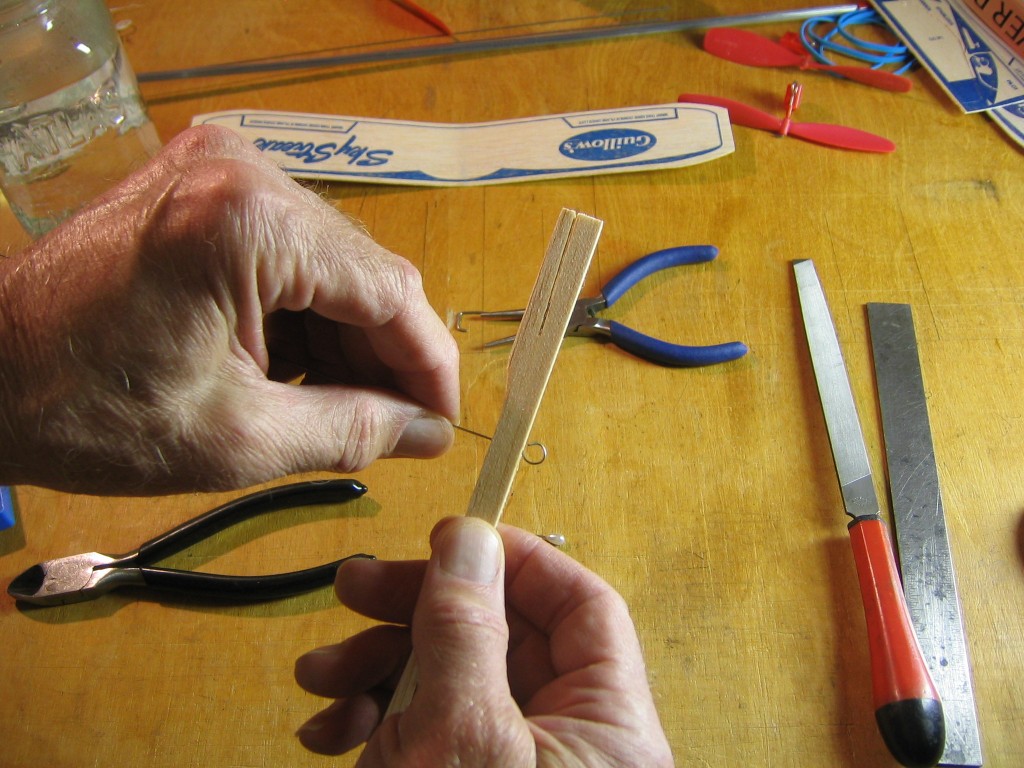
Pull it all the way through until the hook loop is up against the wood, with the opening to the back.
Be sure the opening is facing away from the prop hook.
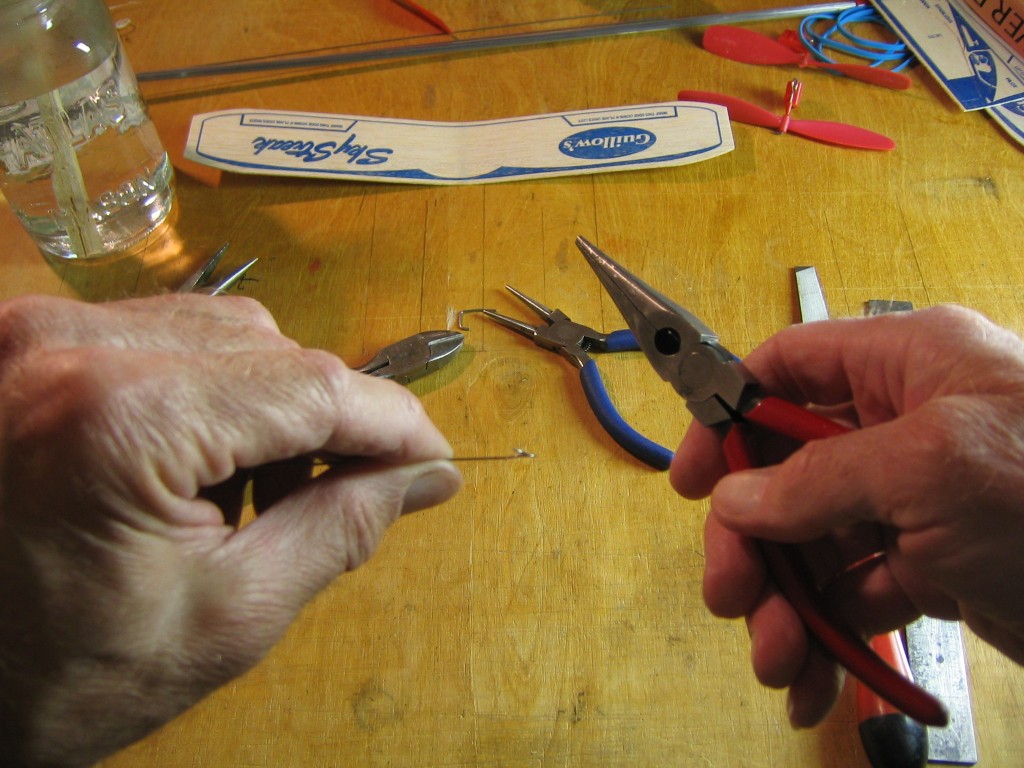
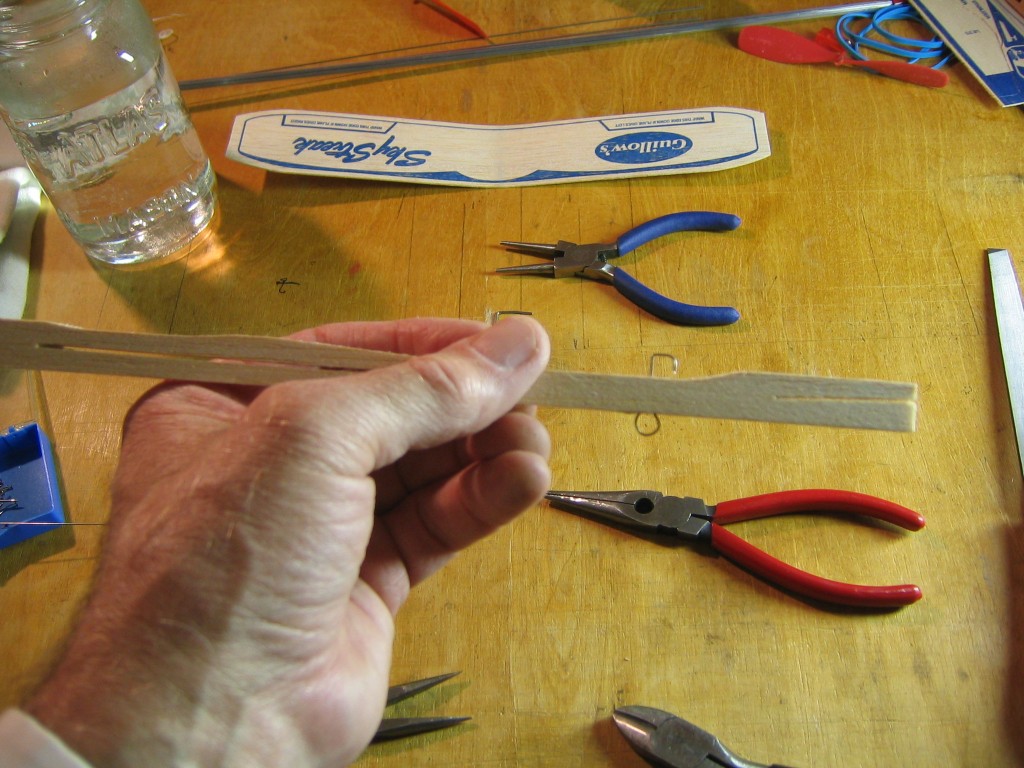
Make a right angle bend (backwards or forwards) 1/8″ above the stick.
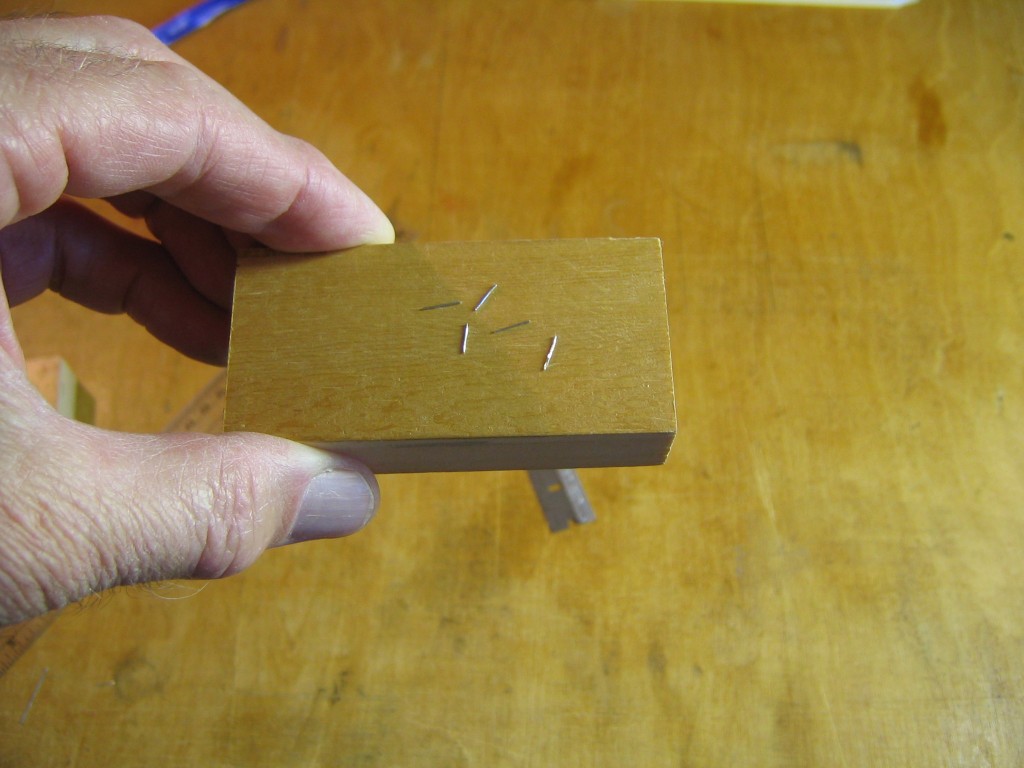
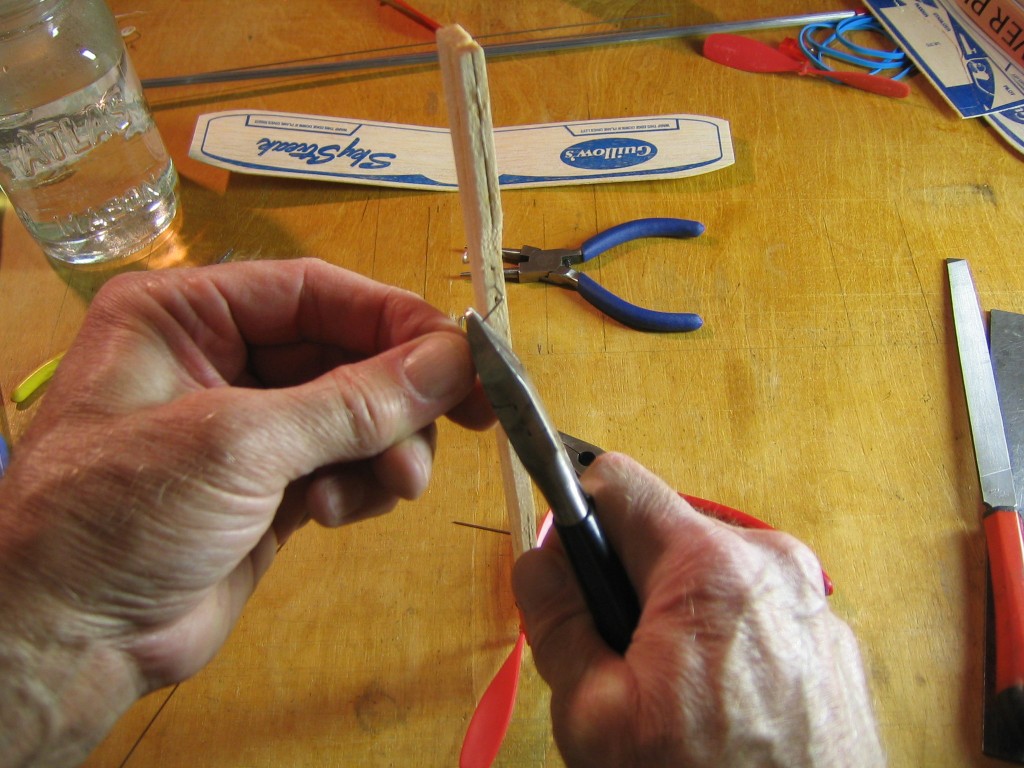
Cut the wire 3/8″ away from the bend. Leave the end sharp, it will be pressed into the wood later.
Bend the last 1/8″ straight down.
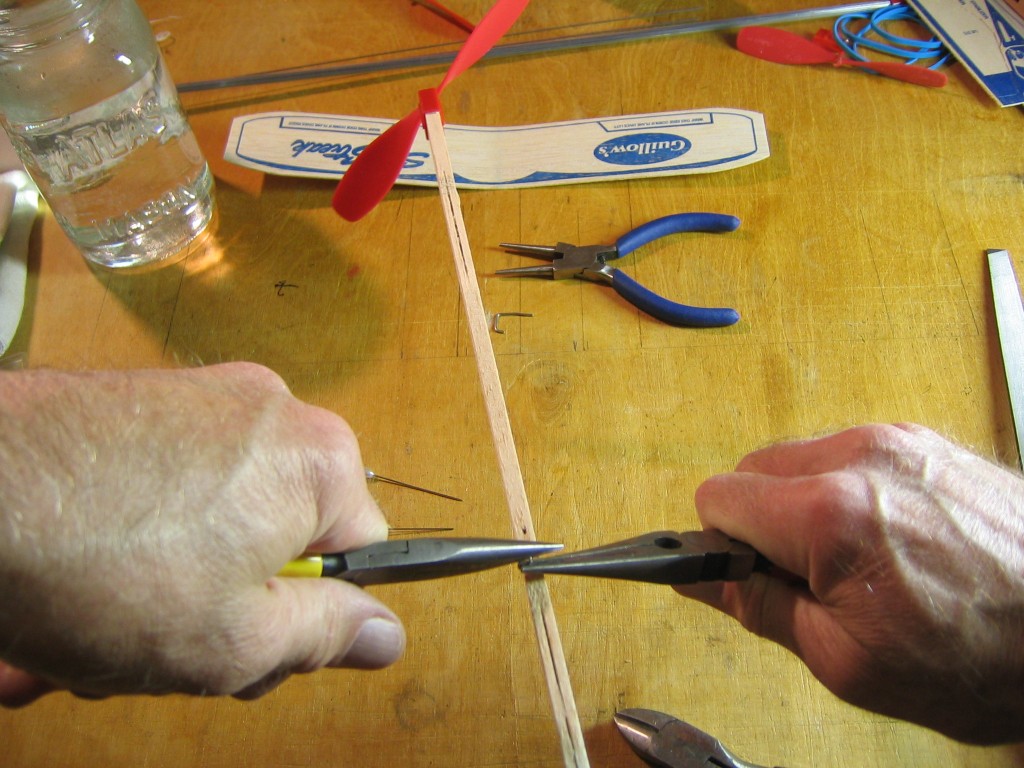
This looks like a staple.
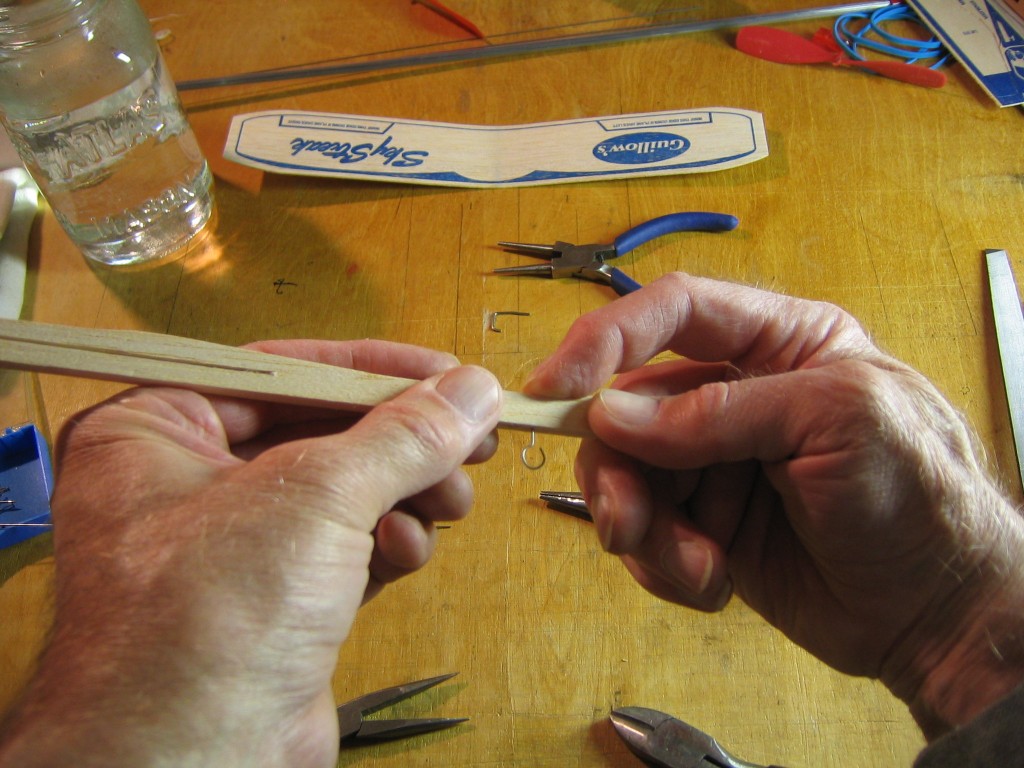
Press the staple into the wood.
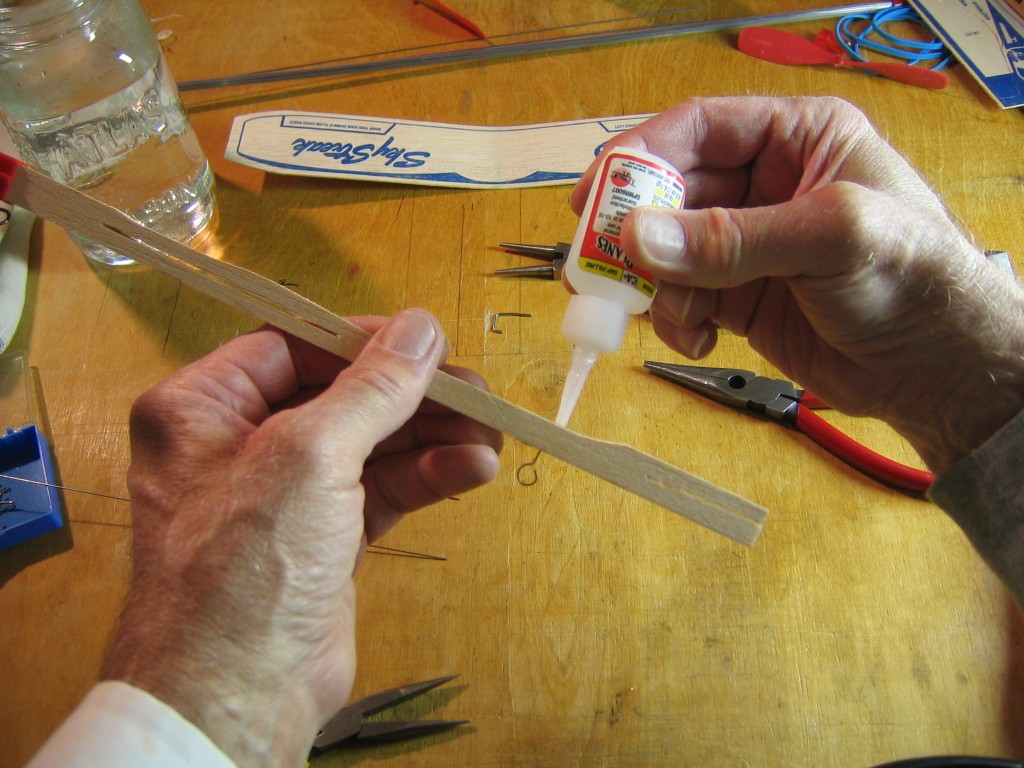
Apply glue to keep the hook from sliding out of the wood. I made the stem longer than intended. It is hard to make precise bends in steel wire while bending over a camera tripod and working at a distance.
We are now ready for a long motor.
Make a Longer Motor
I hadn’t thought of this until now, but you could link two kit motors together to get a motor twice as long. The original reason for making a new motor was to use a better quality rubber. Contest quality rubber is not as tough as the kit motors, but it can take more turns and store more energy. Competition flyers also make their motors longer than the distance between the hooks to get more turns in. They also stretch wind their motors with a winder. With these techniques, they can get much longer flights. Longer motors become harder to manage. We are going to make a motor that is twice the distance between the hooks, which is about 7″. To make a 14″ loop, we need a 28″ length of rubber strip.
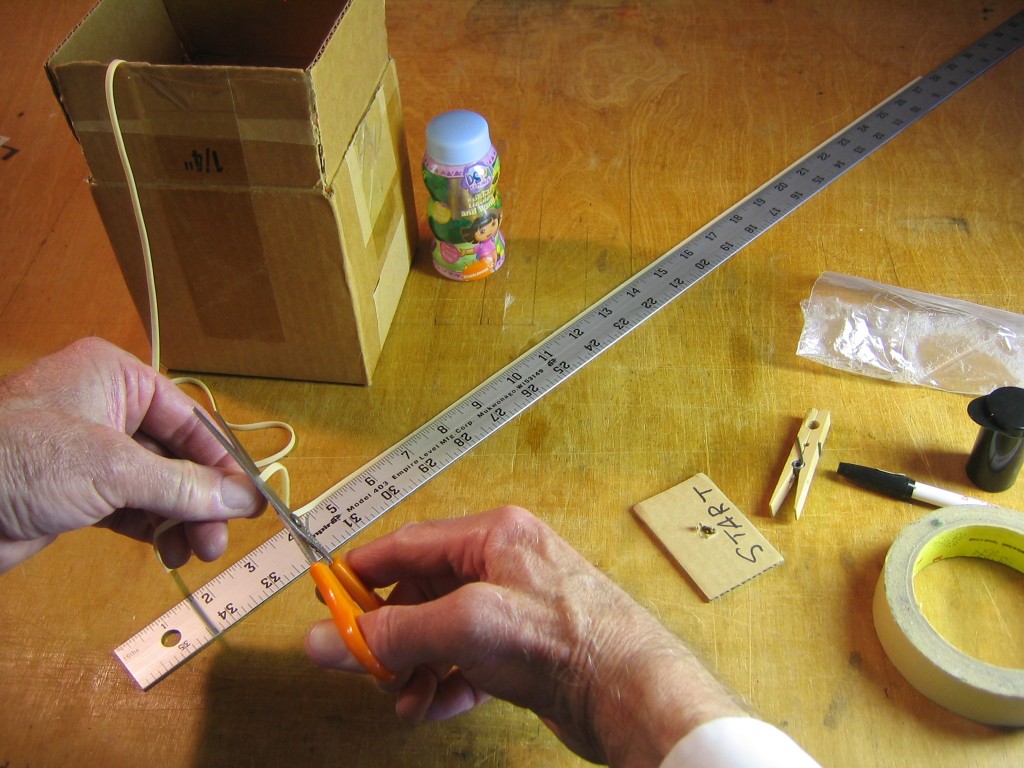
Measure out and cut a 28″ length of 1/8″ FAI rubber strip You can cut it with scissors or a razor blade. (I started with a 1/8″ width because that is what comes with the kit. Later I decided that 3/32″ strip is better.)
Slip an O-ring over the end and slide it down out of the way.
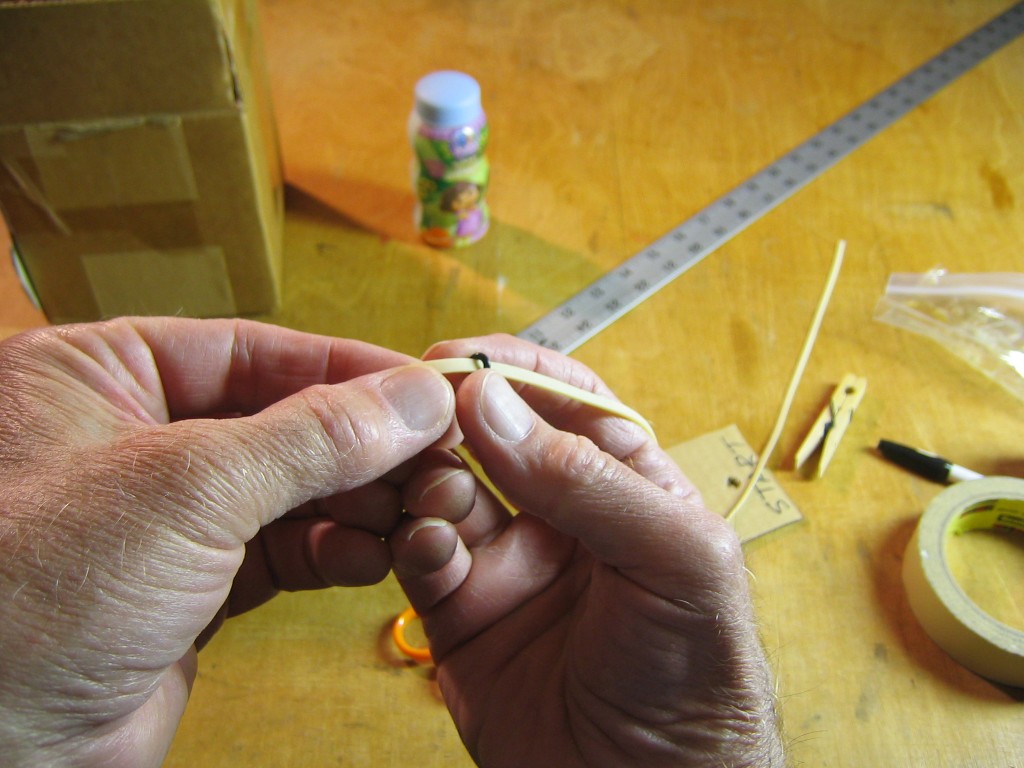
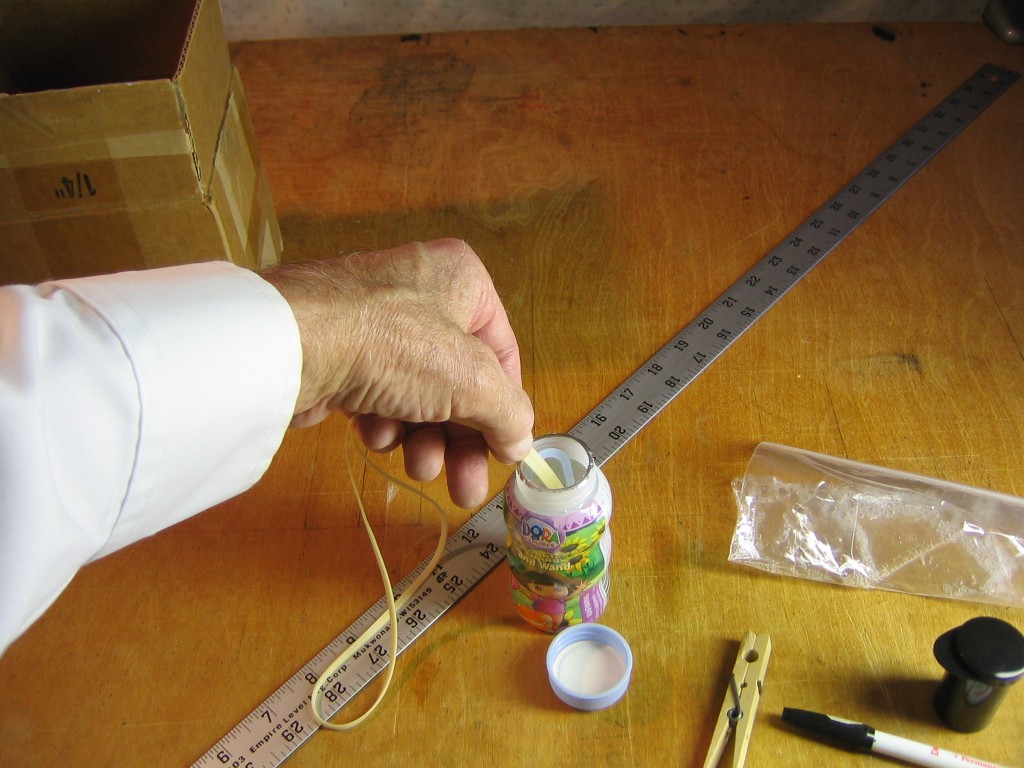
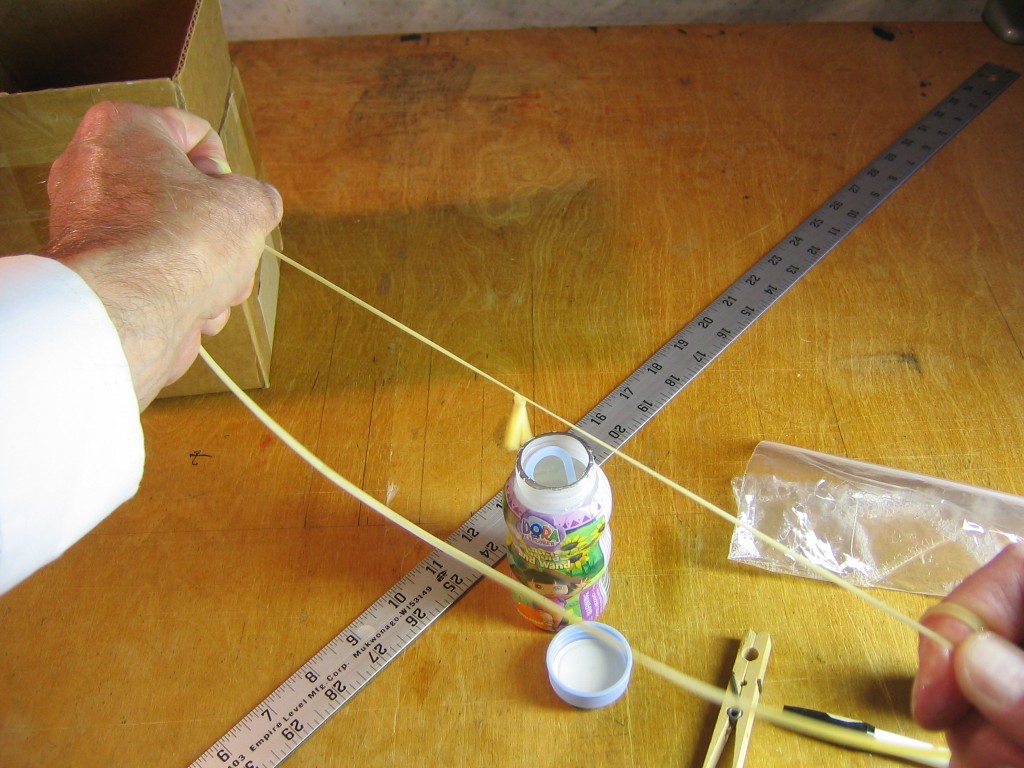
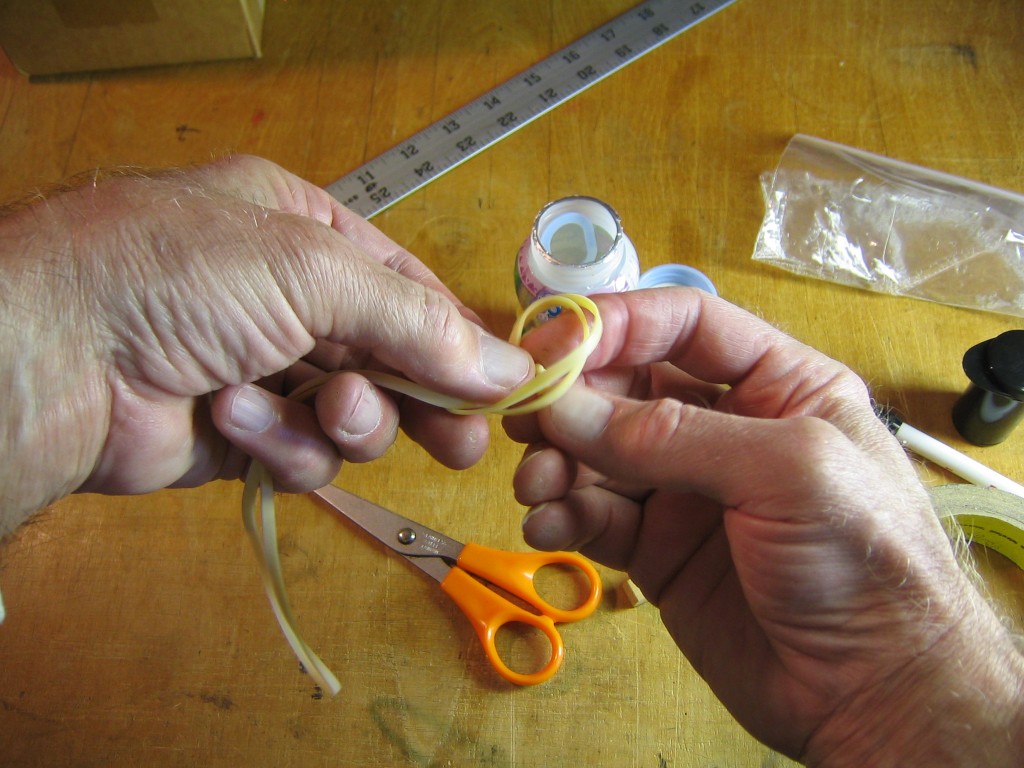
We want to tie the ends together without the rubber abrading itself. To do this, we apply a knot lubricant. Full strength lube is too slippery, the knot will untie itself. I found that bubble soap makes an excellent knot lube. Dip a couple inches of the rubber into the lube.
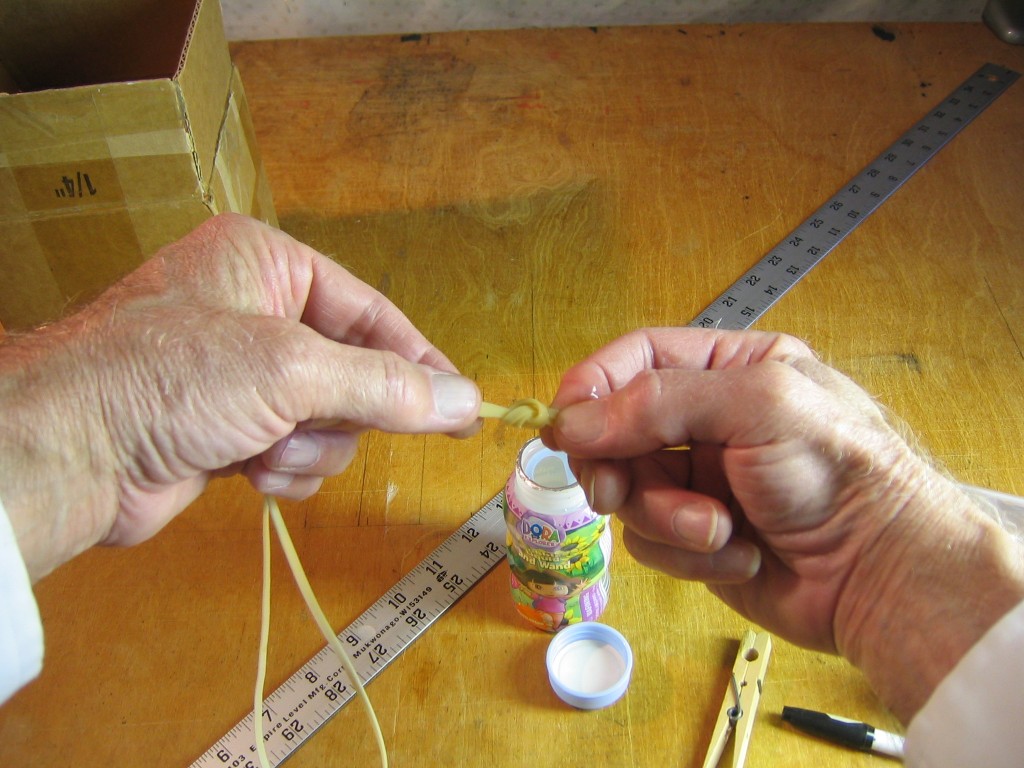
Tie a simple overhand knot in the two strands, as close to the end as you can. Sometimes you can push the knot closer to the end by pulling the rubber between your fingers.
Pull the knot snug.
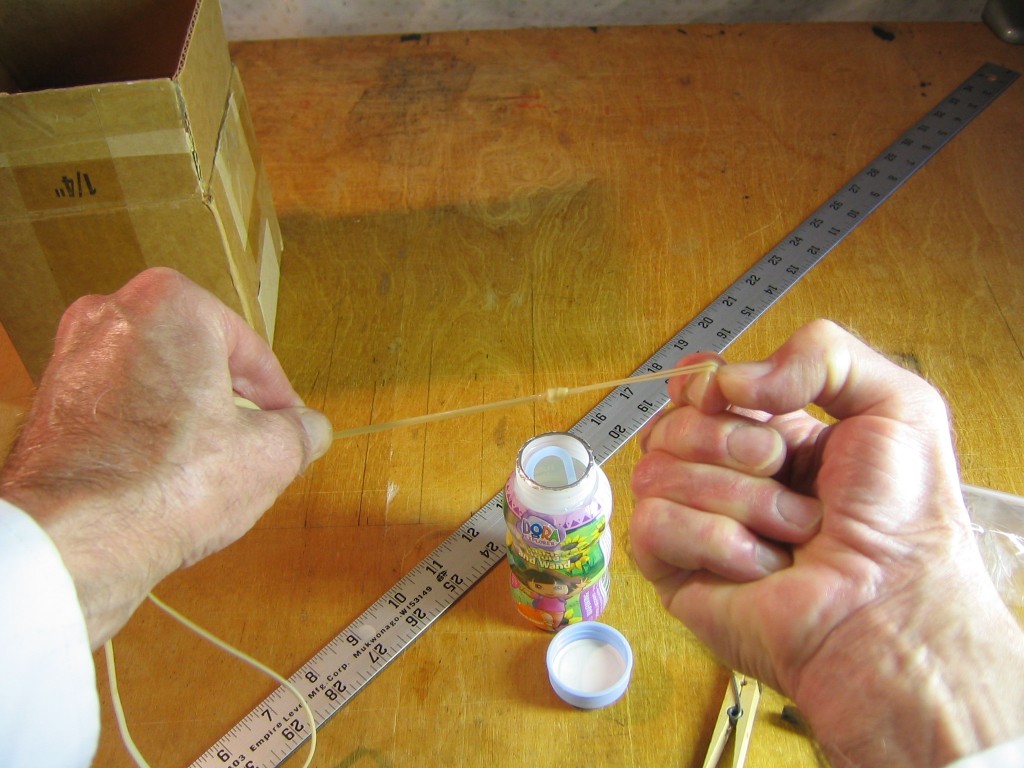
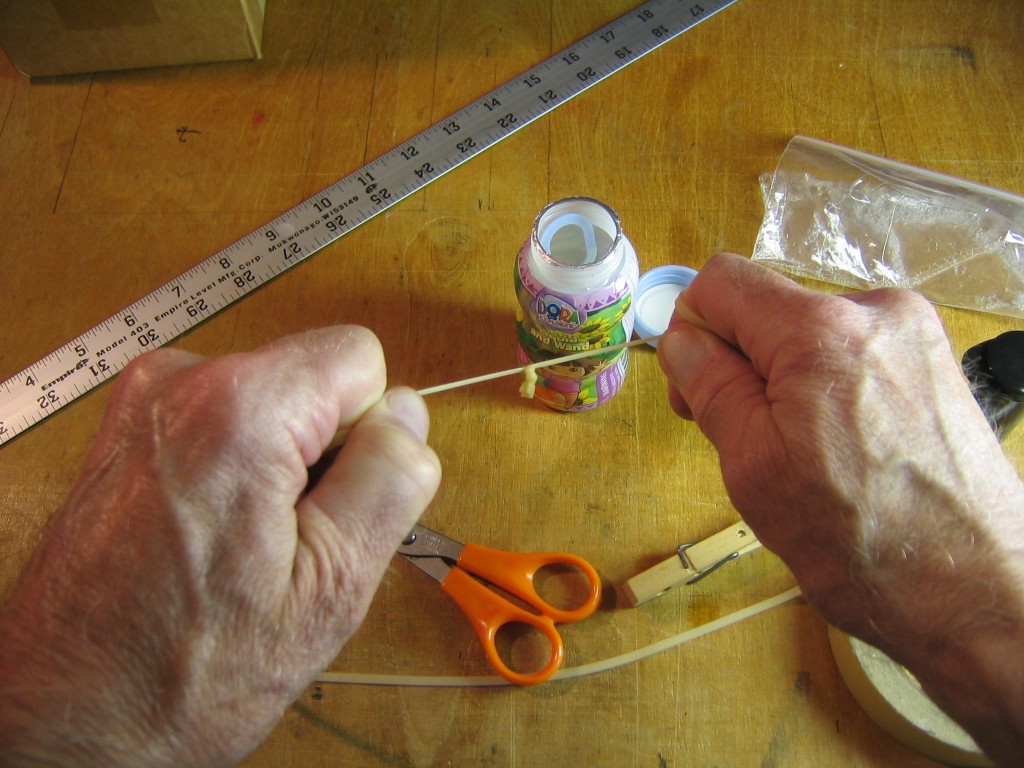
Pull the strands apart to move the knot to about 1/8″ from the ends.
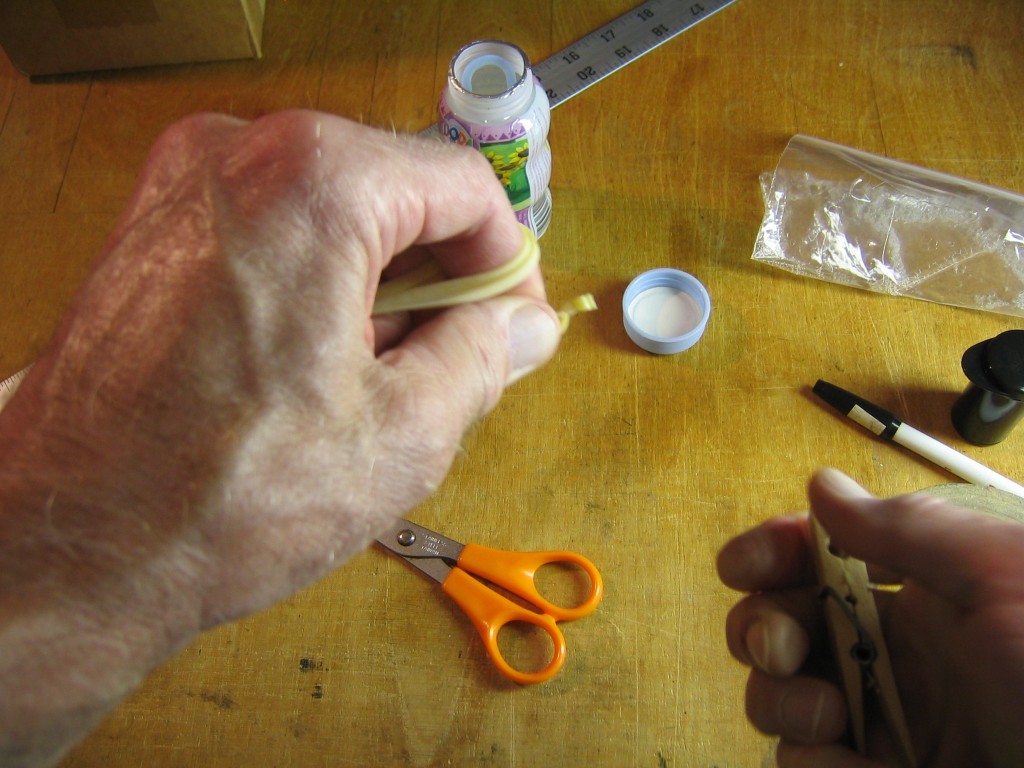
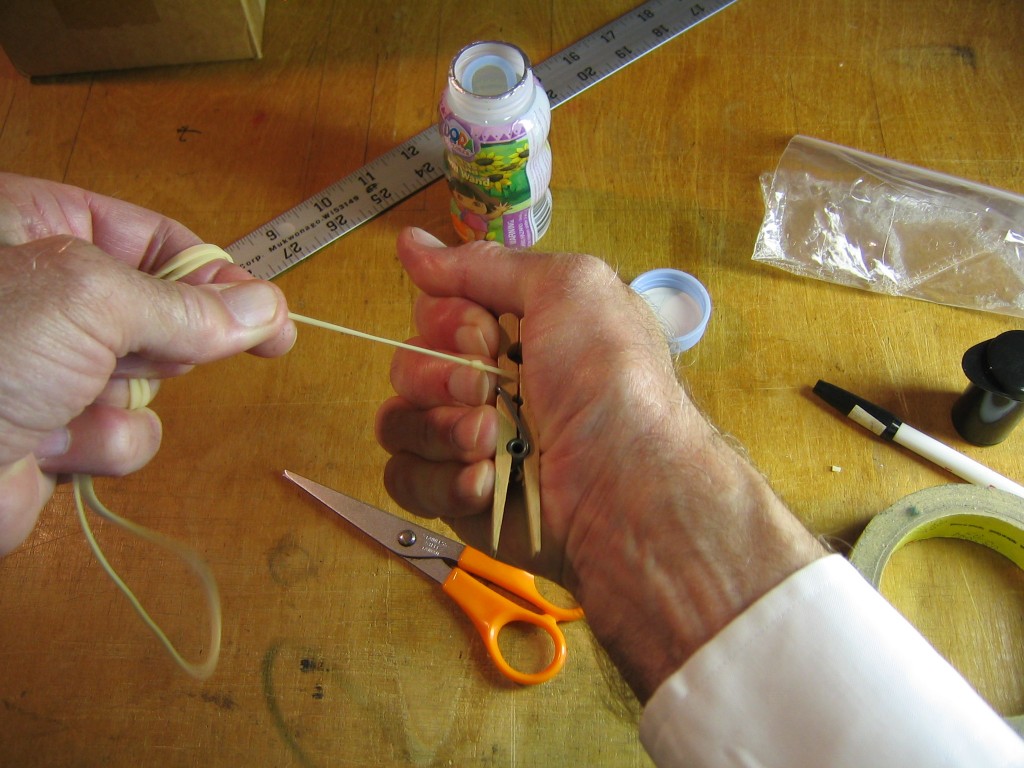
Grab the tag ends tightly with a clothespin and pull hard. Get the knot as tight as possible.
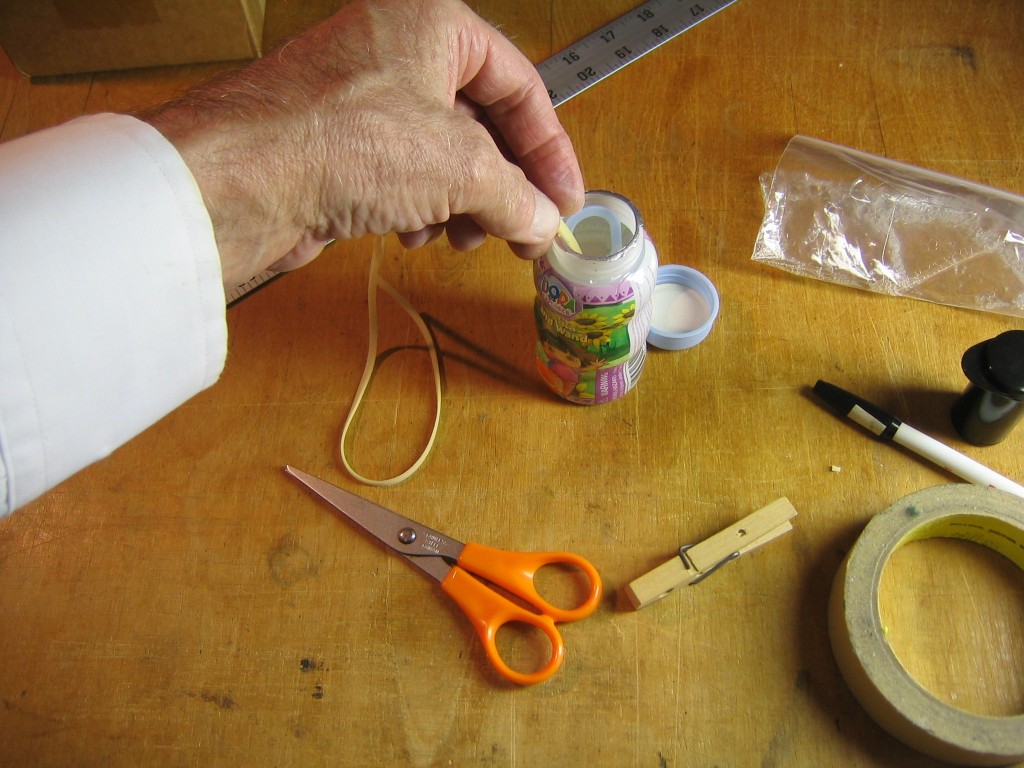
Dip the knotted end in knot lube again.
Tie another overhand knot, but this time make the loop in the opposite direction from the first one.
Pull the second knot up tight against the first knot.
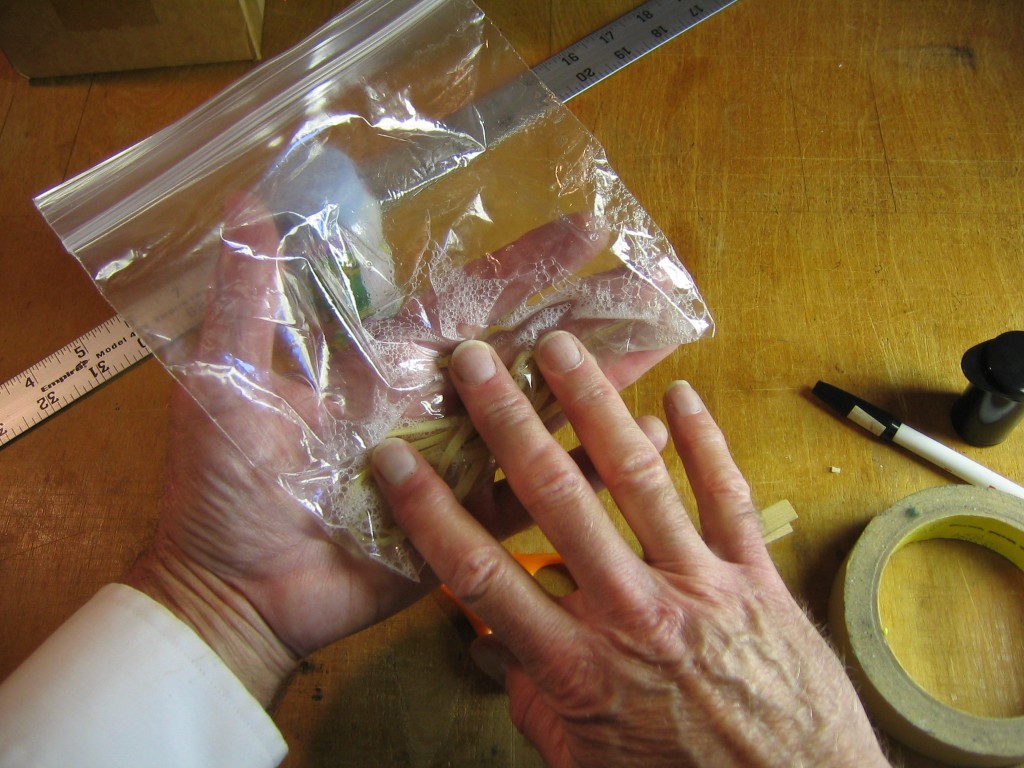
Drop the motor into the lube bag and massage it to coat it with lube.
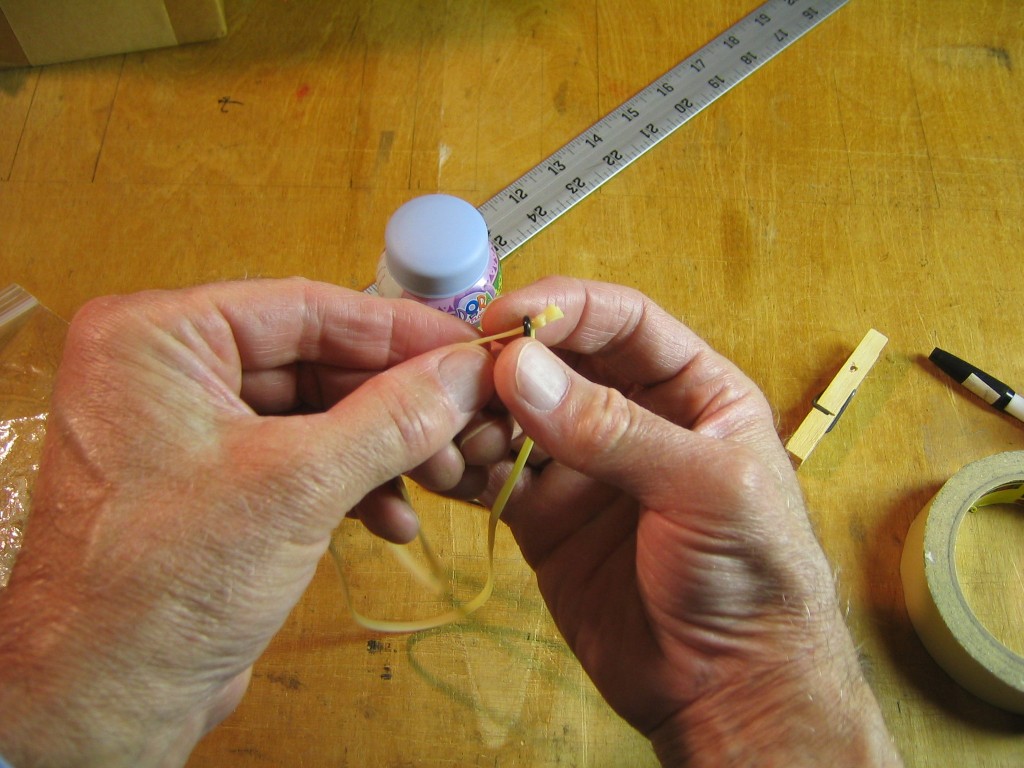
Slide the O-ring against the knot.
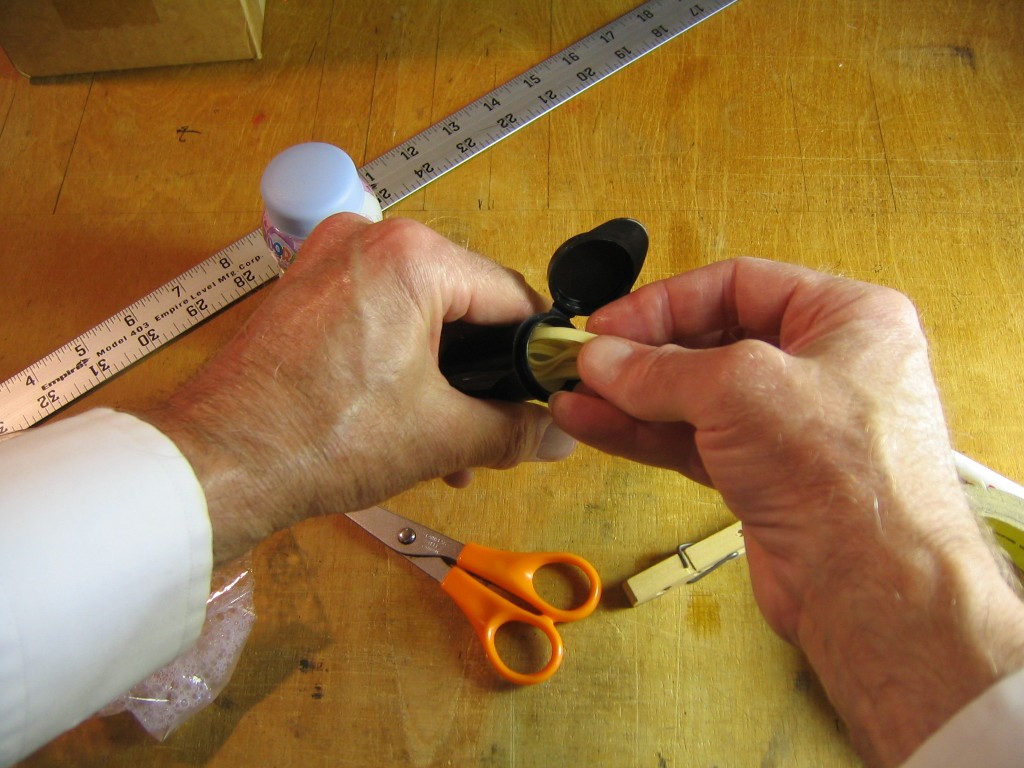
Fold the motor and put it in a storage can.
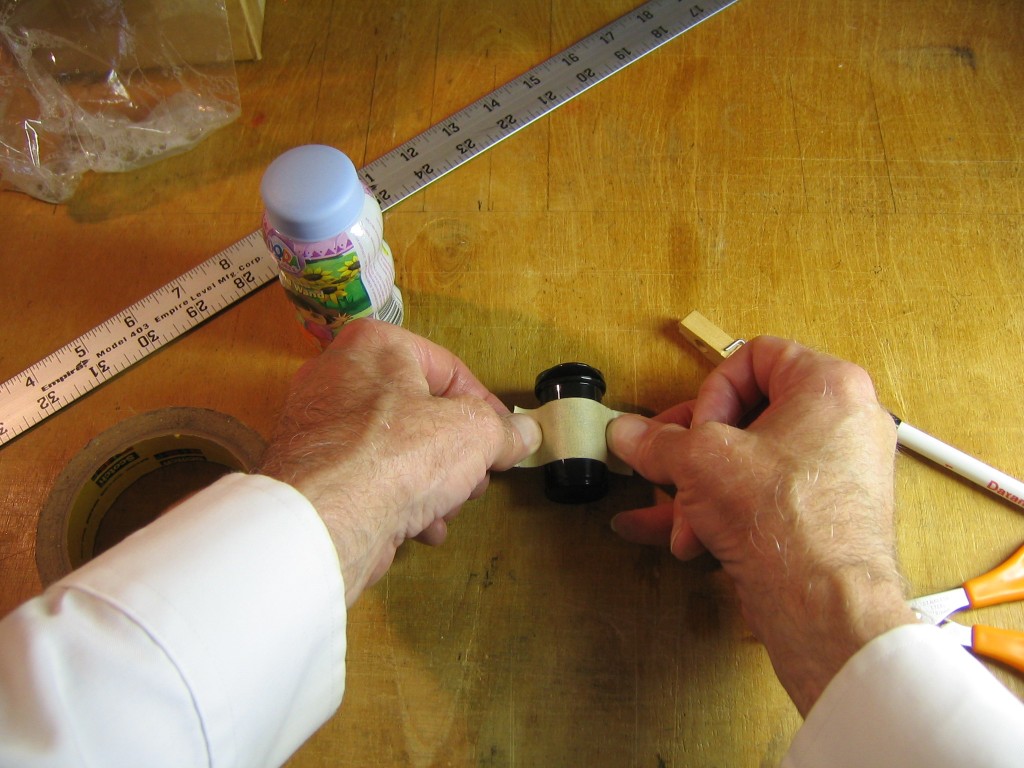
Put tape on the can for a label. (It’s best to do this before making the motor, before you get lube all over your fingers.)
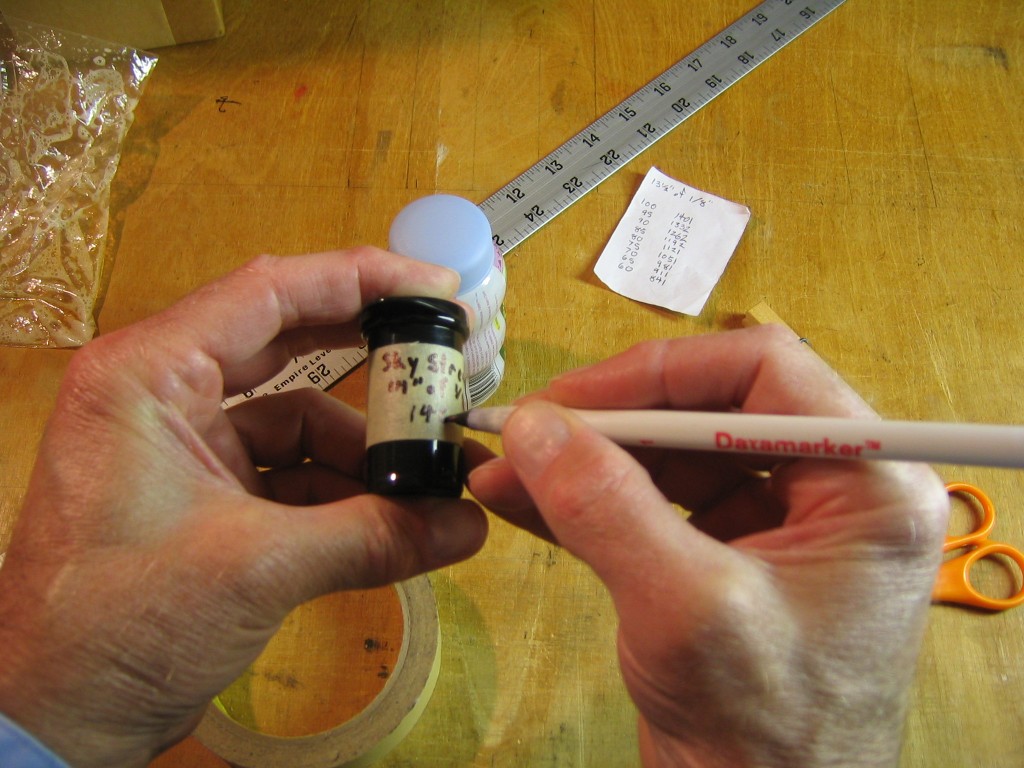
Write the label. The name of the airplane, the length and width of the motor and the estimated breaking turns are good information to have on the label. This motor can take up to about 1,400 turns. After being broken in, it might take a few more.
This motor must be wound using a winder and stooge. You can read about those elsewhere on this site. Put ‘stooge’ and ‘winder’ in the search window.
After flying with the 1/8″ motor I found that it was thicker than necessary. I am now using a 15″ loop of 3/32″ rubber. This motor can take up to 1,700 turns, although I rarely go over 1,600.
Landing Gear
Last but not least, you can add landing gear. Kids love airplanes that can take off from the ground, what we modelers call ROG – Rise Off Ground. The landing gear came from the Guillow’s Air Plane Design Studio. This adds a little weight up front. The wing must be moved all the way forward. The cambered wing is better for this. It is best to not do this together with the 6″ prop. The motor must be wound fairly tightly. You can get good flights with the 7″ blue rubber band that comes in the kit. I have got 400 turns on a lubricated motor, but some do not seem to be able to take more than about 300. Get it flying well first. You can try a few hand launches with the wheels on until you are satisfied that everything works. It will need a lot of room for takeoff. It may not rise very high, but it is fun to watch. It will settle down and land on the wheels, too. ROG flights won’t work in wind. The plane will roll in a circular arc. At some point the wind will get under one wing and tip the plane over, spoiling the takeoff.
Here is a video of a ROG flight.
Here is a video using 300 turns in the blue rubber band.
Here is a video using a 15″ loop of 3/32″ rubber for the motor. It surprised me by going off to the right in a large circle, getting lost in the trees. It made a complete flight and landed upright on its wheels. I found it behind the white pickup truck in the tanbark along the fence.
Some Technical Notes
My ultimate Sky Streak originally had a 6″ prop, a 14″ loop of 1/8″ rubber, cambered wings, an improved motor hook and a bendable rudder. With those modifications and 1,100 to 1,200 turns on the motor (79 to 86% of breaking) I have had many flights of 35 to 37 seconds. That isn’t necessarily the best that can be done with it. The motor in particular is from stock rubber strip. It could be that better performance would result from rubber strip custom cut to width.
Here is a video of a 40 second flight. The details are described in the text below the video screen.
The stock wing has 6.4 degrees of dihedral angle under each wing. I considered that to be enough. Many modelers prefer more stability and would use more. You can increase the dihedral and form the camber at the same time. Soak the whole wing in a cookie pan of water. Weigh it down with soup spoons to keep it under water. Strap each wing to a form and set it in a jig with a jar to bend the center section to the dihedral you want. I found that bending wings around a 2″ diameter jar would break the balsa. The jar shown above is 4 1/8″ diameter. The wing forms were cut to 6″ lengths. The center was supported on a 3/4″ x 1 1/2″ x 3″ block of wood to keep the inside ends of the forms off the table top. The tips were raised 1 11/16″ (1 1/2″ + 3/16″), putting them 11/16″ above the center.
The Sky Streak is a fairly heavy airplane for its size. Airplanes may be rated according to their wing loading, the ratio of flying weight to lifting surface area. The weights of the components for one Sky Streak kit are:
Propeller assembly 3.54 grams
Stick 2.47 grams
Wing 3.22 grams
Tailplane 0.68 gram
Fin 0.24 gram
Motor 1.46 grams
Total 11.61 grams
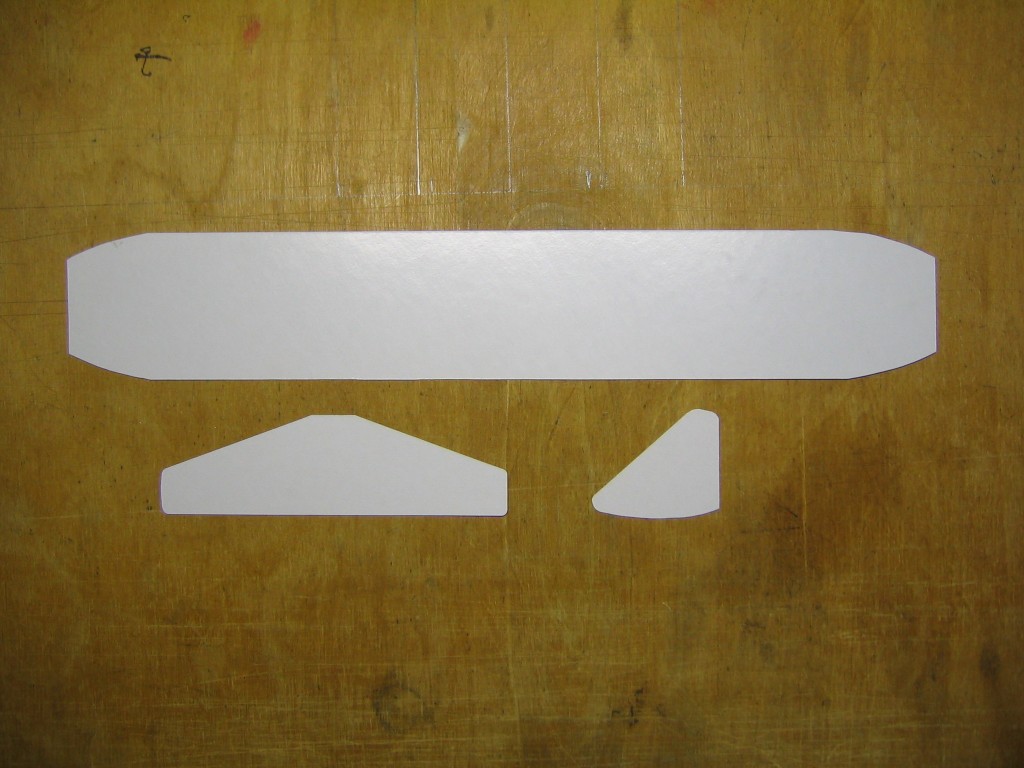
To calculate wing loading we need the wing area. The wing is approximately 2″ x 12″ or 24 square inches in area, but the corners are trimmed off. One way to measure the wing area is to trace the wing onto a thin sheet material of known, uniform density, cut out the pattern and weigh it. I used an 11 7/8″ x 14 9/32″ piece of thin cardboard from a cake box weighing 33.2 grams.
The wing pattern weighed 4.496 grams. This weight is the same fraction of the total weight of the sheet as the wing pattern area is to the area of the whole sheet.
The area of the wing pattern must be (4.496/33.2) 169.775 = 22.99 square inches.
The wing loading is thus 11.61/22.99 = 0.505 grams per square inch.
Compare this with other beginner models featured on EndlessLift. These all have paper covering on balsa frames, rather than sheet balsa surfaces.
Squirrel – 0.313 grams per square inch.
AMA Cub – 0.221 grams per square inch.
Denny Dart II – 0.185 grams per square inch.
The heavier airplane will need to fly faster to support its weight. Flying faster uses more power and that runs the motor down sooner. The heavier airplane also comes down faster when the power runs out. What this means is that the Sky Streak should not be expected to fly as long as relatively lighter models. Its main advantage is that it goes together quickly, in less than two minutes compared with around an hour for those other planes, and it doesn’t require sharp blades, pins or glue. It still flies reasonably well and is particularly adapted to small parks, playgrounds and school fields where longer flying planes will likely drift away and get lost. The higher speed of flight means it is more tricky to trim. It has a lower margin for stability and adjustments can be very sensitive.
Further Developments
Considering the difficulties I had launching the plane while trying to operate the video camera, I decided to follow Dave’s lead and increase the dihedral to improve stability. I soaked an entire wing and bound it to the airfoil form with the jar holding down the center and the tips raised up 1 1/2″. When dry, the tips sprung back to 1.3″, increasing the dihedral from 6 degrees to 12 degrees. First flight spun in to the right. I replaced the bent rudder fin with a flat fin. Good flight, but steep descent, so moved the wing all the way forward. I had two flights of a little over 50 seconds. This with the motor wound up only 80% and not the optimum motor. I’m going to try for a minute.
Flight tests showed that the motor should be a bit thinner, so I replaced it with a 15″ loop of 3/32″ strip.
My best flight so far lasted 1:16.
This is not the best that can be done. Notice the stall and tumble at the beginning. A better climbout will conserve the energy that was lost in that tumble and produce a longer flight time.
You can see that there are opportunities for further experimenting with this airplane. Once you have got your Sky Streak flying well you will have mastered many elements of miniature aircraft aeronautics. The next step is to learn to cut out and assemble parts to make more complex airplanes that can fly better. A good place to start would be the AMA Cub series on EndlessLift. Start with the AMA Cub Master Class. Buy several AMA Cub kits and continue with the AMA Cub Squirrel, the AMA Cub Denny Dart and the AMA Cub Pennyplane.

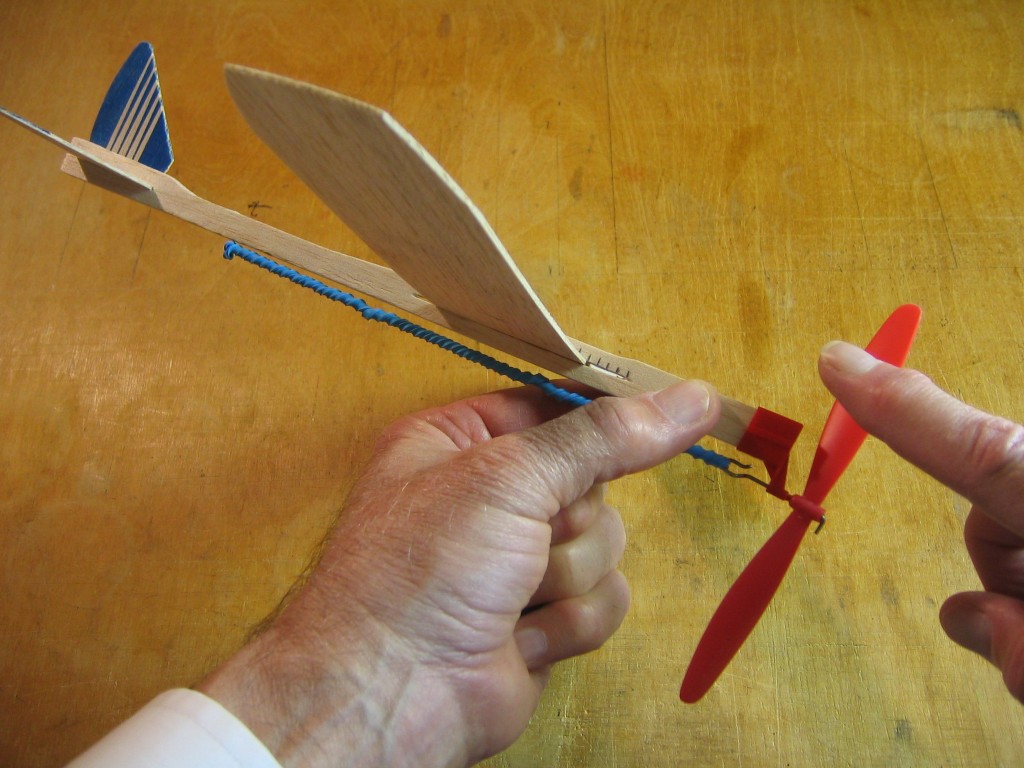
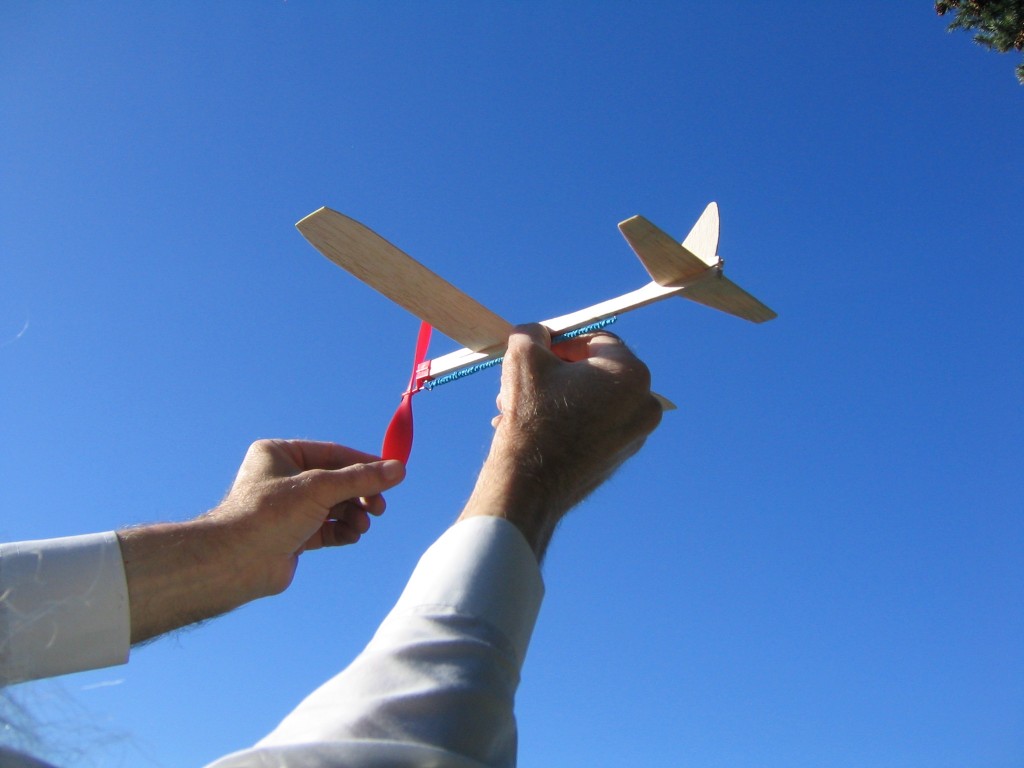
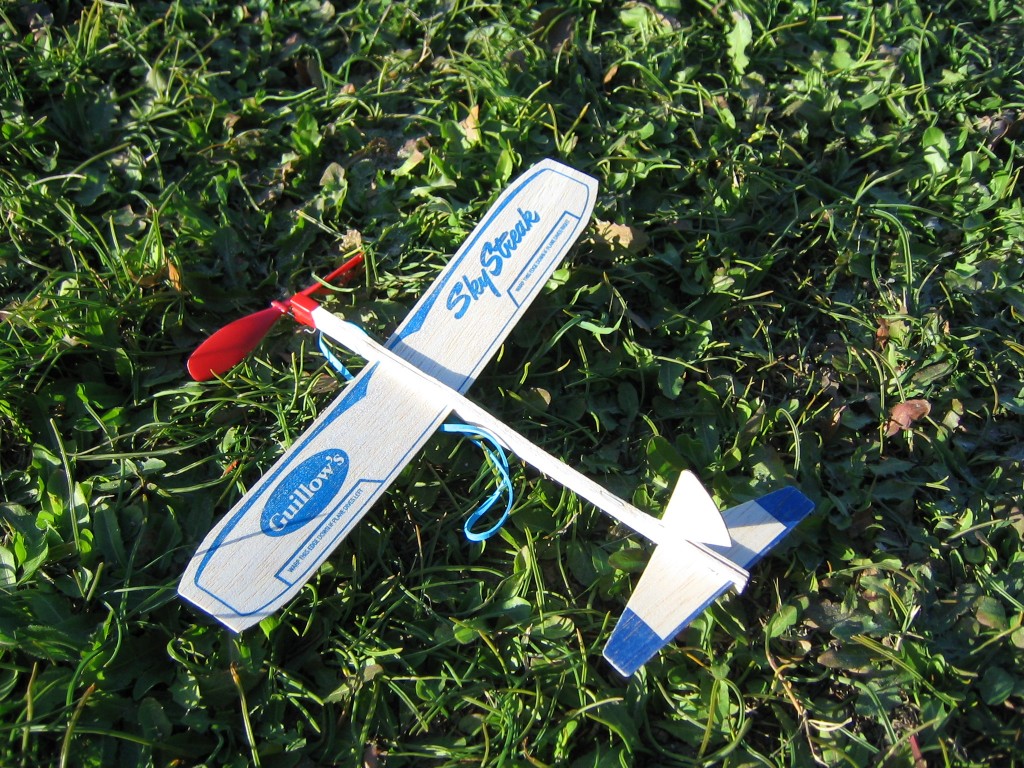
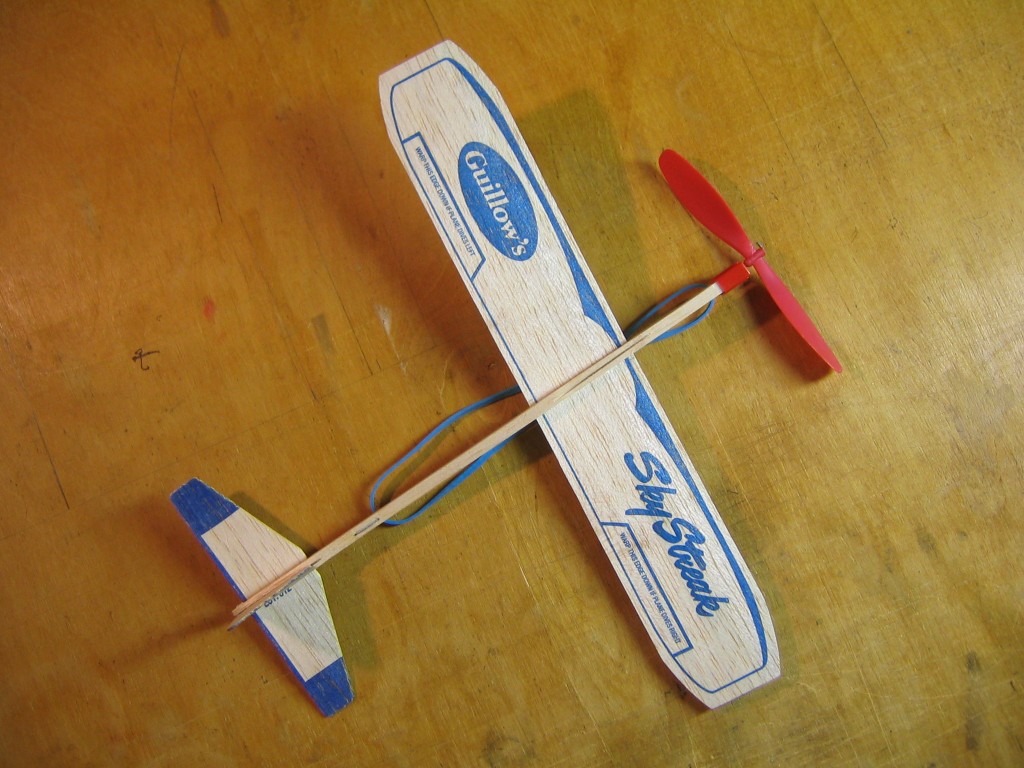
Hi Gary: about the most fun a person can have for $6,49 or so, especially after cambering the wing, adding dihedral, using a 3/32 motor, changing the tail hook and generally following/enjoying your tutorial . Thanks for sharing! PS: I used a sky stream, not sky streak, but they seem to be twins.
Gary: Thanks for publishing all this. I remember buying the Strato Streak for $0.25 back in the day. They never flew very well. 50+ years later, I decided to give it another go with my 4.5-year-old grandson and the initial results were pretty much what I remembered. I did your recommended tune up and the results are transformational. It is amazing how well it flies.
I bought the 3/16th Tan Super Sport Rubber to substitute for the same size blue OEM rubber motor. I made a 14” loop (HTP = 8”) but I couldn’t really get more than 400 turns without over-torquing the plane and sending it into a kamikaze dive. The added length brought no benefit so I decreased the loop size to 10” to save weight. For whatever reason, I can now increase the windings to 500 with the 10” loop and that thing climbs like a rocket even though I know it has more torque with the shorter loop. (???!) I ordered 1/8th Super Sport so I can increase the turns to 1000 in order to keep this thing in the air longer.
BTW, a friend who teaches Lego Robotics is now interested in what you’ve done here so your mission of teaching kids about aeronautics continues.
Thanks,
Mike W
love these guillows, i played with them as a kid for number of hours, and even now as an adult i will wind and fly at the park with the kids.
great memories, i always thought the propellers were a little too big for the plane, so i modified them with smaller propellers and longer/thinner rubber bands, this made the plane fly a little faster and longer, thanks for the post
Amazing article…I have been experimenting with Guillow hand launch gliders to learn how to trim. This article takes me way forward in my thinking Thankyou!
When you are ready to move beyond the Guillows gliders, there are many good resources on the Internet. I recommend this as a good place to start:
https://www.amaglider.com/
Great Sir Respect for you. You have taken so much time and so many pictures illustrating every step. I am teaching Robotics and AeroModeling was looking upon some information on how to improve the flight performance. Such a great source of information you have given us.
Thank You sir
Shyam
http://www.digitalbuddha.co
WOW! Incredible. I’m going to give this a try.
The hobby shop had Strato Streak planes, but since the same instructions will work, I went ahead and bought four, one for a kid in the neighborhood, three for me and two friends to play with at Lagunita. I will camber the wings and put in dihedral, as well as add the other modifications before the “event.” I am continually impressed with Gary’s devotion to kids and flight and have begun looking again for an indoor venue. Thank you very much for this excellent tutorial.
Truman B. Cross
Thanks for the well detailed process with the Guillows Skystreak. Tomorrow I will be helping at the AMA Flight Camp in Muncie, IN and in my portion of the event, we will be featuring the use of a modified Skystreak. We will be modifying the wings to a quasi-polyhedral (tip dihedral) and upgrading to Tan II Sport for outdoor flying. I have two profile scale airplanes, an F4U and Japanese Jill using the bto fly that use the basic Skystreak with added material to assume the scale outlines. Both fly extremely well.
In addition, I will demo a “competitive” version that has special features. These include:
1) Shaved and balanced prop with pitch increase of 2 degrees (less mass, longer prop rotation/ duration using 1/8″ rubber)
2) Tapered aft end fuselage, includes losing the “hump” just forward of the fin location (less mass again)
3) Sanded wings for airfoil and easier “aileron” tweaking
4) Sanded empennage to save weight and for easier trailing edge adjustments.
5) Aft motor hook using a dress pin (w/ball end) with the hook suspended so that the rubber motors rarely rubs the fuselage.
6) The wing will be polished on the bottom so that there is more turbulation over the top of the wing.
For the polishing, I discovered that the multi-colored finger nail buffers are magnificent!! I use the same buffer to polish the prop blades after shaving.
BTW, that last version “competition” version easily thermaled for a local park recreation manager and was lost going straight up. Needless to say he was shocked and understood the need for a larger flying site. The good news is it will be added to their camp next year. Finally, with similar mods and 3/32″ rubber the Skystreak can do almost a minute indoors if the prop pitch is increased.
Best Regards,
Tom Sanders
AMA EDCOM
Science Olympiad National Supervisor, Aeronautics
I love your number 6. It is a bit of the logic behind the Squirrel wing. Most people think that the wing is up-side-down but it actually works well with the covering on the bottom for this reason.
I trimmed a Strato Streak using this excellent tutorial, learning a lot. Then I glued strips of 1/32″ balsa sheet to the top surface, to increase lift the way the squirrel wing does, because I was too impatient to soak the wings and bend them. I found that the wet glue on the top of the balsa sheet wing warped it into shape as if it had been bent on formers! Something new to explore.
Great educational video of beginner Rubber Powered FF Airplane from beginning assembly to end of flight.