In this tutorial I will show you how to carve a propeller from a block of balsa or other wood. The sizing of the block is discussed elsewhere. Here I will assume you have obtained the block dimensions from a plan or decided the dimensions on your own. You will also need a blade pattern. That might come from a plan, a book, you can trace the outline from a prop you have or you may draw your own. Once the dimensions and shapes have been decided, the carving can begin.
Carving a propeller may look very complicated. It is, but like building an airplane, it is done one simple step at a time. You can do each step and so you can carve your own prop. There are many reasons to carve your props yourself. Some early model airplane designs originally included a balsa prop. Copies and kits that use a heavy plastic prop instead will be nose heavy. The Flying Aces Moth and the Sig Tiger will be easier to balance and lighter with a balsa prop. Duration planes will fly better with a higher pitch prop than what is available in plastic and they will stay up longer with the lighter prop. You will be able to carve props that better meet the requirements of your airplanes. There is a great deal of satisfaction in flying your plane with a prop that you carved yourself. A prop is a thing of beauty.
There are about two dozen ways to lay out and carve a prop from a block of wood. I will show you one of the earliest and simplest methods of laying out and carving a prop, known as the X-block method. This produces a helical prop.
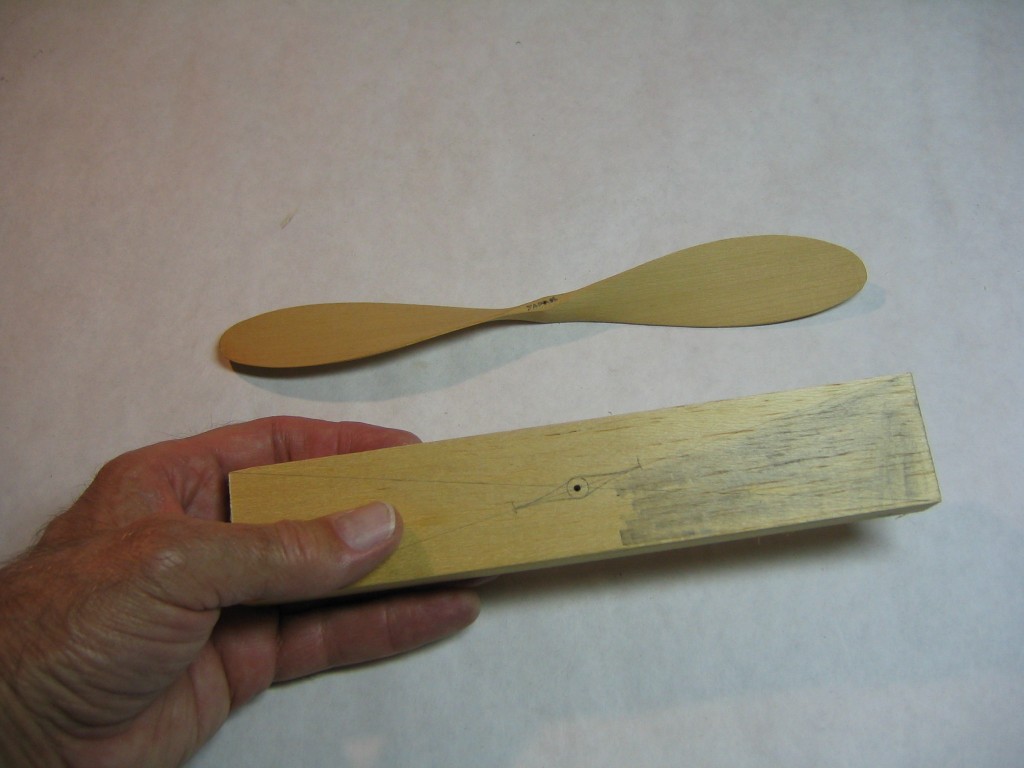
Before we start carving the prop we must collect a few tools. There are several ways to carve a prop. You may do it without all of these tools or you may use others. Some carve entirely with the knife, others may use a spoke shave. These pictures show how I do it.
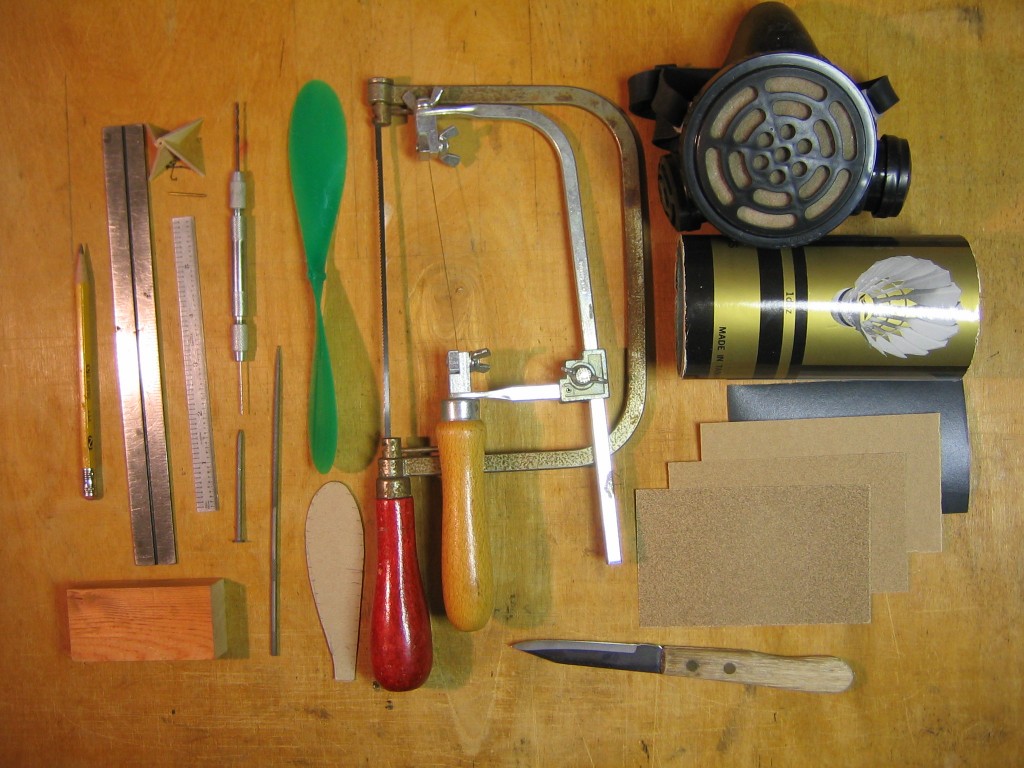
You will need a sharp pencil for marking the lines and blade outline on the wood. The pencil can be sharpened to a chisel point by rubbing it on fine sandpaper at a shallow angle. A scale and straightedge will be needed for locating marks and drawing lines. I use a block of wood to properly align the scale with the faces of the propeller block. To start the hole for the prop shaft, I use a small nail or a round file with a sharp point. The drill is best held in a pin vise. This shows a 1/32″ drill and a 1/16″ drill in the vise. You would use one at a time, to avoid poking your hand. If you don’t have a pin vise, you can wrap the end of the drill tightly with masking tape to give you a better grip. The 1/32″ drill would be used if a 1/32″ steel wire prop shaft was going to be put through the prop, bent back and glued in place. The 1/16″ drill would be used if a 1/16″ brass or aluminum tube was going to be inserted through the prop as a hub. The pyramidal drill guide holds the drill at a right angle to the face of the prop block. The brass tube insert is used in the guide if the 1/32″ drill is going to be used. Learn how to make a Drill Guide on EndlessLift. It is good to have a finished prop on hand as a reference. A cardboard pattern is used to trace the blade shape onto the carved back of the prop. It has slits cut into it on alternating edges to permit it to twist. You can remove the excess wood entirely by carving with a sharp knife, but it is faster to cut off large chunks with a coping saw. The finer saw is better for cutting close around the perimeter of the blade. Final shaping and finishing is done with several grades of sandpaper. 100 grit is used for quick removal and rough shaping. 150 grit is used for final shaping and balancing. 220 grit is used for smoothing and 320 grit is used for final polishing. A short piece of sturdy cardboard tube is used as the sanding block. Taping the sandpaper securely to the tube with masking tape makes it much easier to manage. This one is from a badminton shuttlecock container. Sturdy mailing tubes are another source. Round bottles and jars also can be used. Bits of dowel can be used for small props. A dust mask will prevent you from inhaling the irritating sanding dust, or you can work outdoors in a wind. Some people dope or varnish their props, others cover them with tissue or fiberglass. I won’t be doing that here.
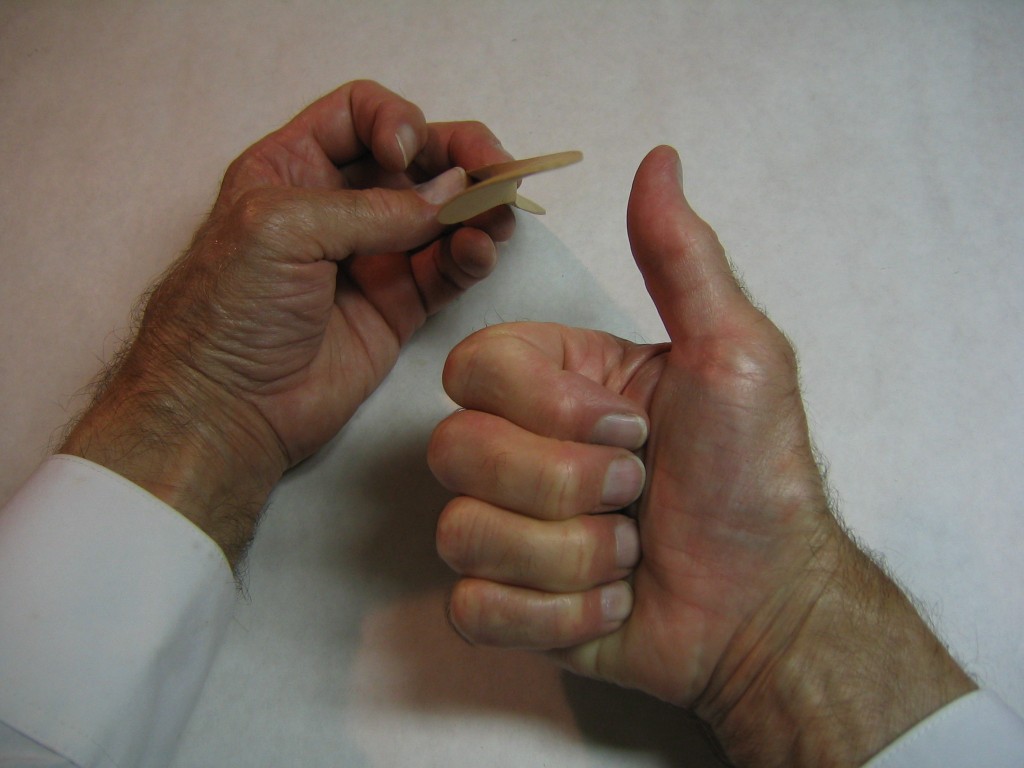
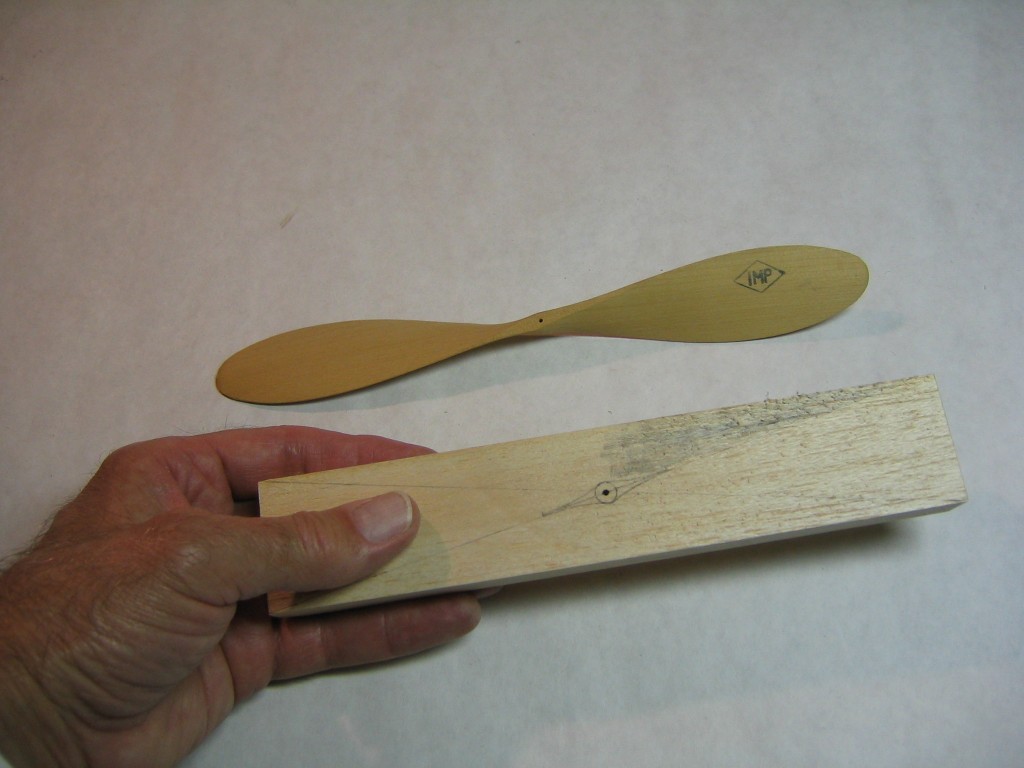
We are going to carve a standard right hand prop. A right hand prop turns clockwise when seen from behind. Reversing things will produce a left hand prop. It is important that both blades be carved with the same orientation. If you carve one blade right handed and the other left handed, the propeller will not work. This is where the example prop is a useful guide.
A right handed prop moves in the direction of the right thumb when it is rotated in the direction the fingers curl on the right hand. It sort of screws itself through the air.
The two blades are identical, each will rotate exactly into the place of the other. There is no right blade and left blade, as there are right and left wings.
A note on nomenclature: the surfaces of the blade may be referred to as front and back or top and bottom. When thinking of the prop blade as a lifting wing, it is usual to refer to top and bottom. When thinking of the prop mounted on the prop shaft, pointing forward, it is usual to refer to the front and back. The top becomes the front and the bottom becomes the back. Sometimes the leading edge of the blade may be referred to as the front and the trailing edge might be referred to as the back, adding to the confusion.
Carving a propeller is like sculpture. You remove anything from the block that is not propeller and what is left is the propeller. You can see that wood must be removed from the right places on the block to properly shape the prop. It helps to have a clear idea of what must be removed and what must be left.
The darkened area must be removed to reveal the top surface of the blade.
The darkened area must be removed to form the edge of the blade and hub of the prop.
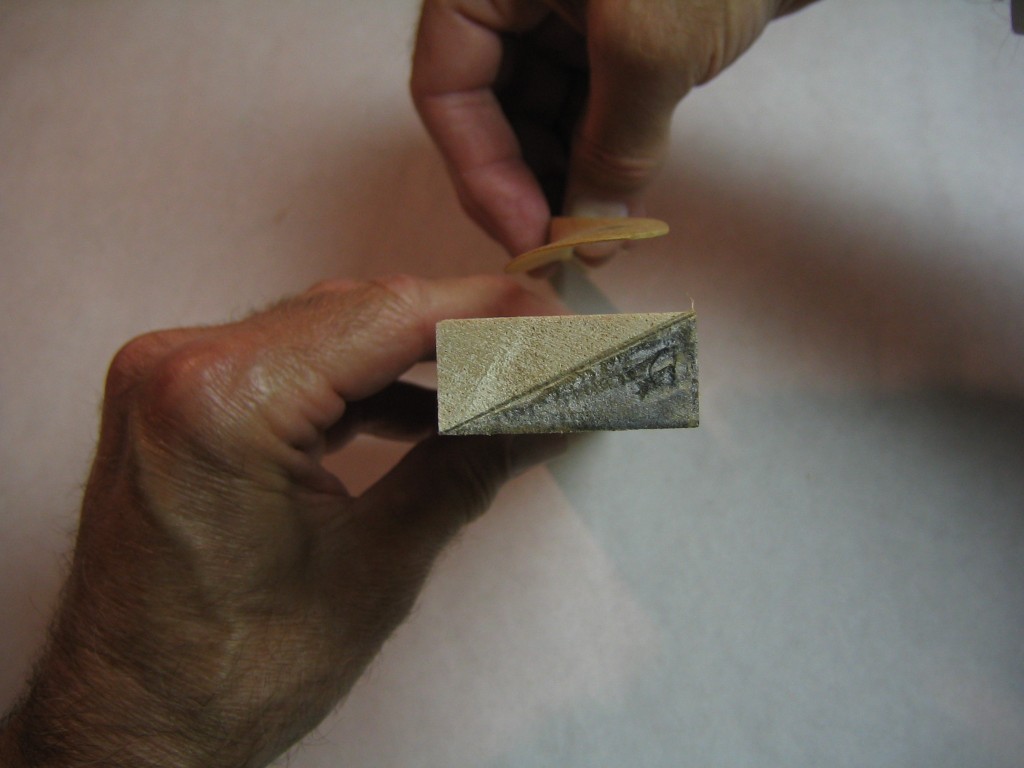
The darkened area shows an end view of what must be removed to expose the under surface of the blade.
Some directions tell you to draw diagonals between the corners of the block and drill the shaft hole where the diagonals cross. I find that this is not a reliable way to locate the center of the face. The point on the front will not correspond to the point on the back, the shaft would be at an angle and the prop will not balance. Small discrepancies in the locations of lines intersecting at a shallow angle make a big difference to the point of intersection. Put two rulers down crossing at a small angle and move one slightly to see. It is necessary to measure to the exact center from each end and each edge of the block.
Sharpen the pencil to a chisel point on some fine sandpaper.
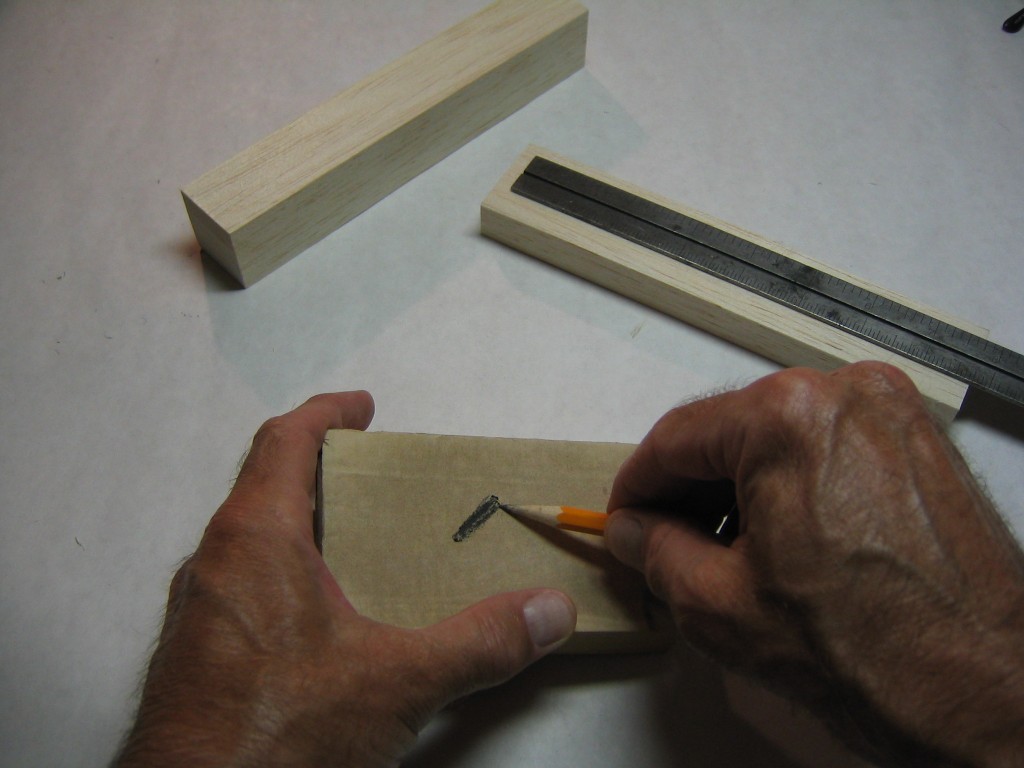
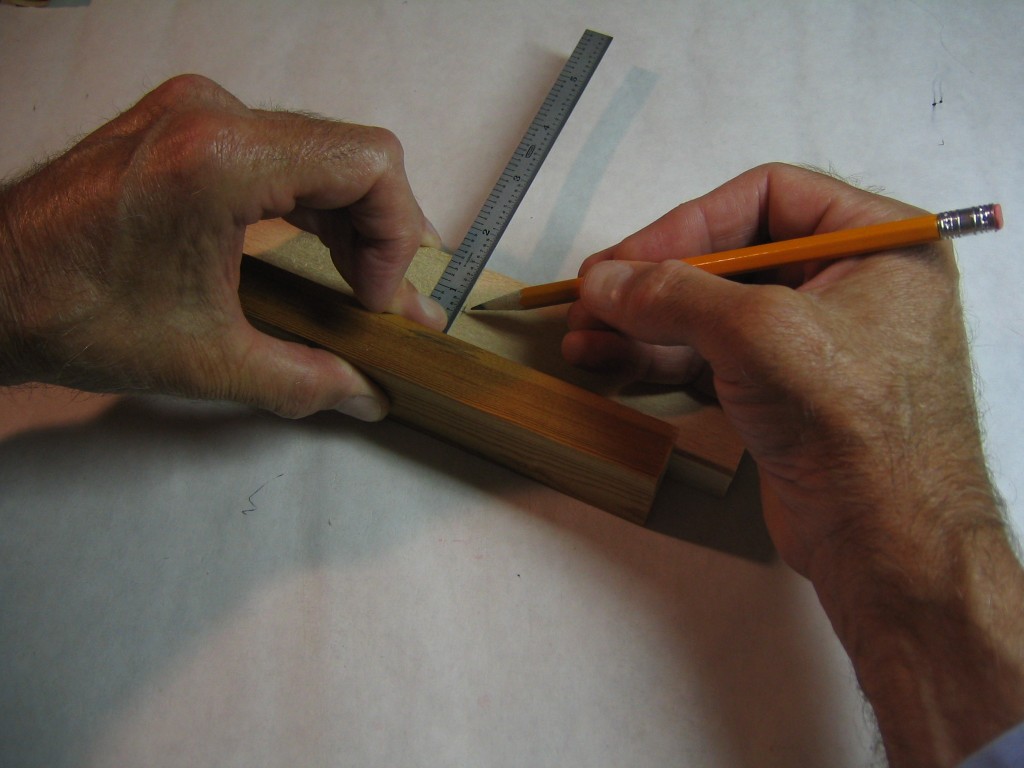
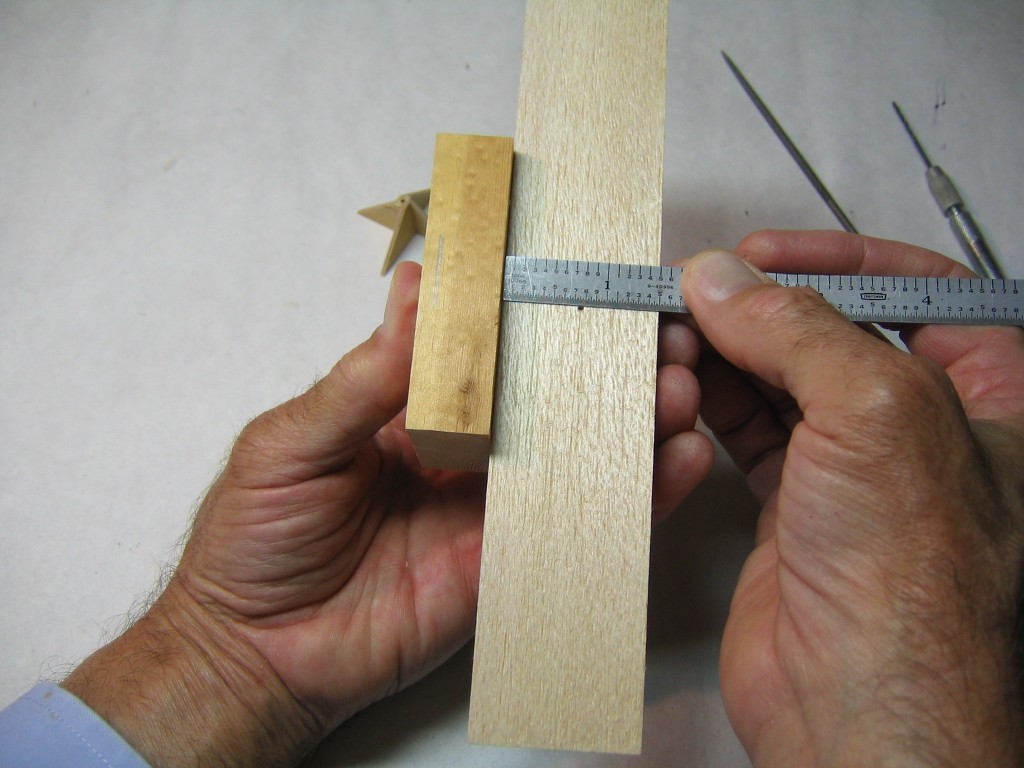
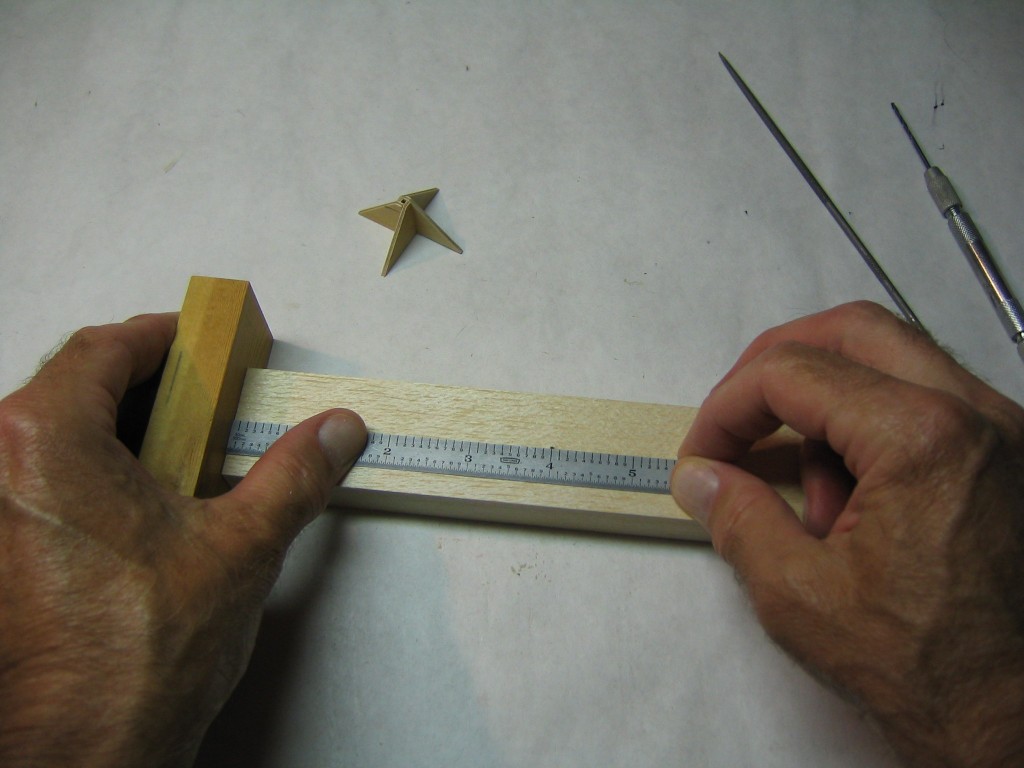
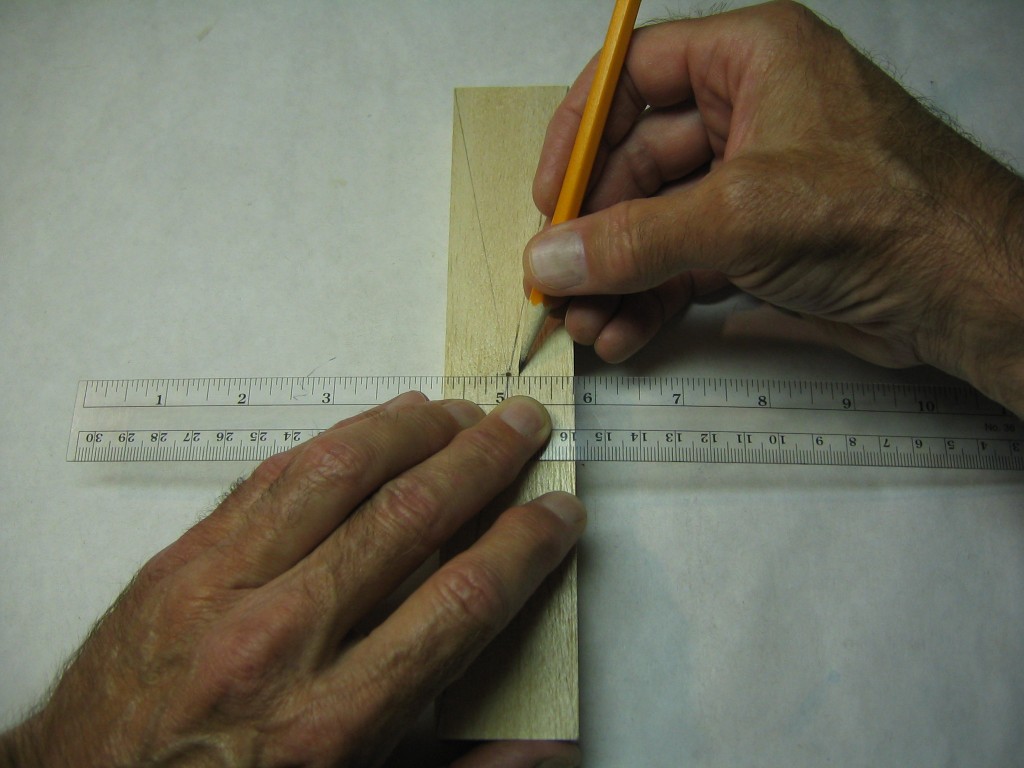
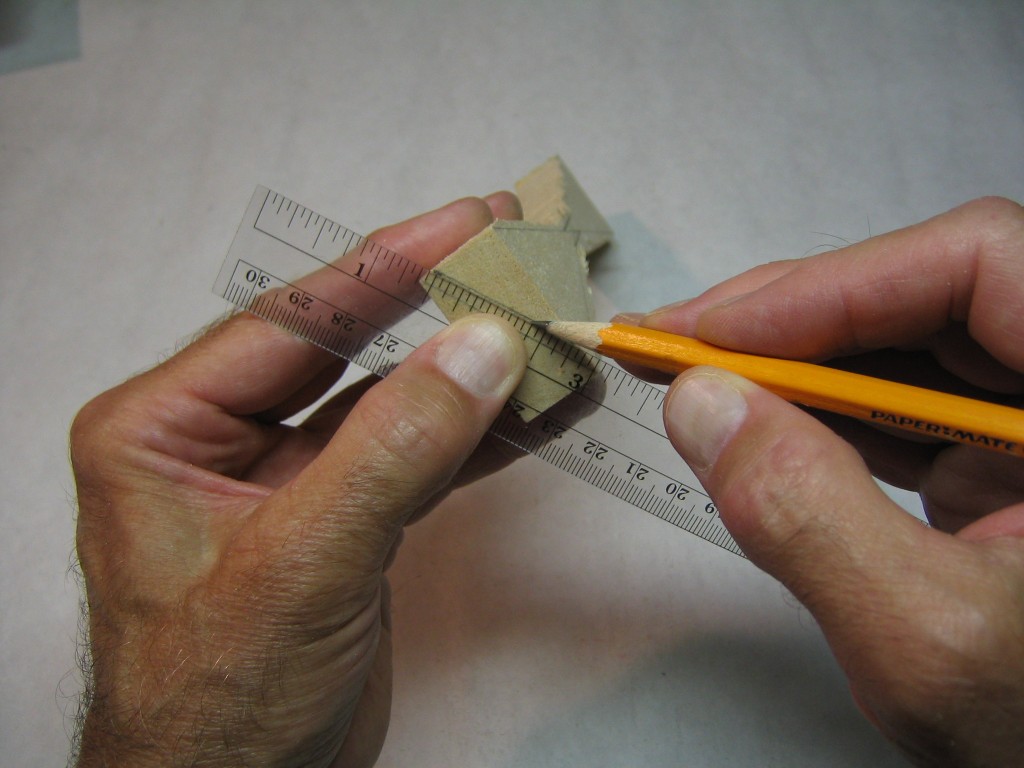
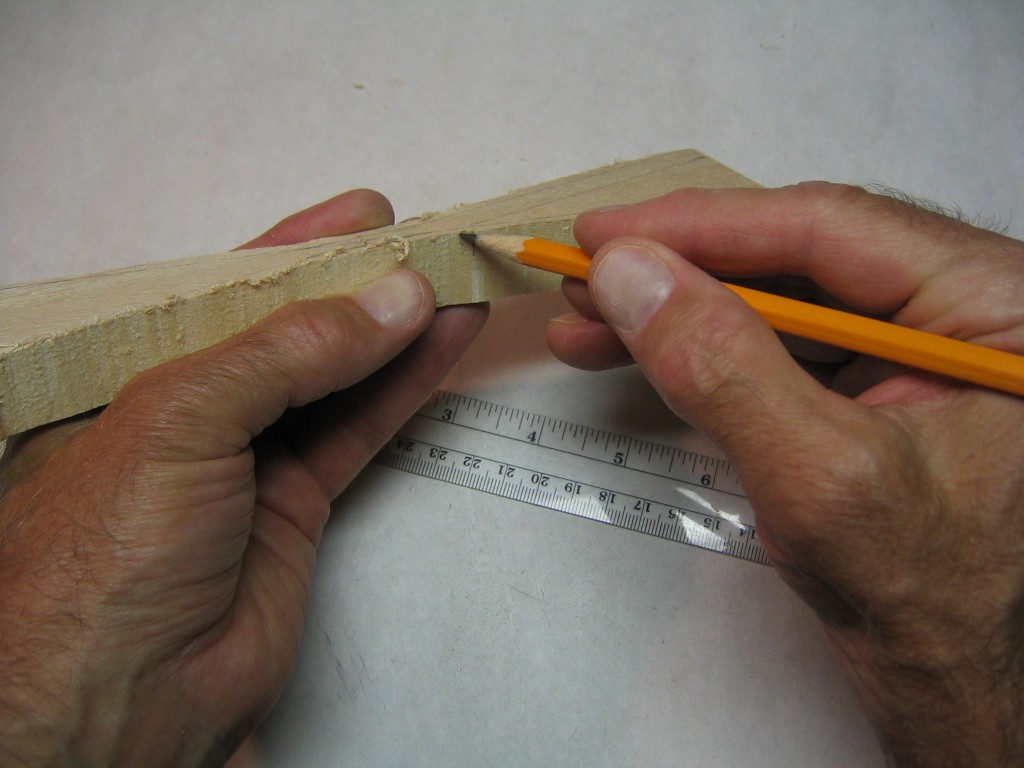
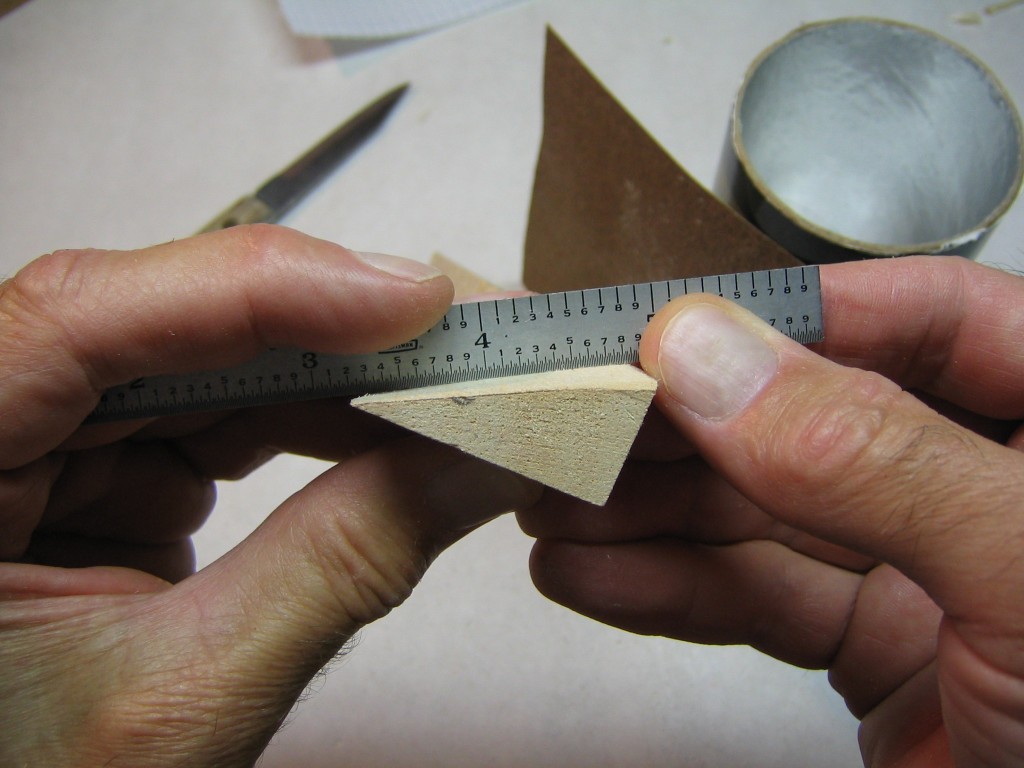
Press the end of the prop block and the end of the scale against a flat block of wood to align them exactly and make a mark at half the prop diameter about half way across the width. Do the same from the other end as a check. If the marks don’t match, make your final mark midway between them, or if the block is not the correct dimension, cut another block of wood.
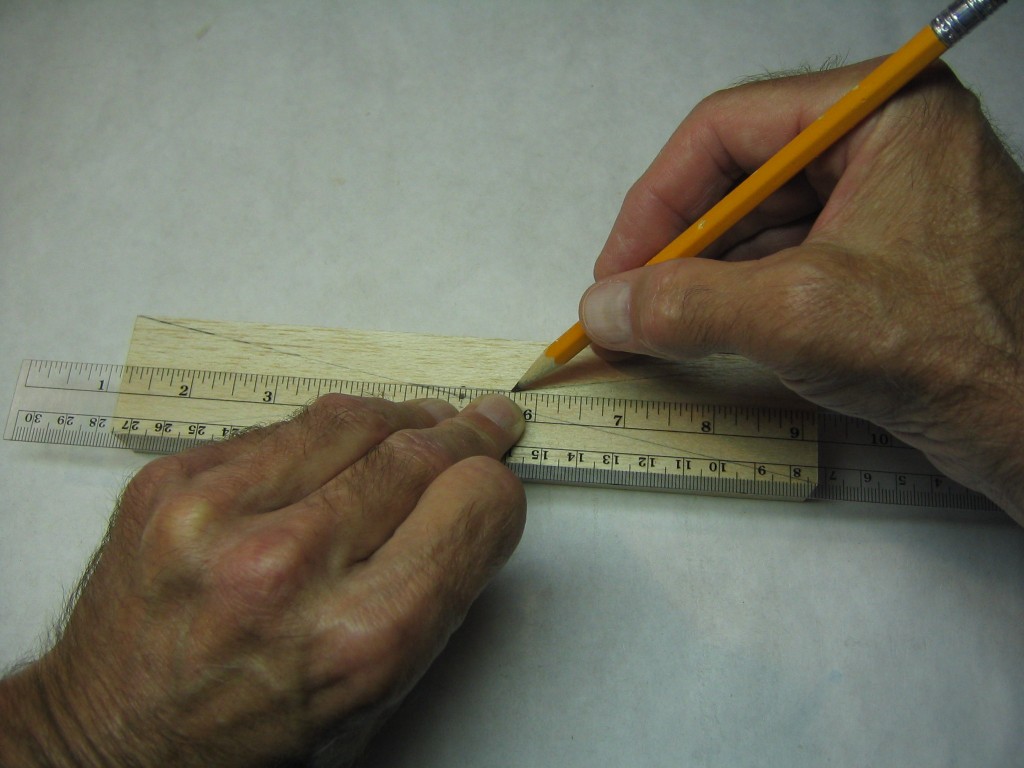
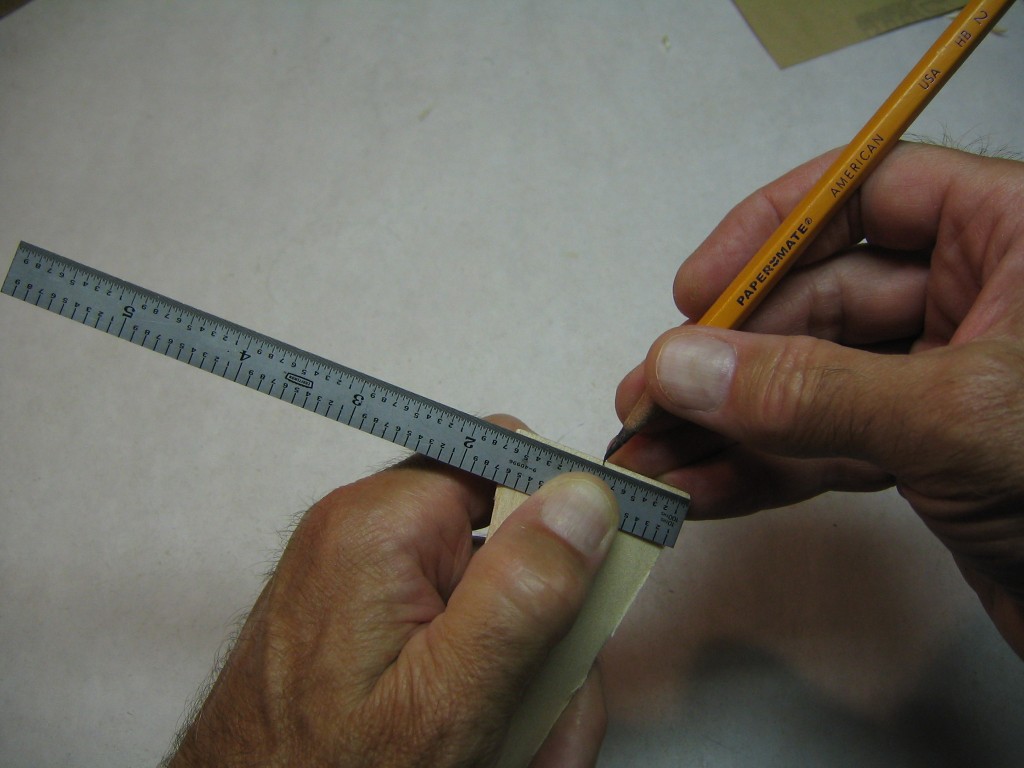
Make a mark half way across the width of the block on the first mark. Do the same from the opposite edge as a check. You will have a small + at the center of the face.
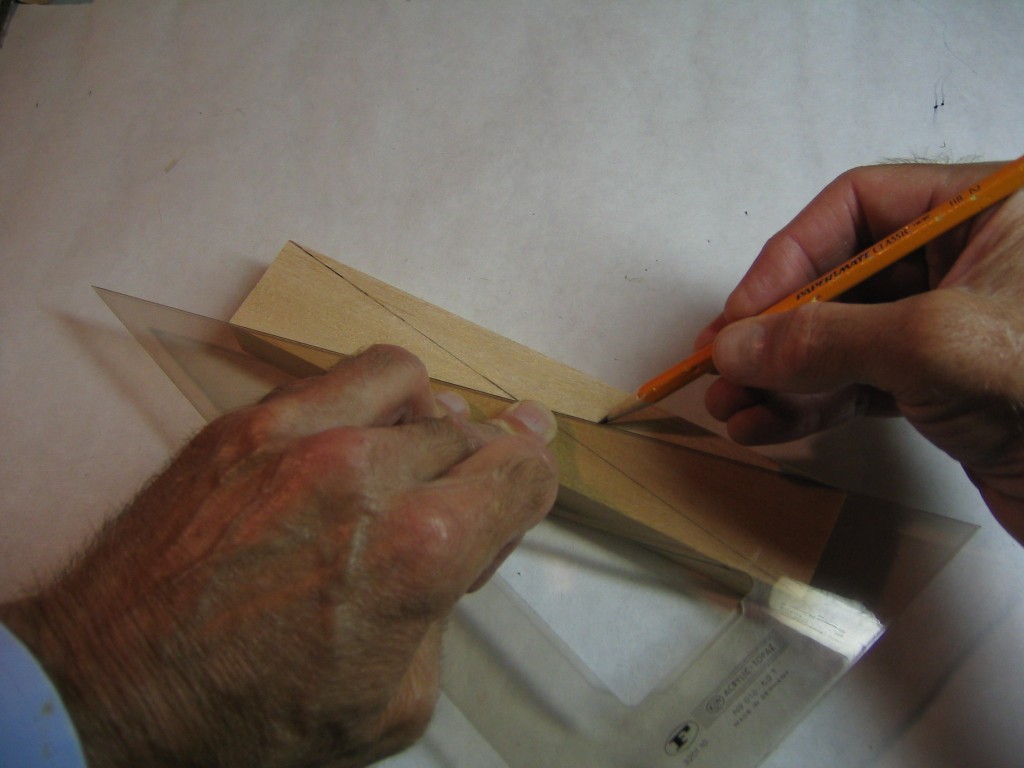
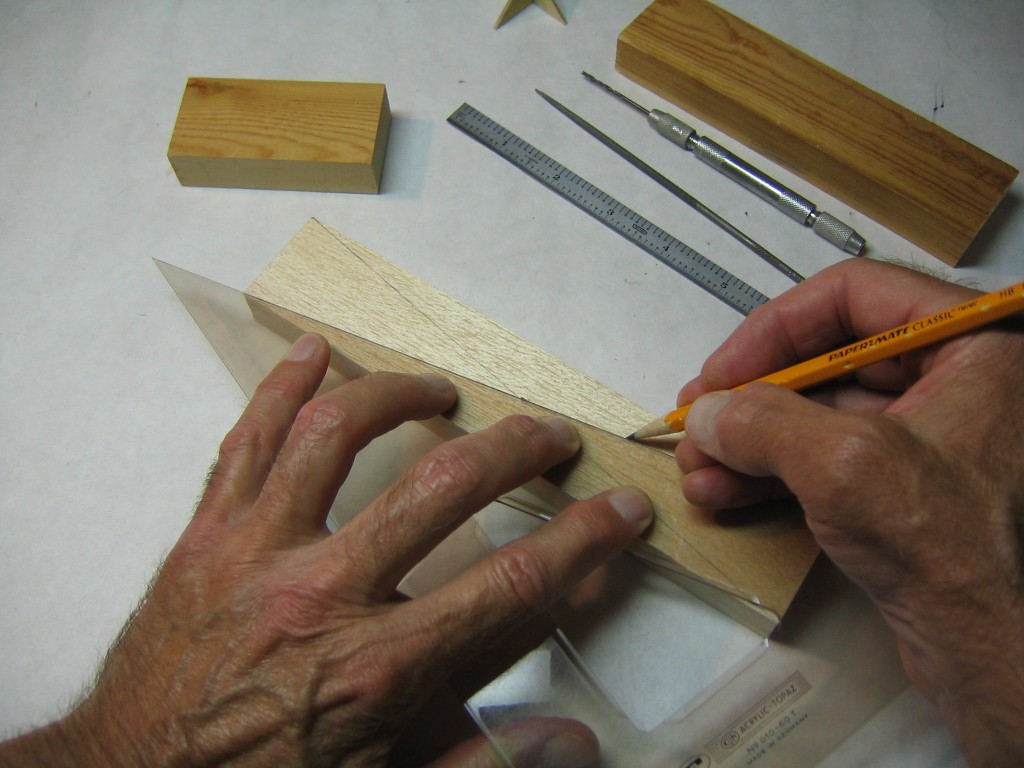
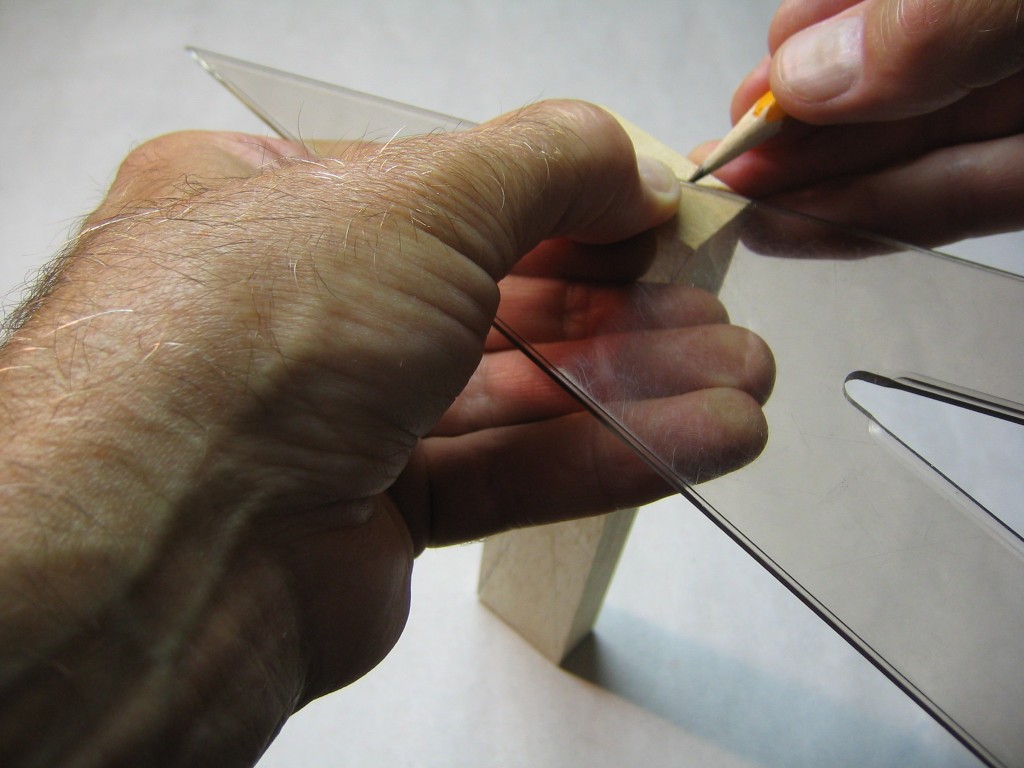
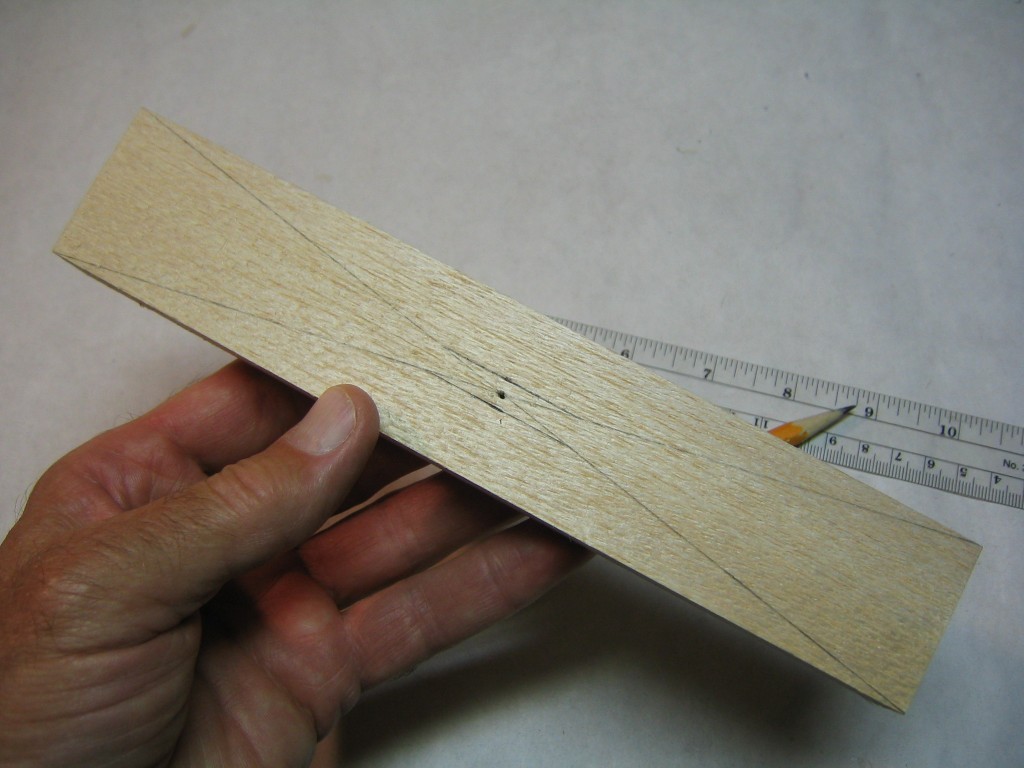
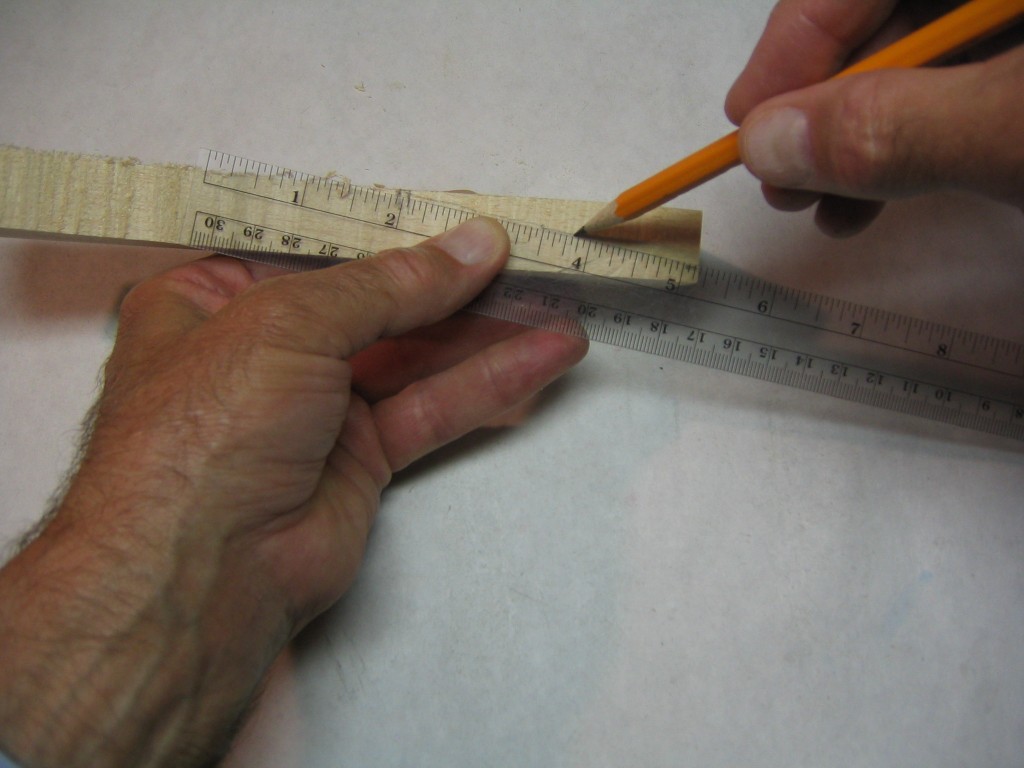
Draw diagonals through the center and opposite corners. Remember that the pencil mark will be slightly off the face of the straightedge, so use the pencil point against the straightedge to locate the point over the center and corners.
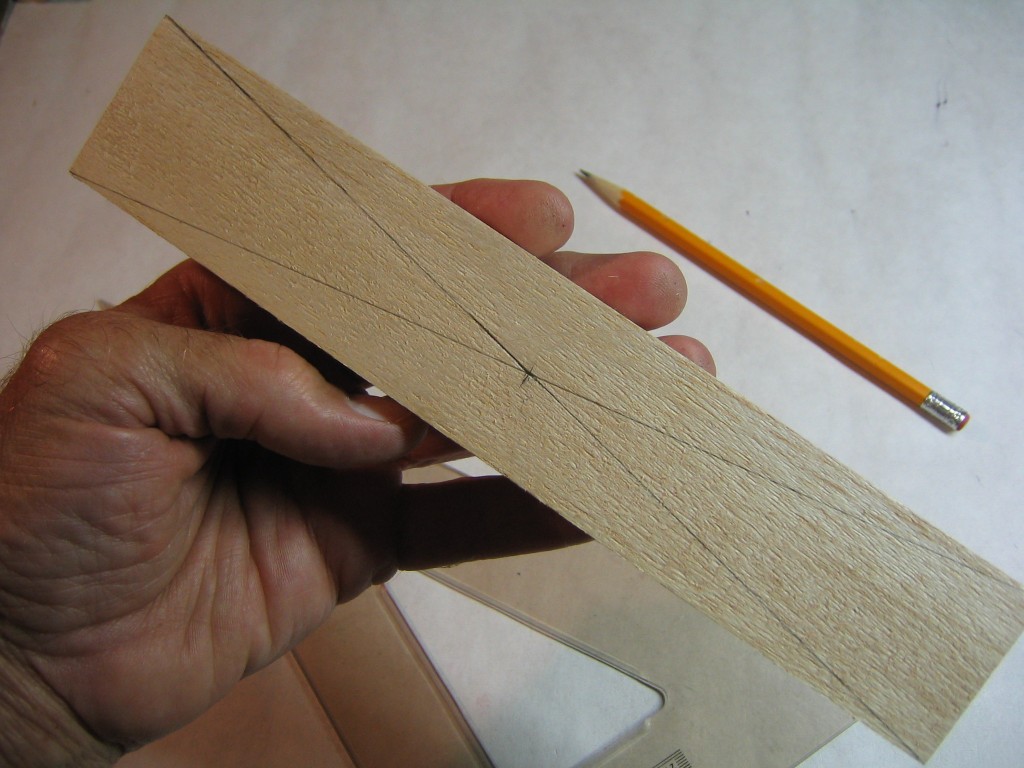
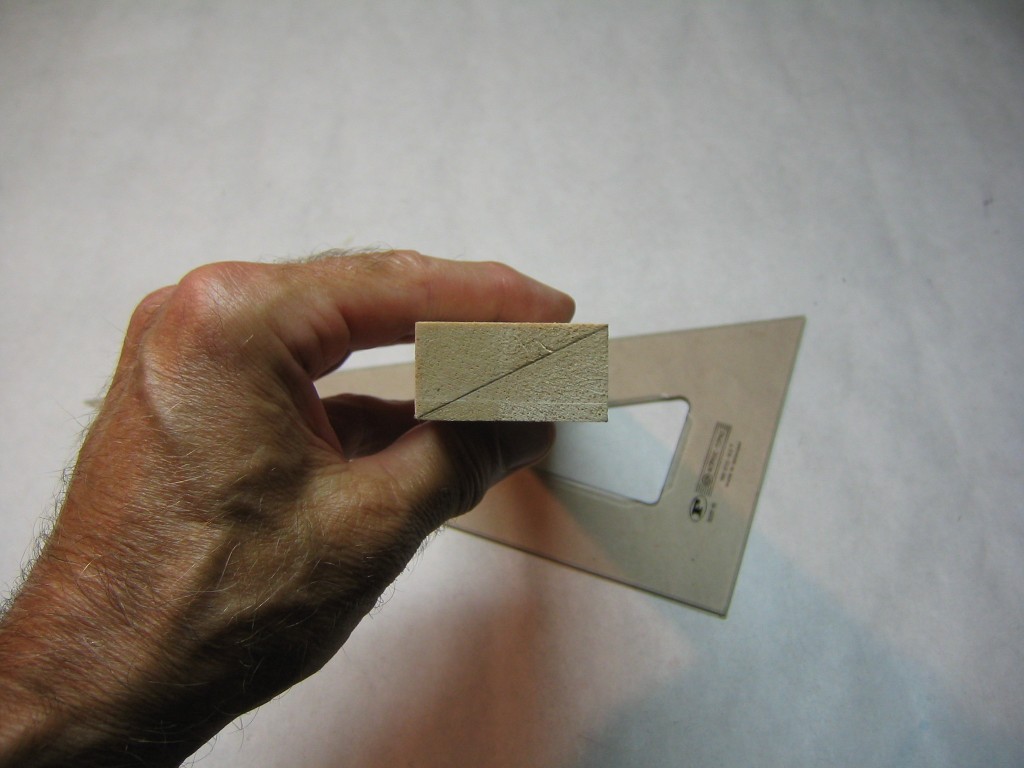
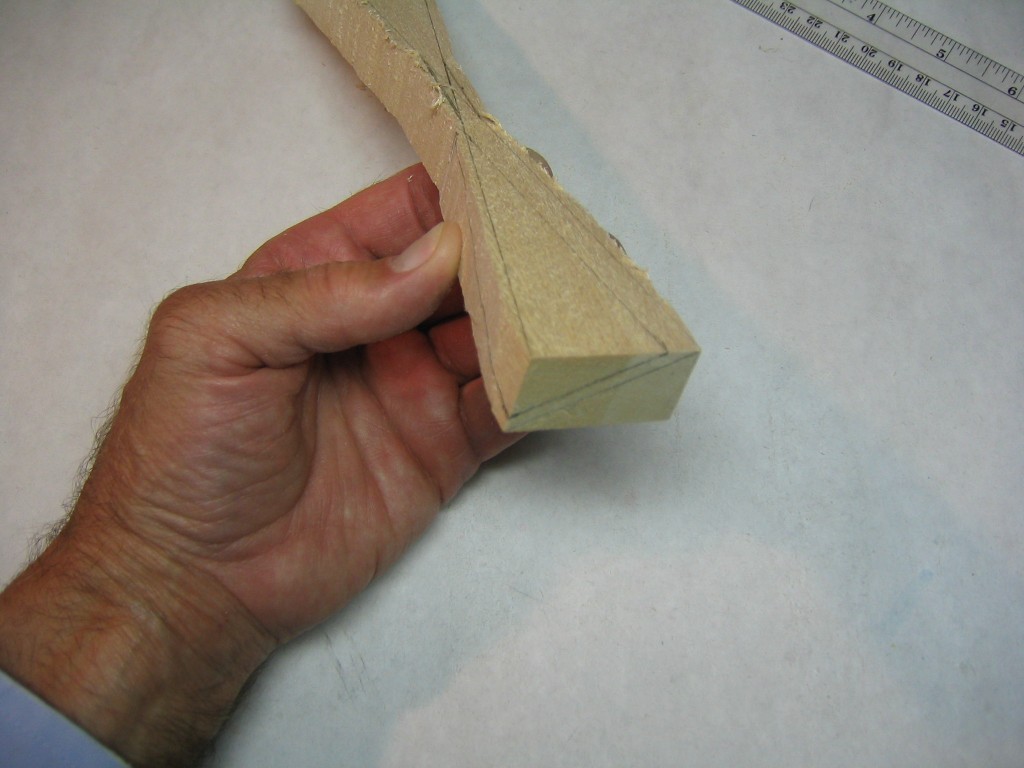
The finished markings. You can see why this is called the X-block method of laying out a prop for carving. One of these lines will locate the leading edge of the blade. The other locates the trailing edge projected through from the back of the block. Together they define the outside perimeter of the final prop.
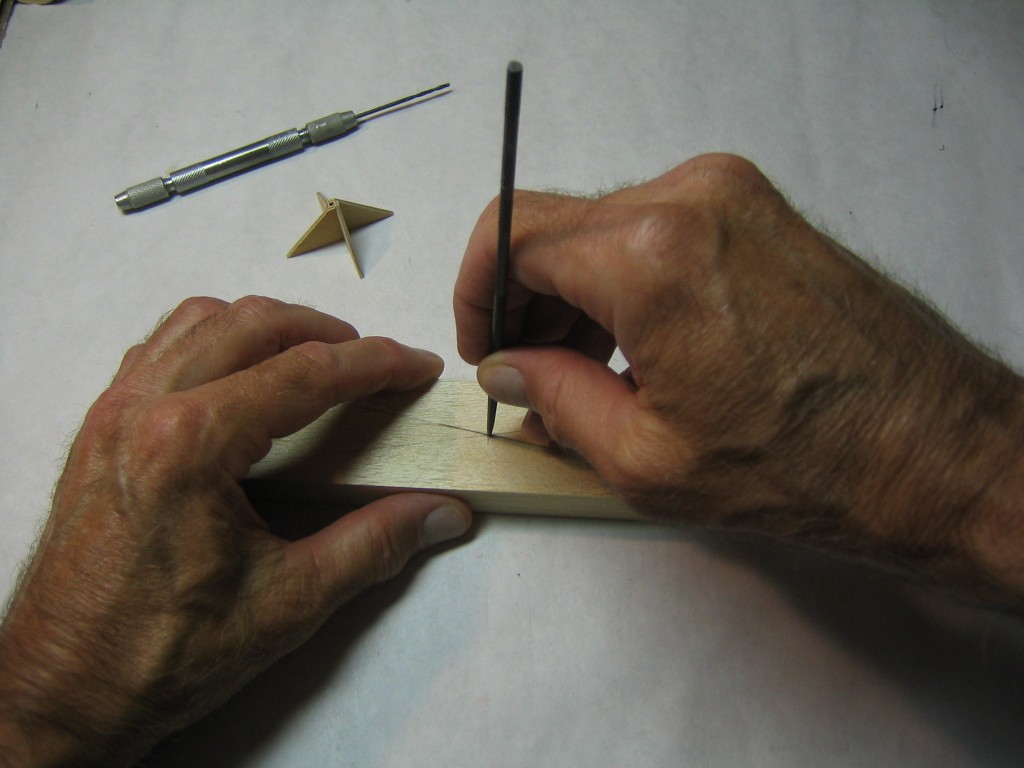
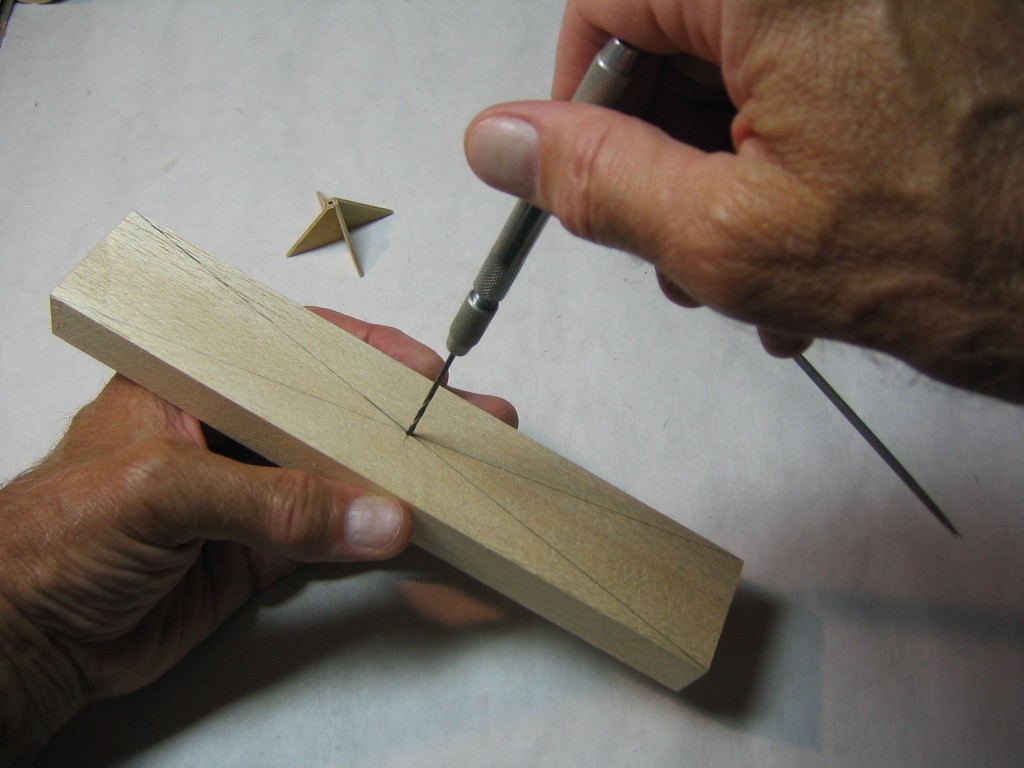
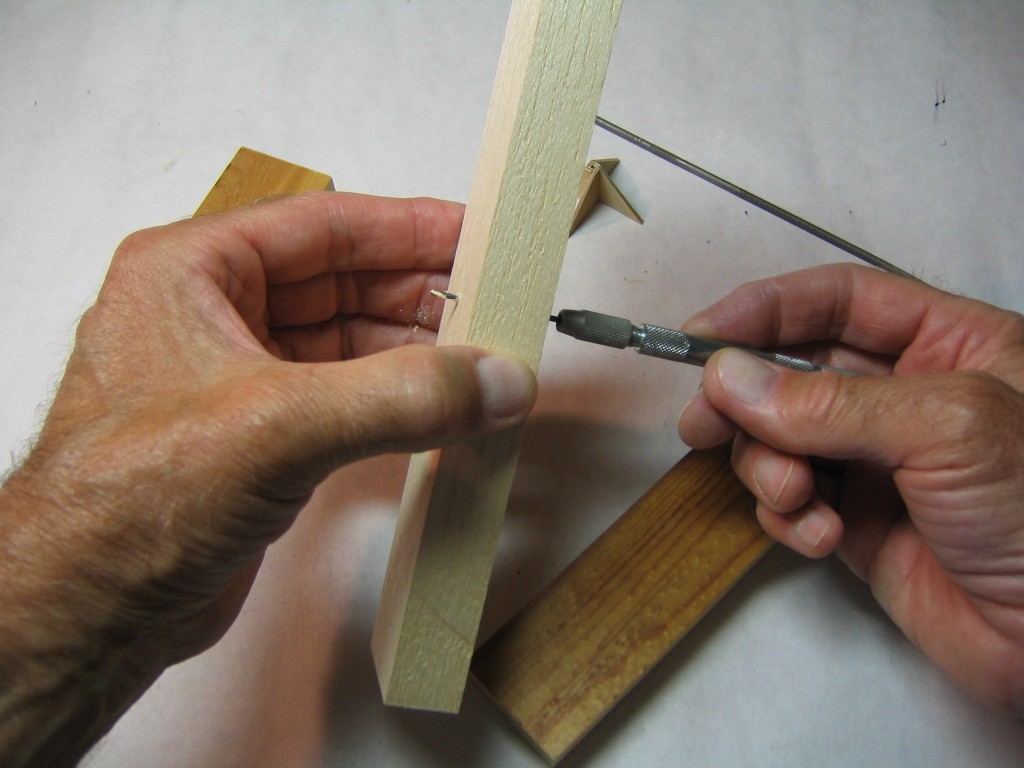
We must drill the hole through the center while we still have flat faces. A twist drill does not have a pointed end. If you start drilling on a flat surface the drill will wander before it digs in. Therefore we make a starter hole. I use the point of a tapered circular file. The point of a small nail will work quite well, too. Make the hole exactly centered and just a little smaller than the drill diameter.
Check that the starter hole is big enough to keep the drill centered.
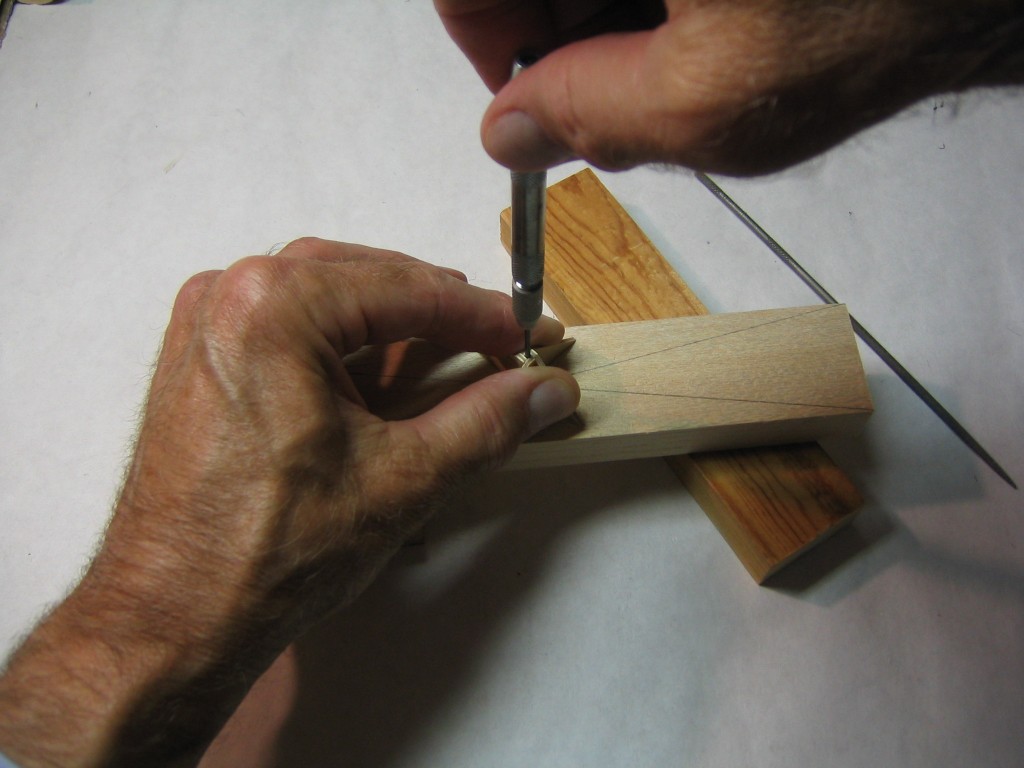
Put the drill through the drill guide and place its point into the starter hole. Make a drill guide here. Most instructions tell you to use a drill press. That is fine if you have one, but most modelers don’t. This drill guide is small enough that you can put it in your prop making box and carry it with you. It does not require an electric outlet.
Press the base of the drill guide flat to the surface of the prop block while keeping the point of the drill centered in the starter hole. Hold the drill guide firmly in place as you twist the drill, pressing it lightly downward.
The pin vise bottoms out against the drill guide before the drill goes all the way through the prop block.
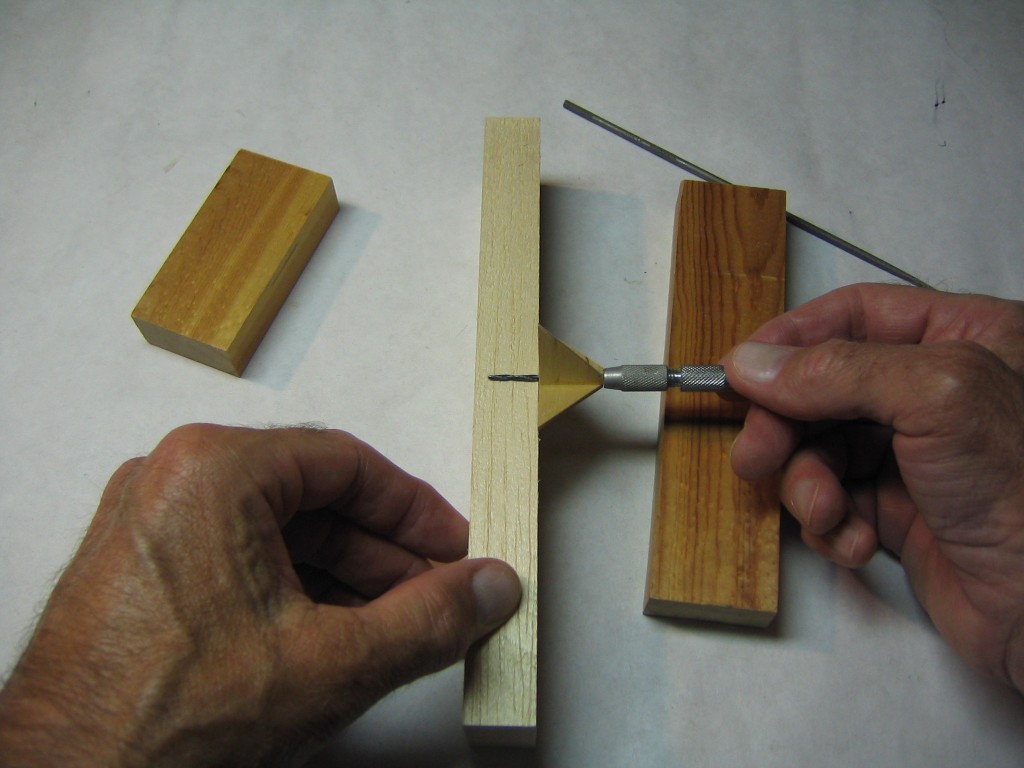
The hole is deep enough now that it can guide the drill the rest of the way. The picture doesn’t show it, but I put the prop block up on those other two blocks on either side of the drill so the drill will not go into the table top when it goes through. Don’t drill against your hand!
This shows the drill coming through. This also tells you why it is not a good idea to place the block against your hand while you are drilling.
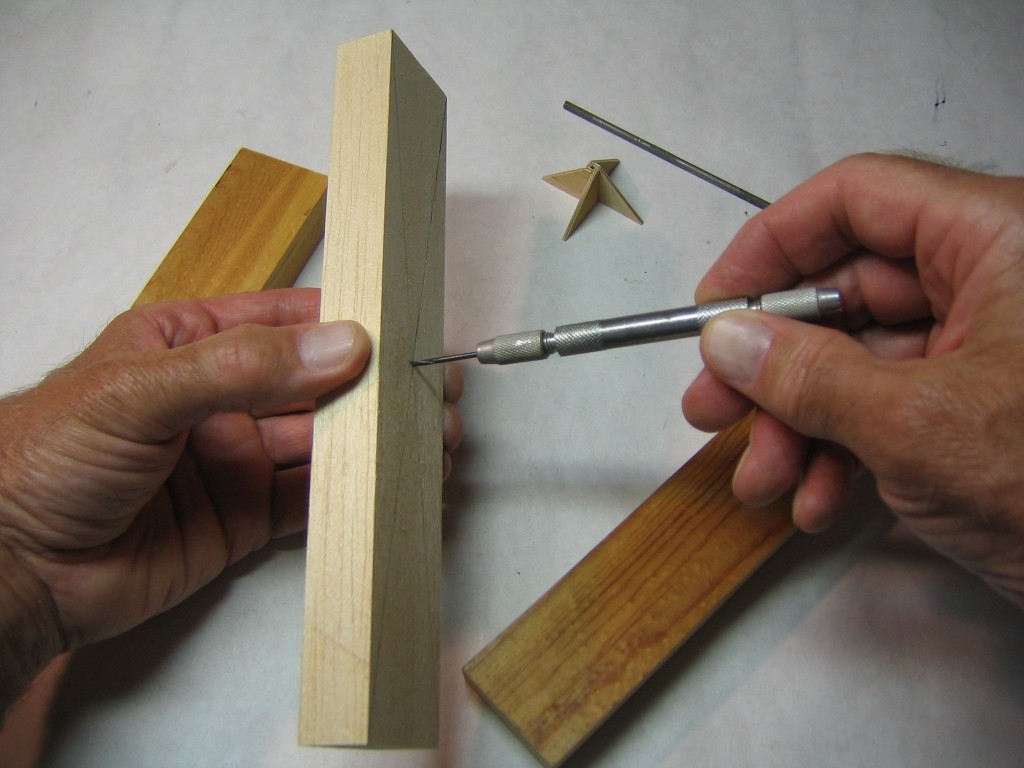
Check that the hole came through on the center of the opposite face.
Check that it is centered on the diameter. If it is off, try to figure out what went wrong. (If your drill is loose in the drill guide, try wrapping it with tissue paper until it is a snug fit.) If it is too far off, you can sand a dowel from some balsa of the same density as the prop block and glue it in the hole. Wait for the glue to dry completely, trim it close with a razor blade and sand it with fine sandpaper. Then try again, after you have corrected whatever was wrong the first time. You can also put a piece of brass tube or steel wire through the hole and spin the block. If it isn’t too wobbly and out of balance, you might decide to go ahead with the carving. With a carefully made and used drill guide, that shouldn’t happen.
If you are happy with the position of the back hole, draw diagonals on the back of the block.
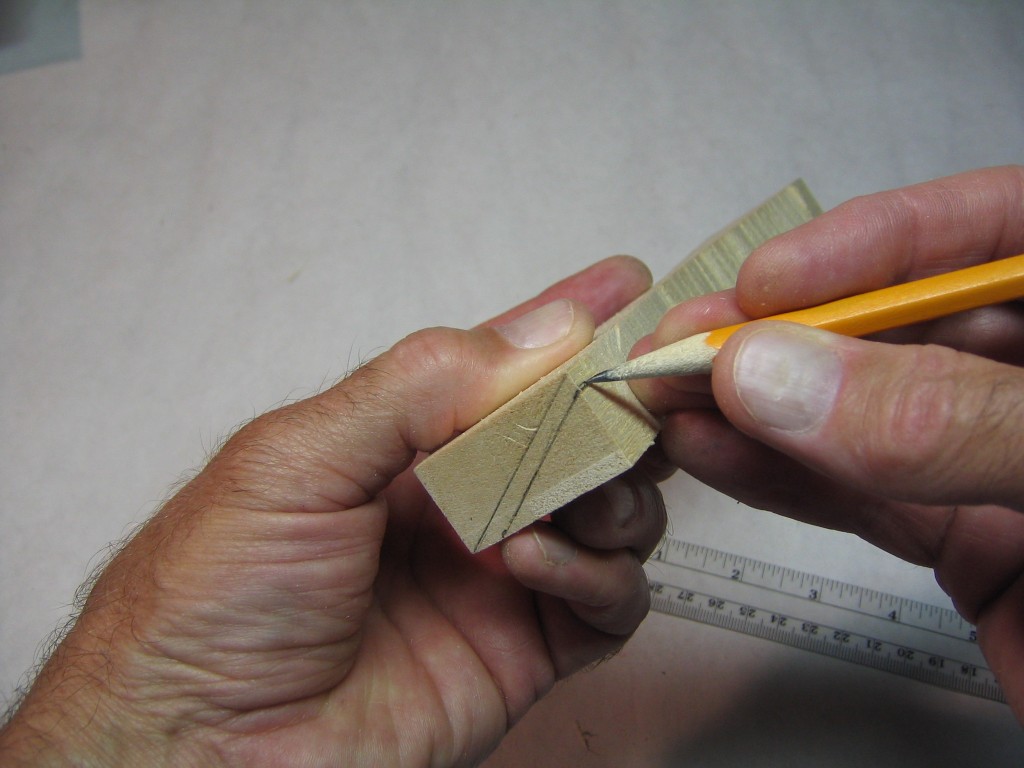
Also draw diagonals on the end of the block corresponding to the tip of the prop blade. This is a good time to consult that sample prop. This diagonal connects one of the diagonals on the front face, the one corresponding to the leading edge of the prop blade, with one of the diagonals on the back face, the one corresponding to the trailing edge of the prop blade. These four lines form a continuous loop.
Here is the end diagonal. It is oriented so when the prop turns clockwise, the prop will move forward. The diagonals on both ends have the same orientation. This diagonal determines the slant of the blade. Rotate end for end to double check that both blades will slant the same way.
I am going to leave the center of the prop 1/4″ wide for the hub. Mark 1/8″ on either side of the center. (Use the dimension shown on the plan if you are working from a plan.)
Draw lines through those points parallel to the sides of the block.
These lines delineate the hub area of the prop. In the previous pictures showing the wood to be removed darkened, you saw another way to lay out the hub, with a 1/4″ circle and curved conforming lines. That works if you are going to carve the blades entirely with a knife, a little at a time. We are going to cut large chunks of excess wood off straight through with a coping saw and must cut evenly on each opposite face before shaping the fairing of the blades into the hub.
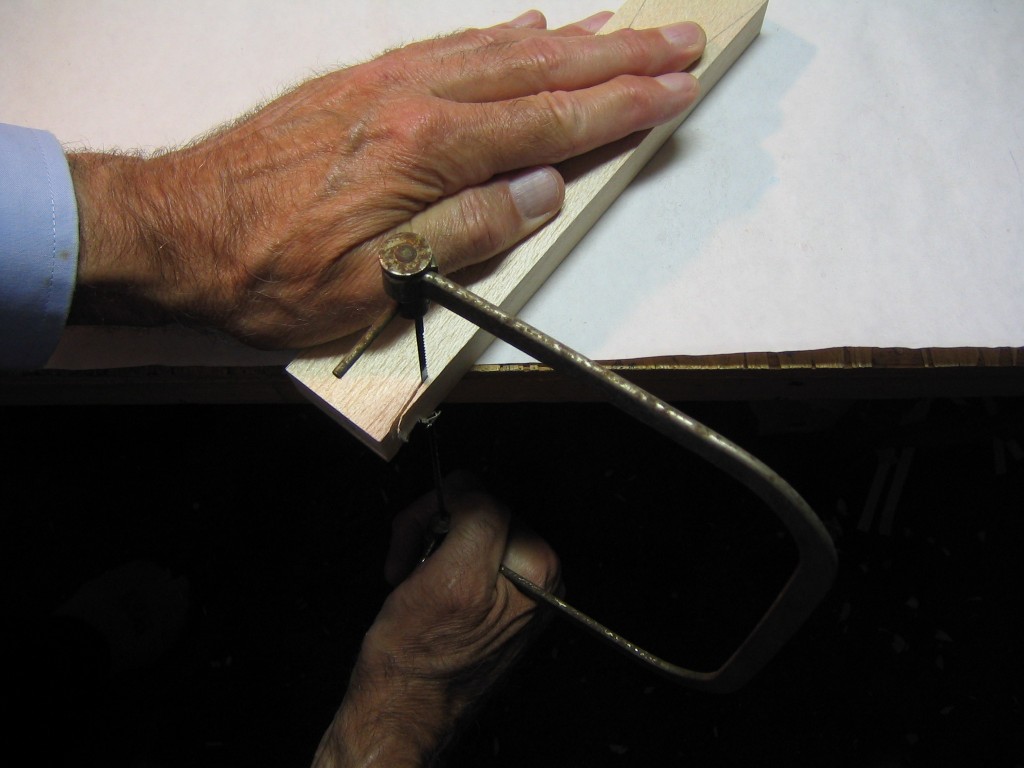
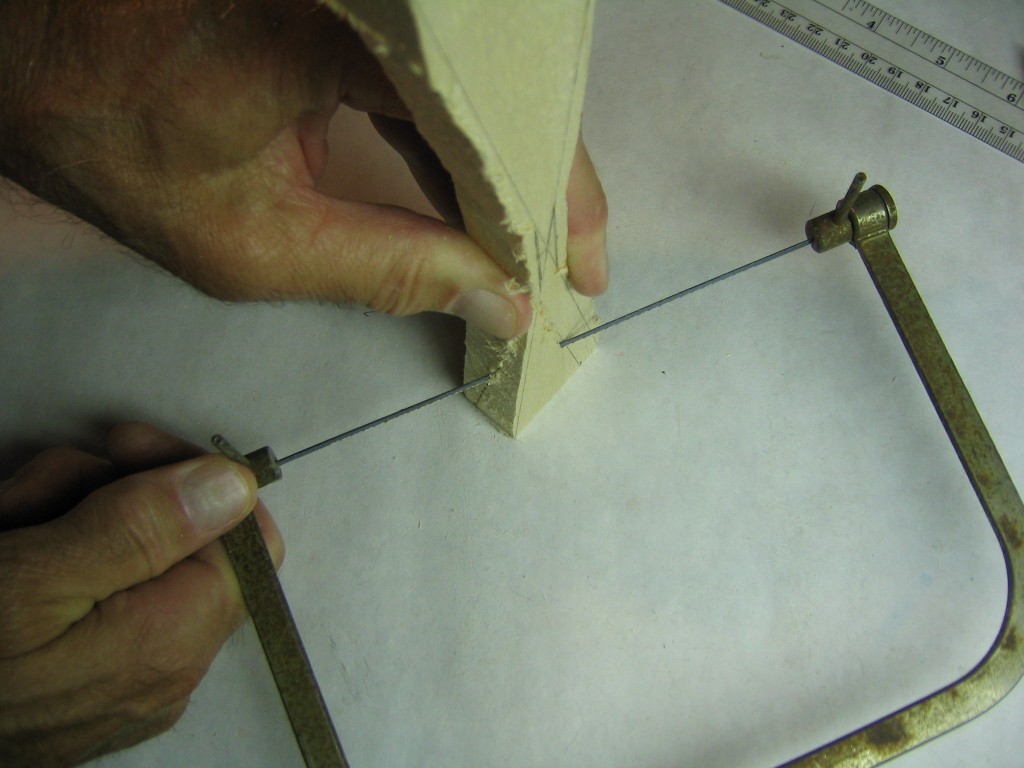
Use the coping saw to cut off the excess wood just outside the lines.
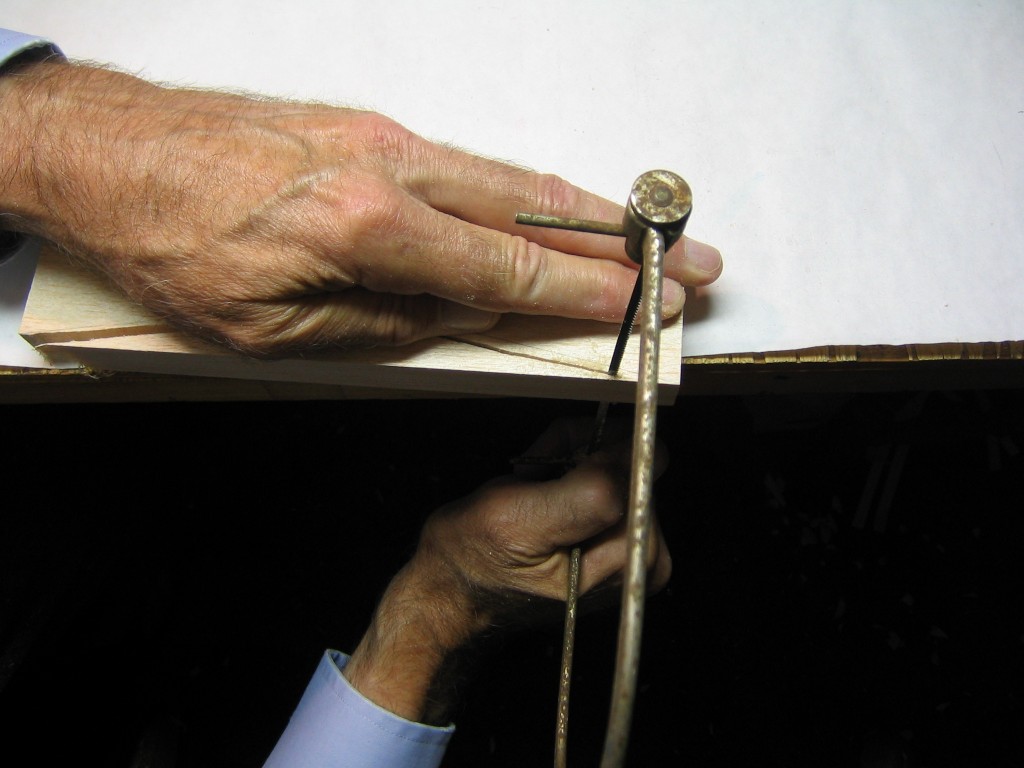
Cut all the way to the other end, then cut the other side in the same way. This could be carved away with a knife at the same time the faces are carved, but the saw is quicker, safer and easier.
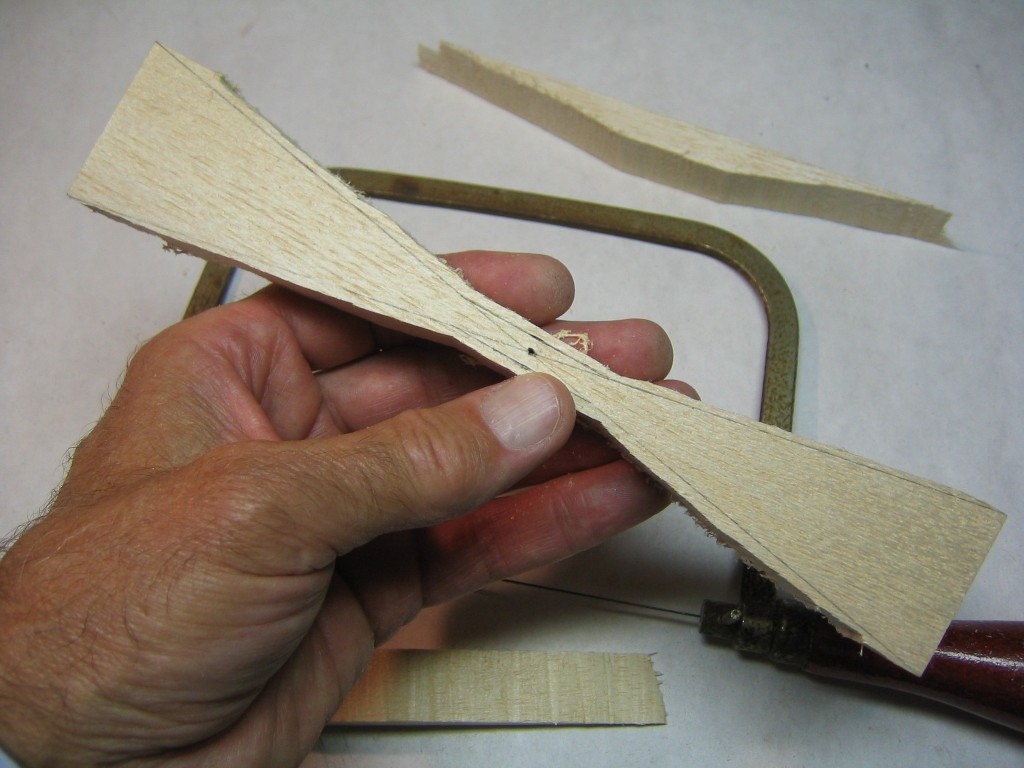
This shows both edges cut away. It’s already beginning to look like a prop. You could start carving down to the faces with a knife right now, but I prefer to saw off big chunks of waste all at once. Several ways of sequencing the cuts will work. You can saw off and sand the back faces first, then saw and sand the front faces, then saw around the blade outline. On this one, I am going to saw both the front and back faces, sand the back face, mark and saw out the blade pattern, sand the undercamber and then sand the front face to shape.
Now we will mark out the excess above and below the blades that can be sawed off. Draw a line on the end parallel with the diagonal and about 1/8″ away from it. The diagonal locates the under surface of the blade. The new line for the top of the blade is spaced to allow the thickness we need to contain the top surface of airfoil. The under surface may be cut closer.
Extend that line onto the edge of the blank.
Extend that line onto the face of the blank.
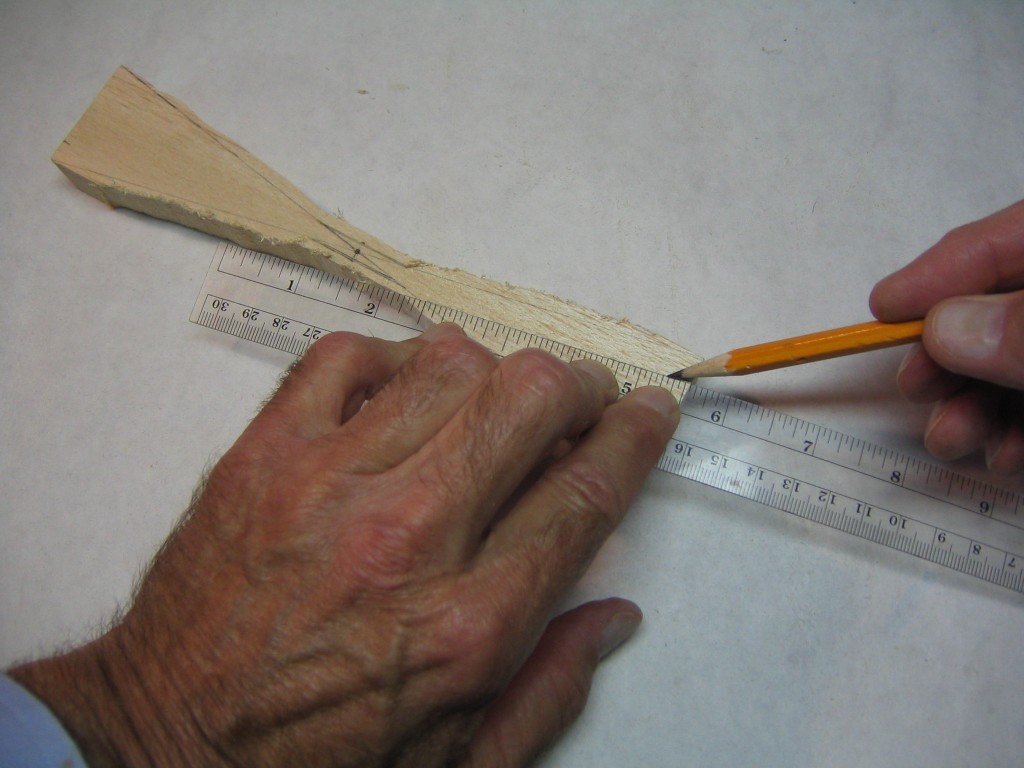
Draw a line through that mark, parallel with the near edge of the blade.
Extend that line around the corner onto the edge of the blank.
Draw a line between that mark and the one made earlier from the line on the end.
The triangular pyramid is excess wood that may be cut off with a saw. You will note that one of the X lines will be cut off. (If you rotate the saw as you cut, you could cut off even more in the hub region, but I am keeping these cuts straight for simplicity.)
Cut along the lines to remove that excess wood. Similarly mark out the other three pyramids of excess wood and cut them off. You will find it convenient to raise the prop off the table with a small block of wood, to allow clearance for the saw above the table top as it cuts through the end.
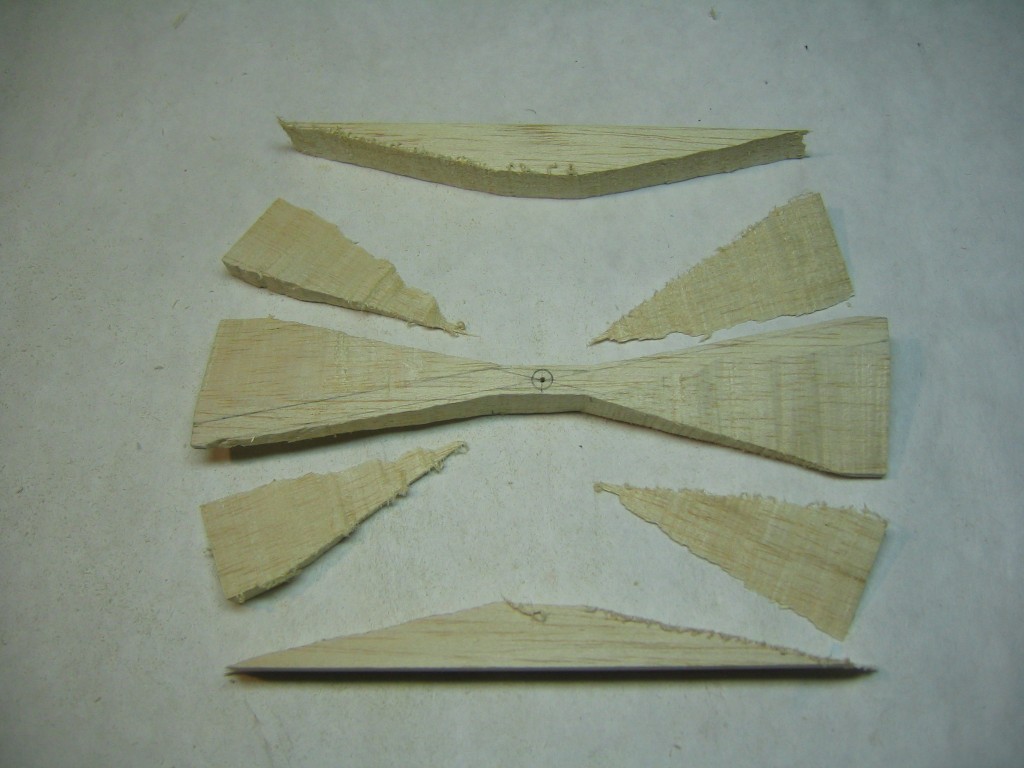
This shows the six chunks of excess wood cut off with the saw. I drew a 1/4″ circle for the hub on this prop. This is similar to the band saw cut prop blanks that were included in kits, except this is thicker at the inside end of the blade, since the saw wasn’t rotated as it cut .
You can get prop blanks finished to about this stage from Volare Products.
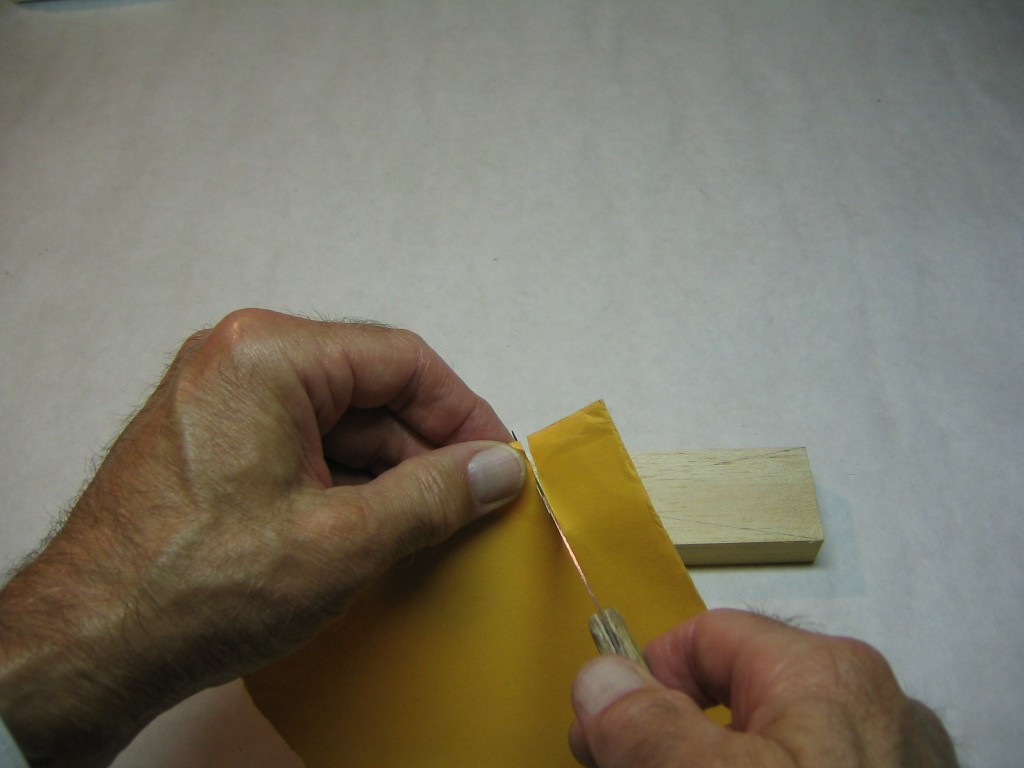
Check the sharpness of the knife by slicing a piece of paper along the entire length of the blade. If it cuts smoothly without hangups, it is sharp. If it catches on the paper at all, it needs to be sharpened.
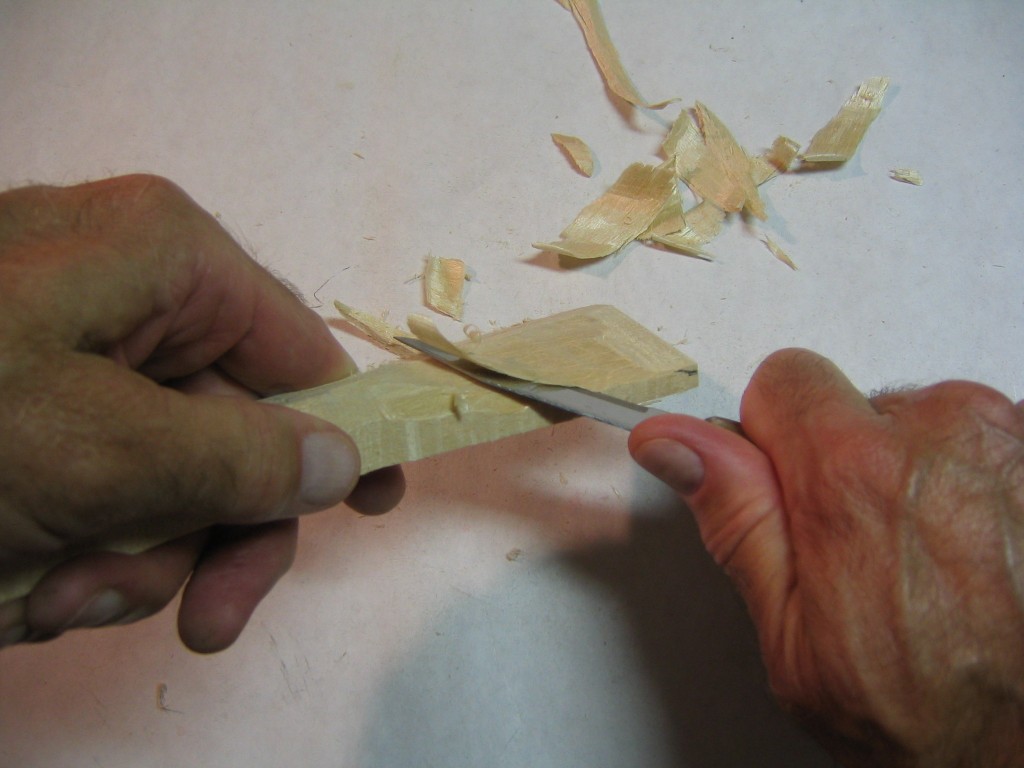
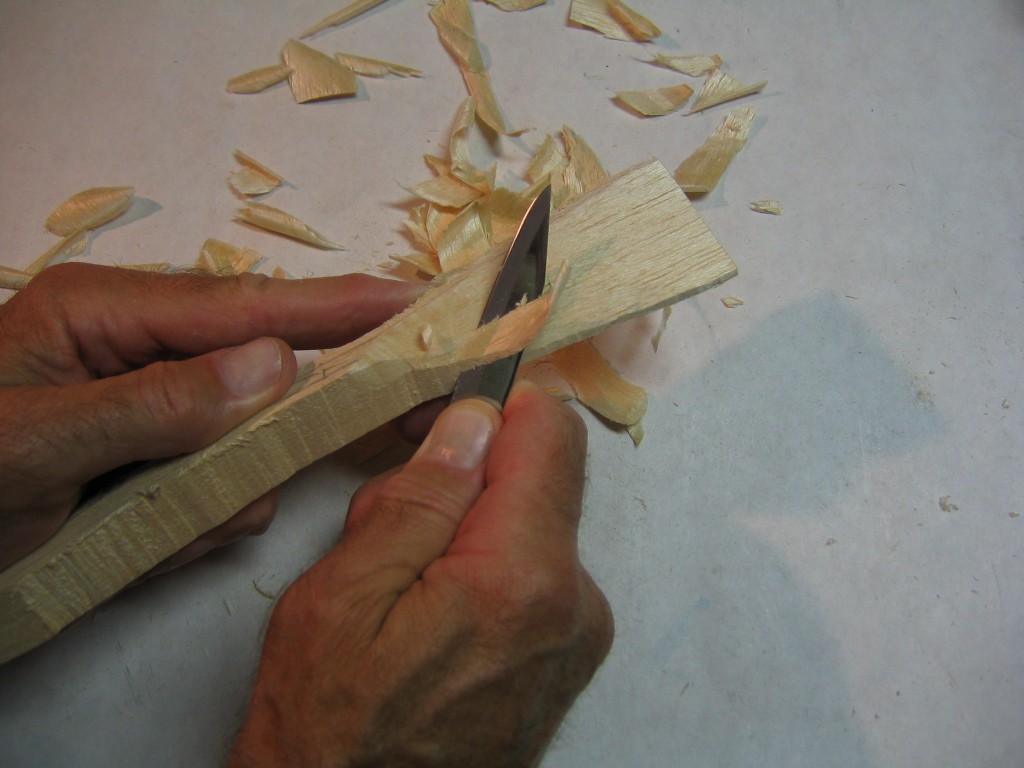
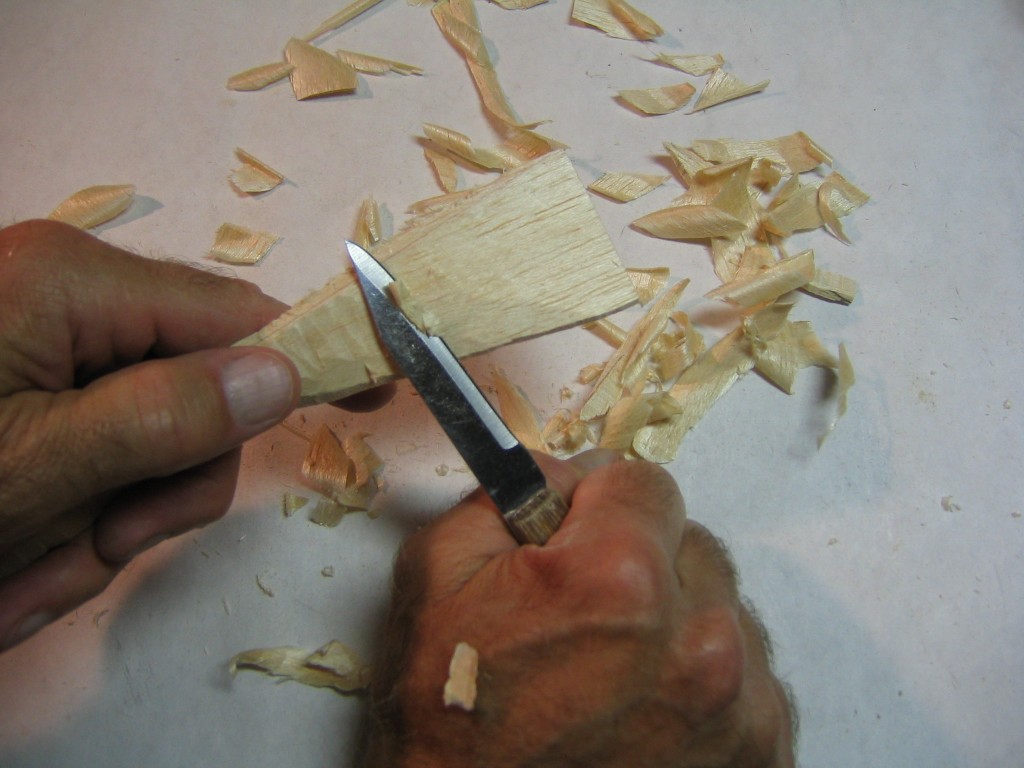
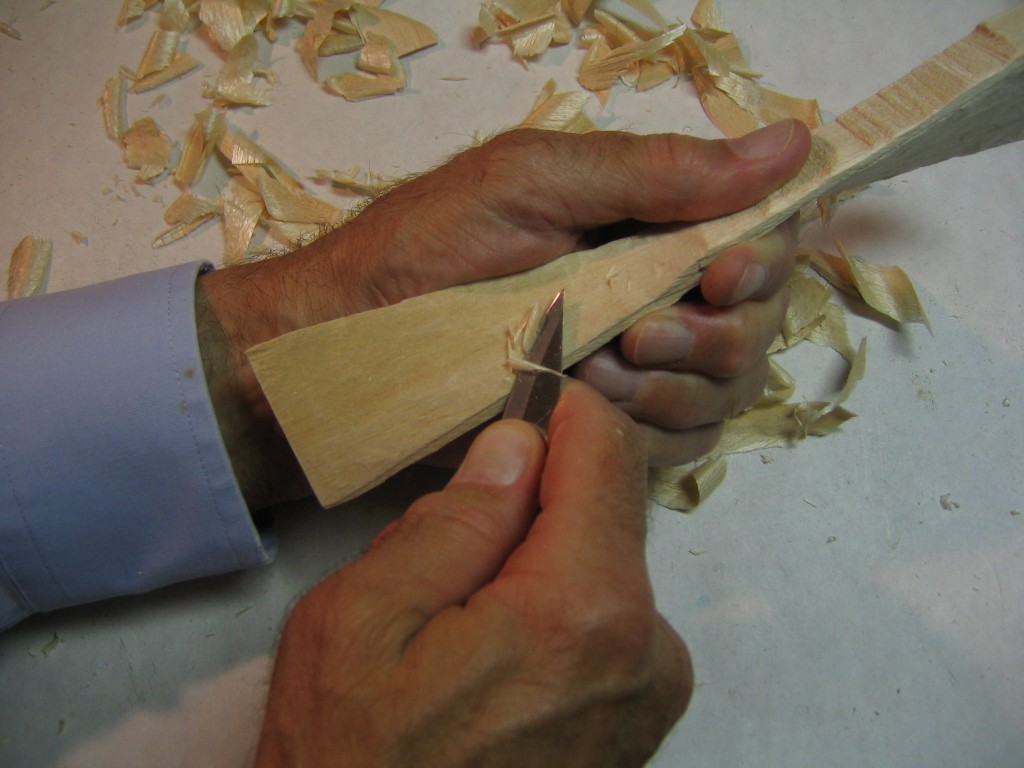
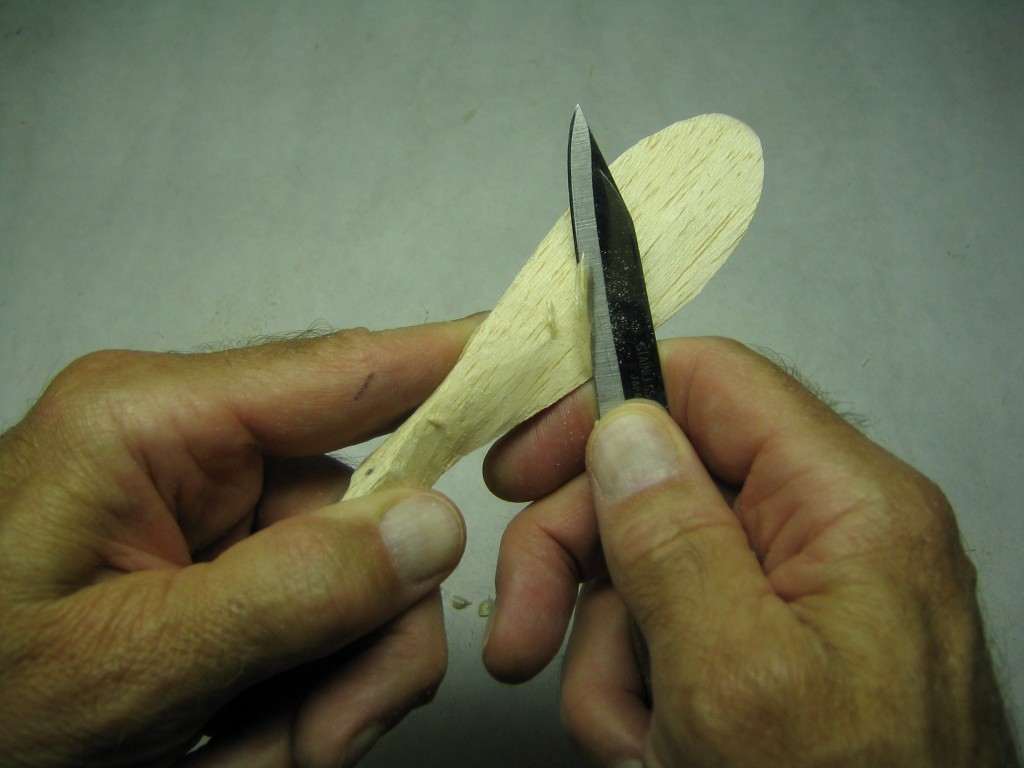
We use a very sharp knife to shave the back surface flat. A sharp knife cuts more easily and is easier to control. It does not get hung up and does not require excessive force. A dull knife is actually less safe than a sharp knife. It gets hung up, can require excessive force and can get out of control when it breaks loose. Keep your fingers behind the cutting edge and away from the point. These large initial cuts can be made with a long sweeping action, drawing the knife a little like a saw.
The goal is to cut down almost to a flat chord line running from the leading edge X line on the front face to the trailing edge X line on the back face. You will find that cutting from the hub to the tip in the leading portion of the blade is easy. Cut from the tip to the hub on the trailing portion. The blade is cutting across the grain and not being pulled into it. Do not cut into the wood that will be in the finished prop. Later we may sand some undercamber into the back of the blade, but for now we will keep it flat. We need a flat surface for drawing the blade outline.
When coming in toward the hub, we find that the grain of the wood makes it easier to cut the other direction. Be especially careful here to protect the thumb and fingers of the other hand behind the wood. Bracing both hands against the table top will limit their motion.
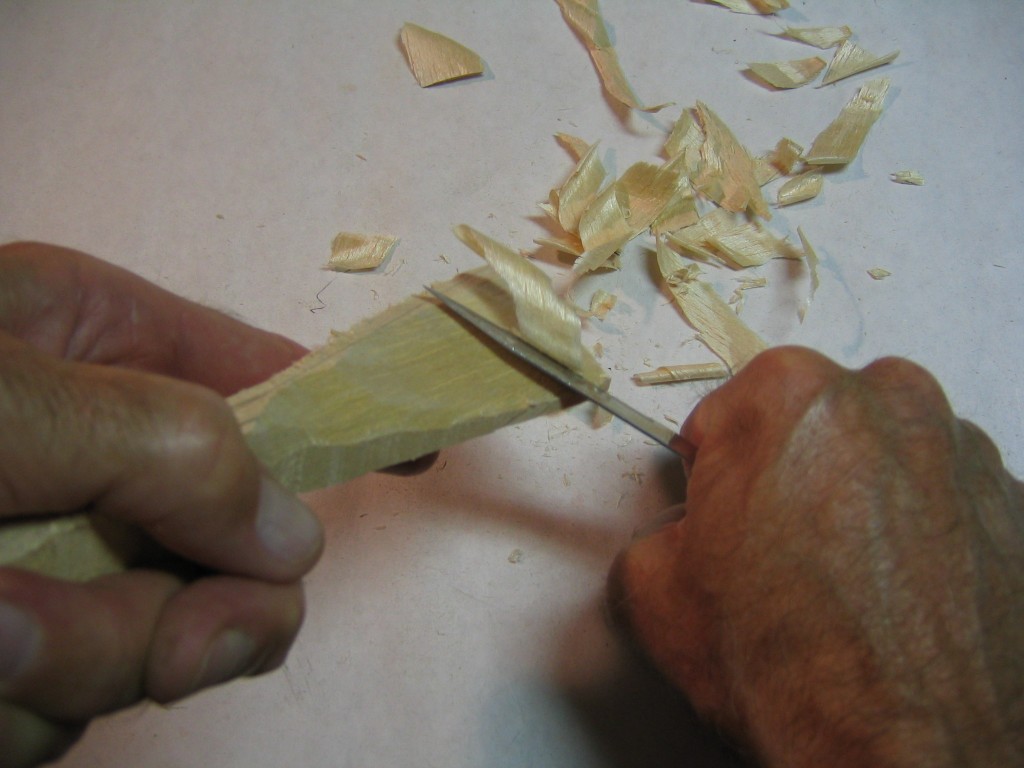
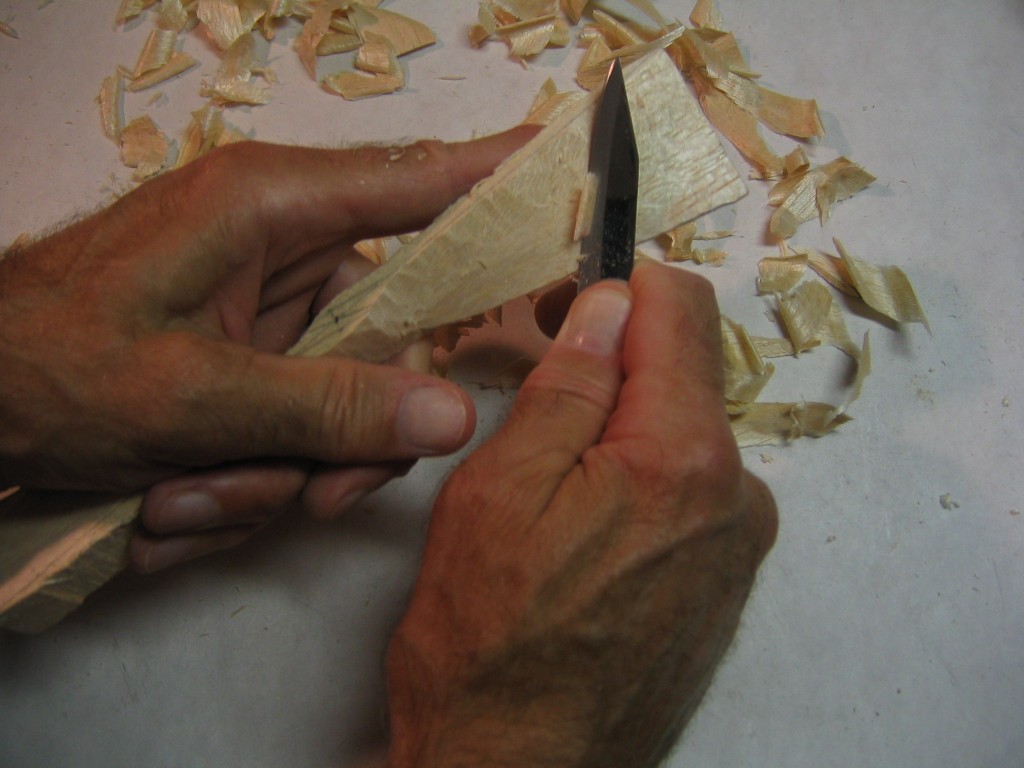
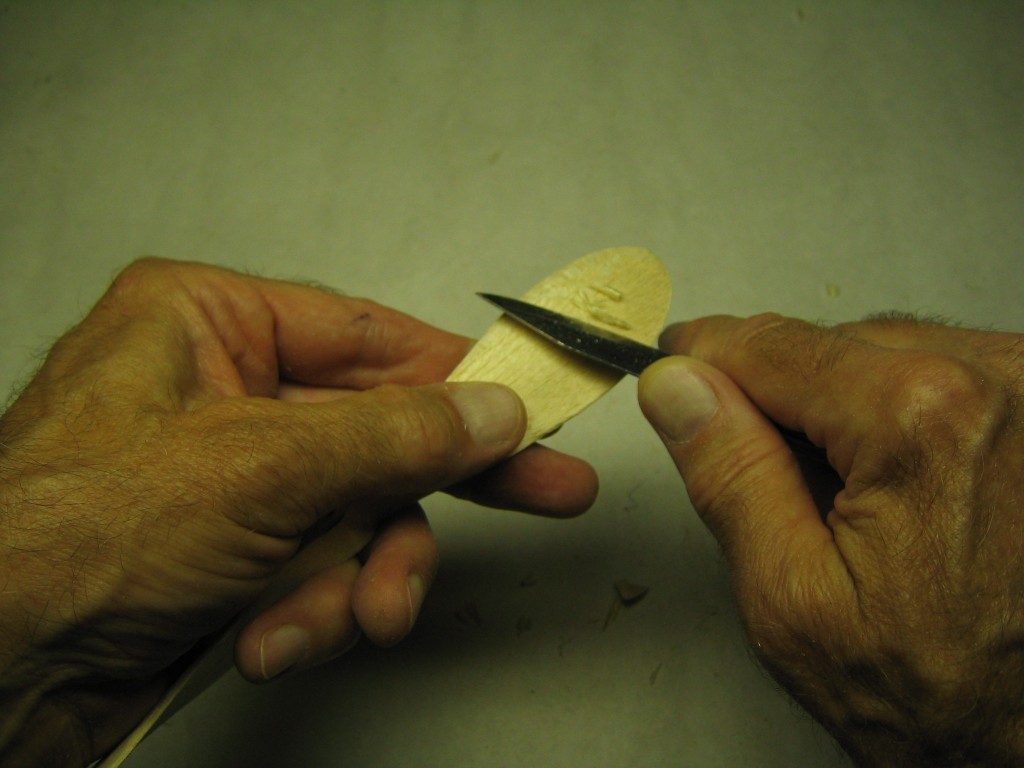
As we get closer to the finished surface, we make smaller cuts with the curved part of the blade.
Here I am using my left thumb to block the cutting hand in case the blade slips. At this point I am taking off small slices of wood.
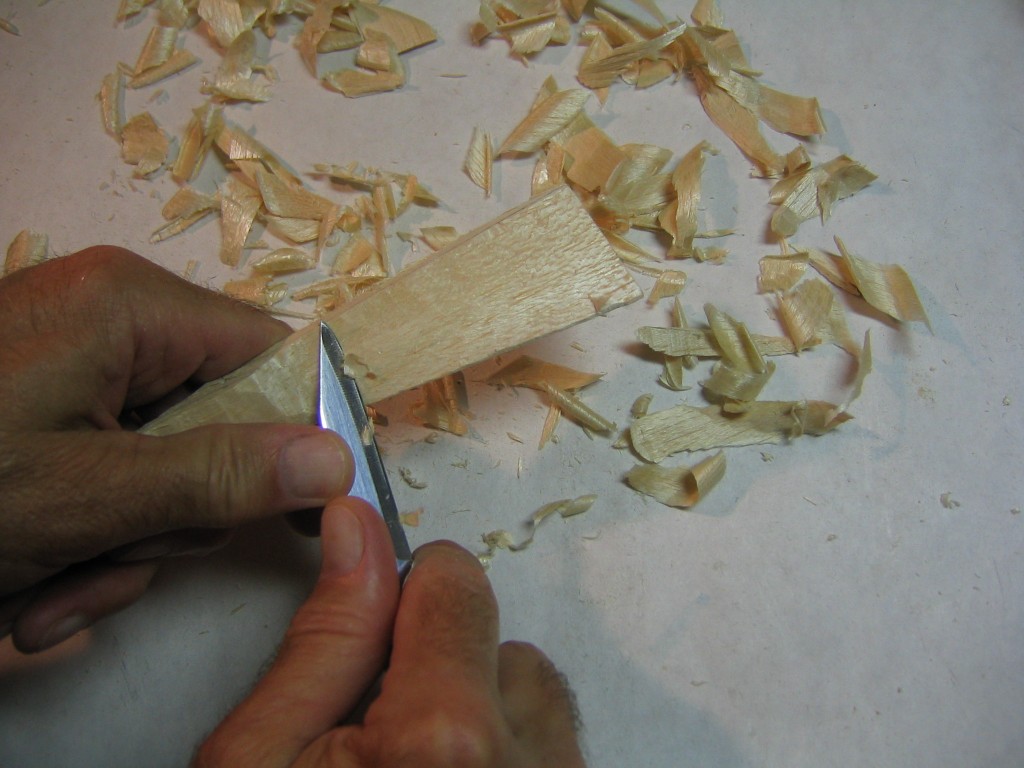
For the more precise cuts, the left thumb can apply direct pressure to the back of the blade. Wood is taken off in small chips with the most curved part of the blade.
For final smoothing, the blade can be drawn over the surface at a shallow angle like a plane or spoke shave.
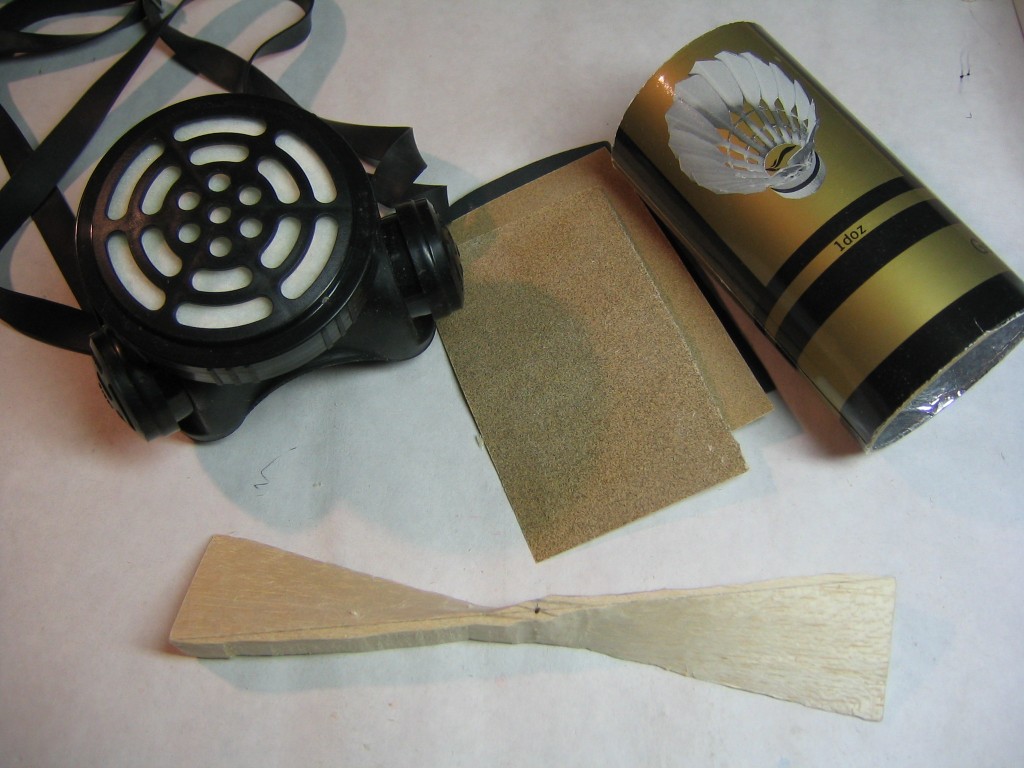
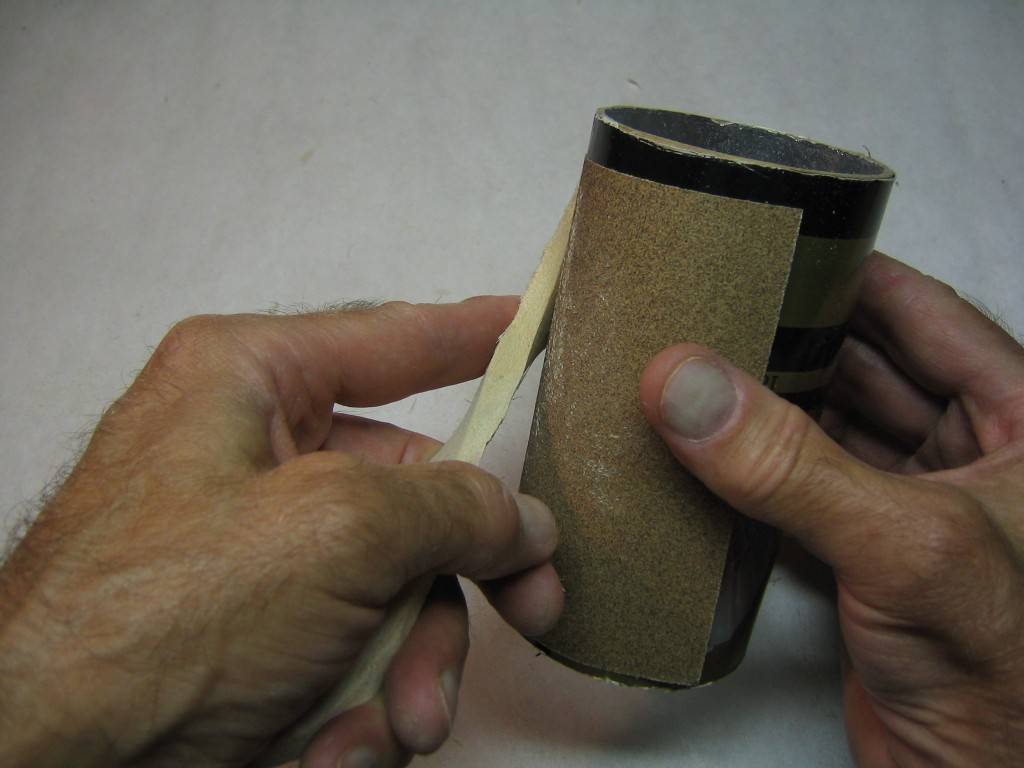
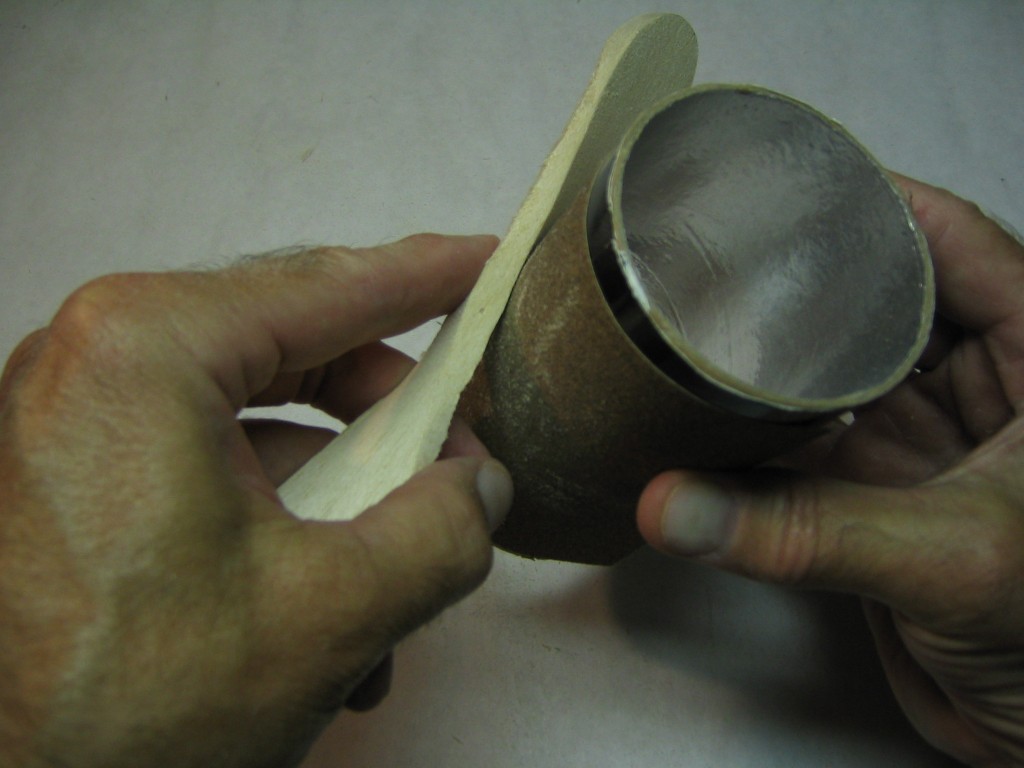
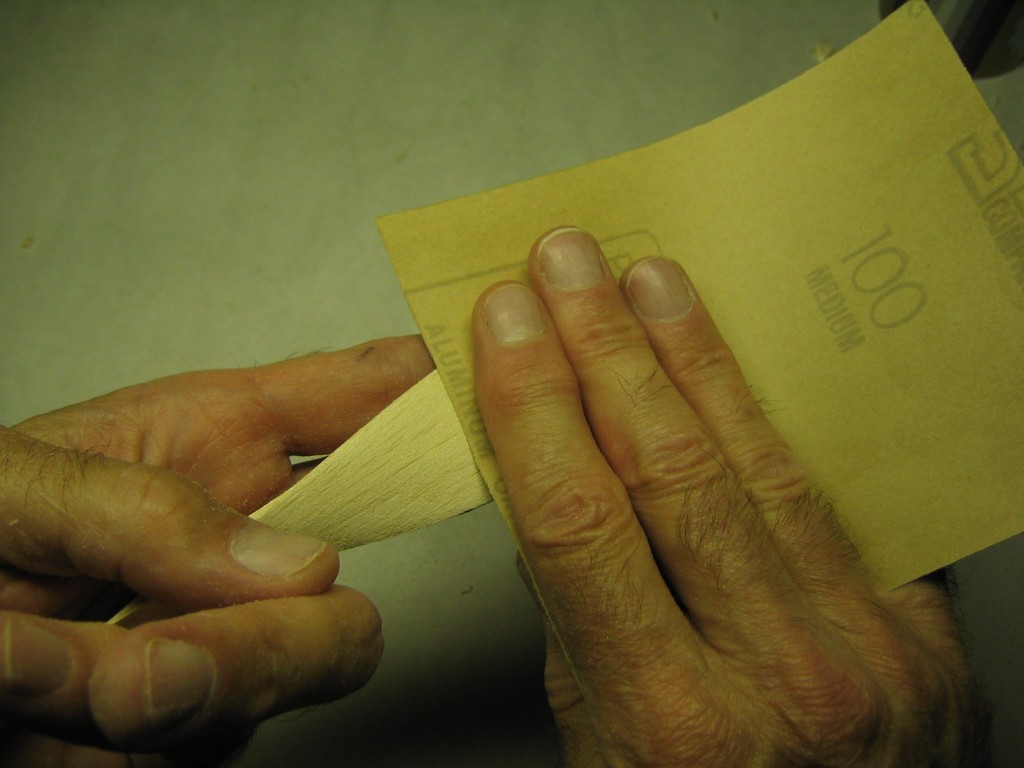
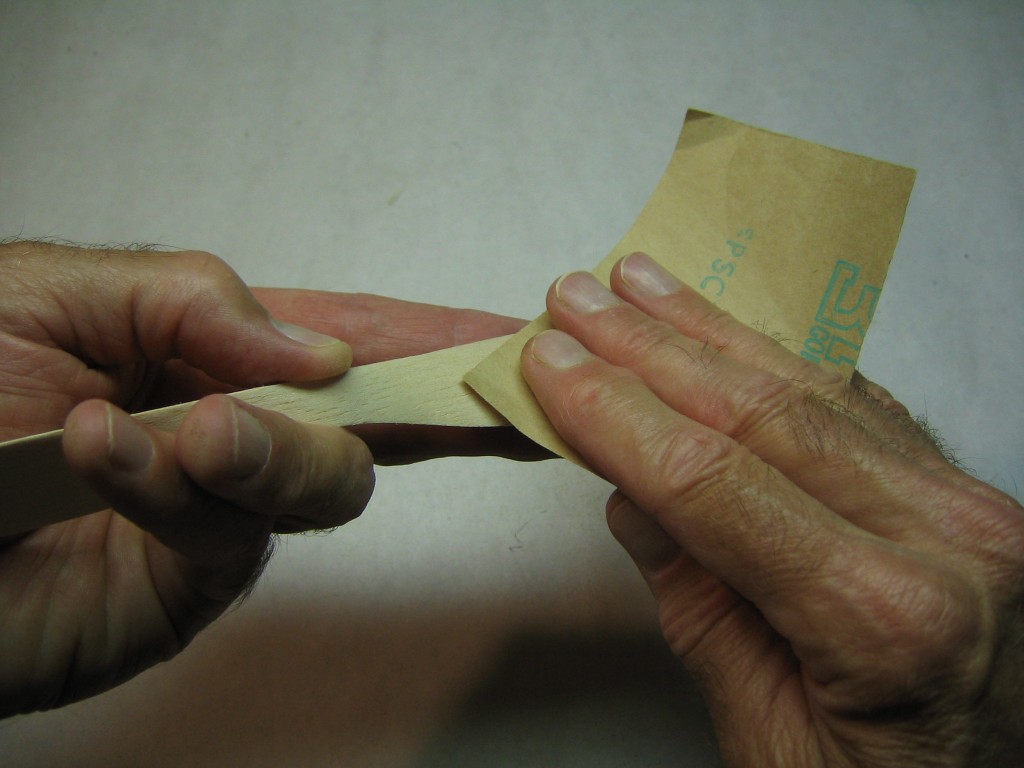
Once you have the back of the blank as flat as you can get it with the knife, you will smooth it with sandpaper. Because we are working on a twisted surface, a flat sanding block will not do. We must use a round sanding form. This one was cut from the container for badminton birdies. Mailing tubes or anything similar will work if it is sturdy enough to hold its shape. You may be able to use cans, jars or short lengths of wood dowel. Smaller sizes can be used to shape the smaller radius curves where the blade conforms with the hub, or you can wrap the sandpaper around a thumb. There will be a lot of sanding dust, so a dust mask is recommended to protect your lungs, or work outside where a wind can blow the dust away from you.
Note that the pyramid of excess wood was not sawed off the front faces of this prop blank. I made photos of the carving of six different props and each was carved a little differently. I left the pyramid on the front of this blank for stiffness during the carving. I found that it was not necessary. You can cut the pyramids of excess wood off all four faces before you start carving, or you can do them two at a time. The front pyramid of this one will be cut off later.
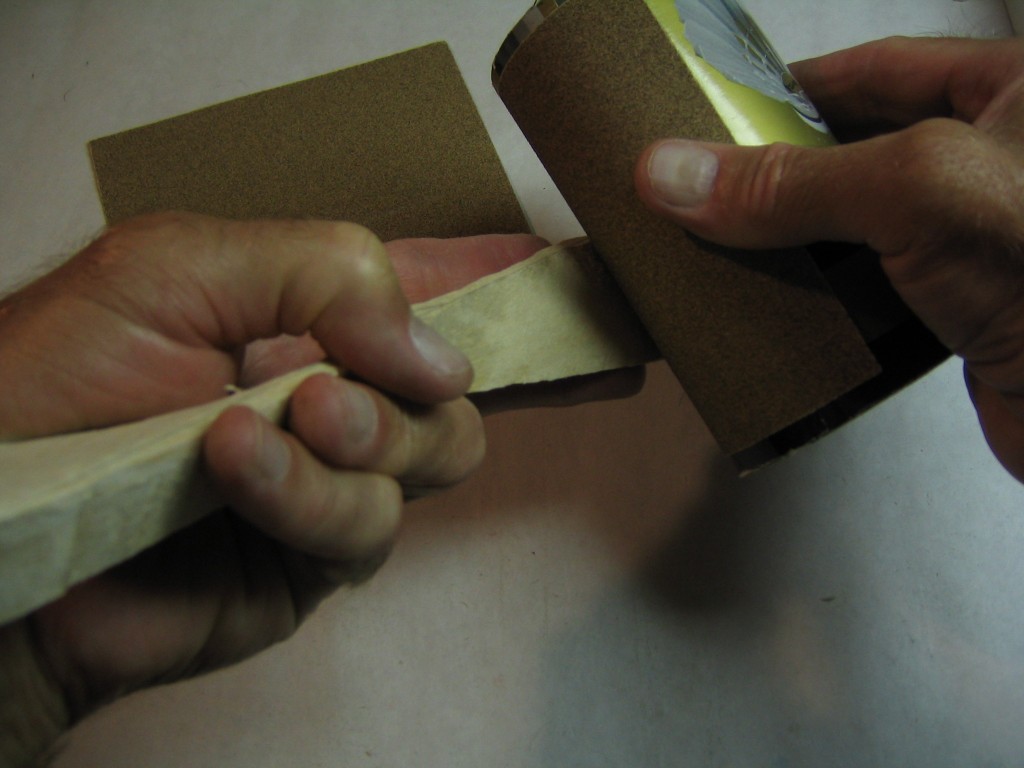
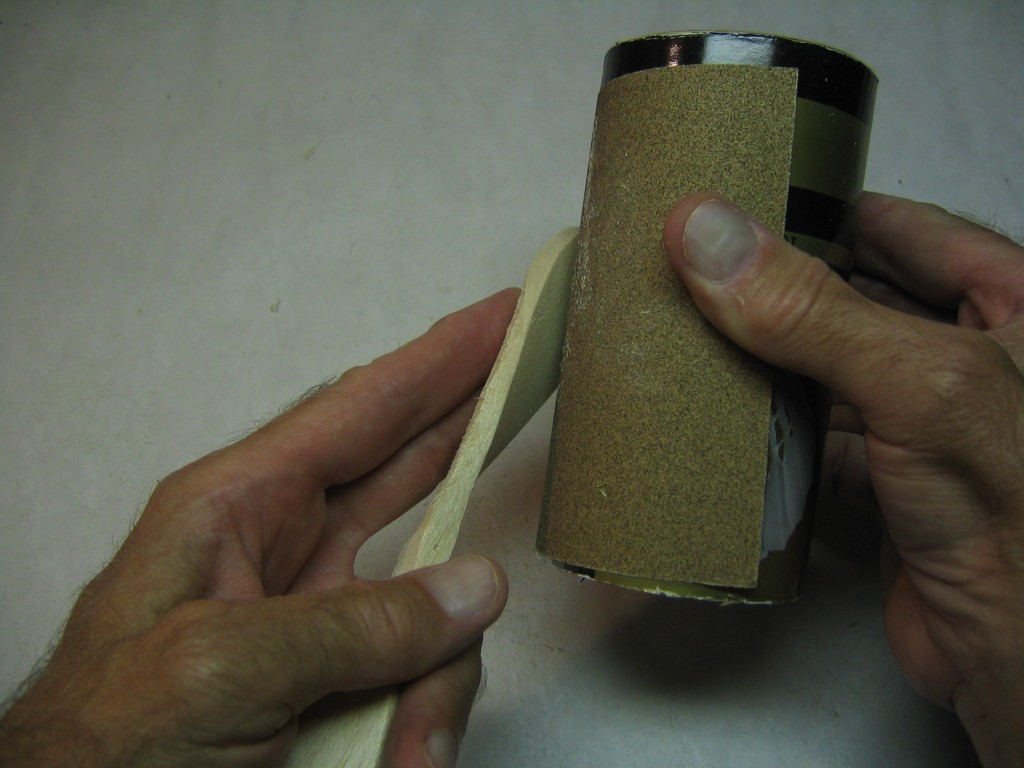
Start with the coarse sandpaper. Sand back and forth across the blade to tear the wood fibers and remove material quickly. Hold the tube perpendicular to the prop. We want to sand straight across along the chord from leading edge to trailing edge.
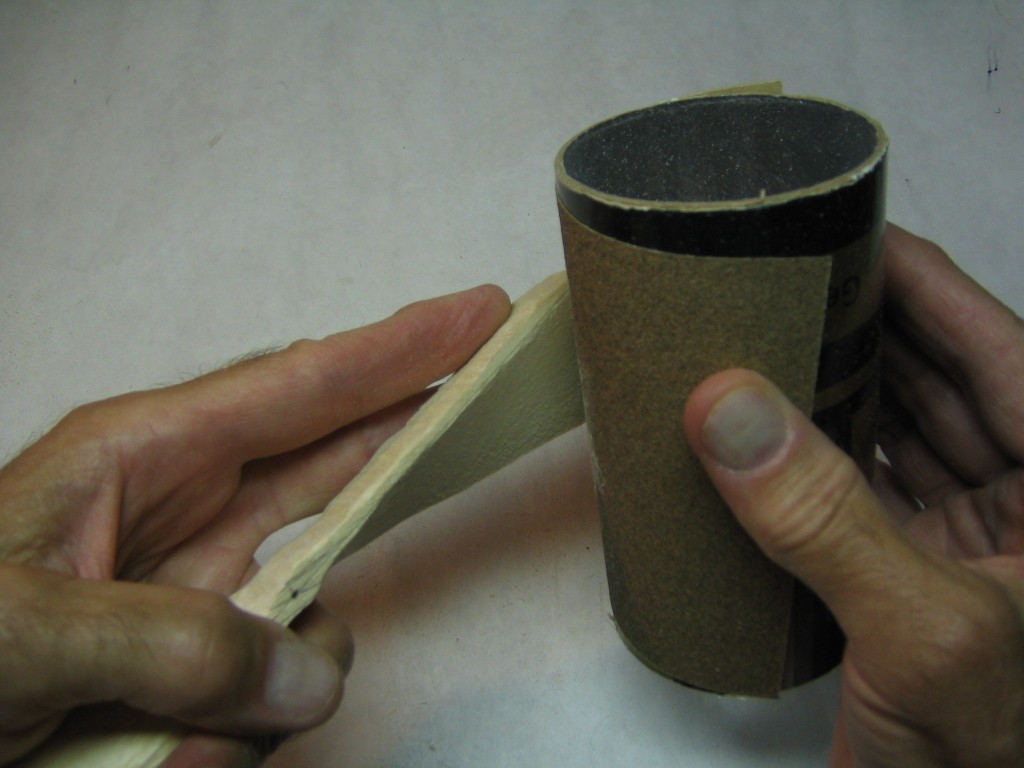
Now sand along the length of the blade, rotating the tube with a sweeping motion, at the same time rotating the prop around its diameter to account for the twist in the blade.
Use a smaller radius form for sanding the transition to the hub. Small dowels can be used for small radii.
The back of the blade should be flat going across.
Mark the position of the tip of the blade on the end diagonal. In this case, the tip of the blade is at the midpoint of the diagonal.
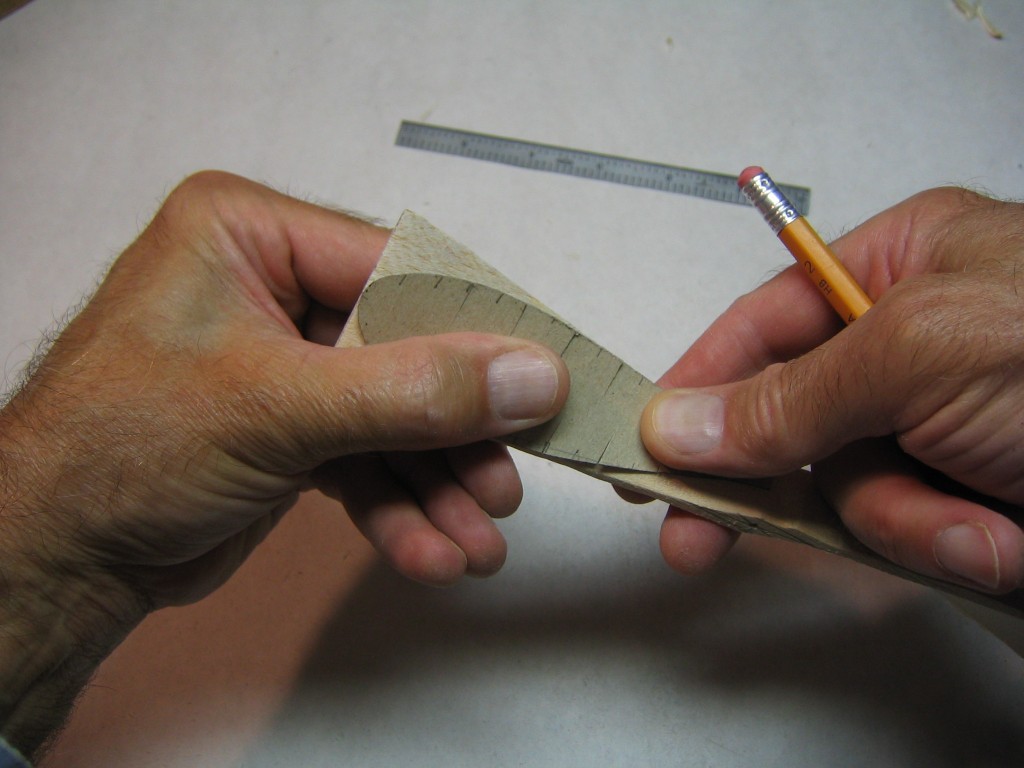
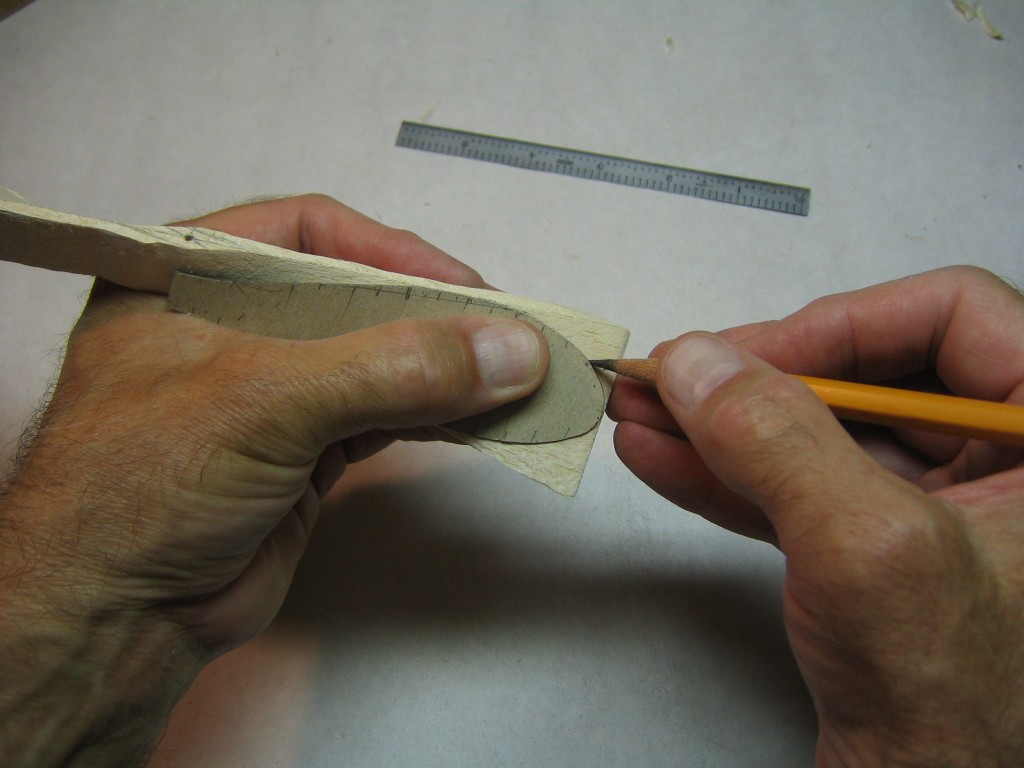
Align the mark at the tip of the blade pattern with the mark you just made on the diagonal and align the leading edge of the pattern with the leading edge X line. Note that the pattern has slits cut in every half inch from alternating edges to the axis to allow it to twist and conform with the twisted back surface of the blade.
Trace the leading edge of the pattern onto the block.
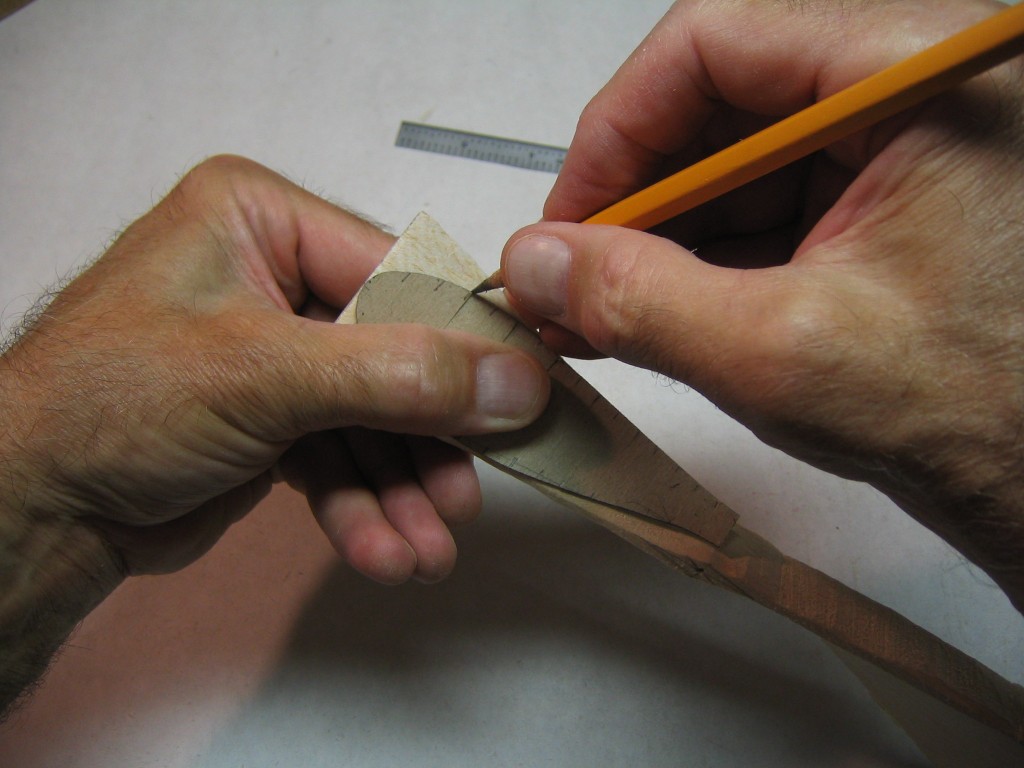
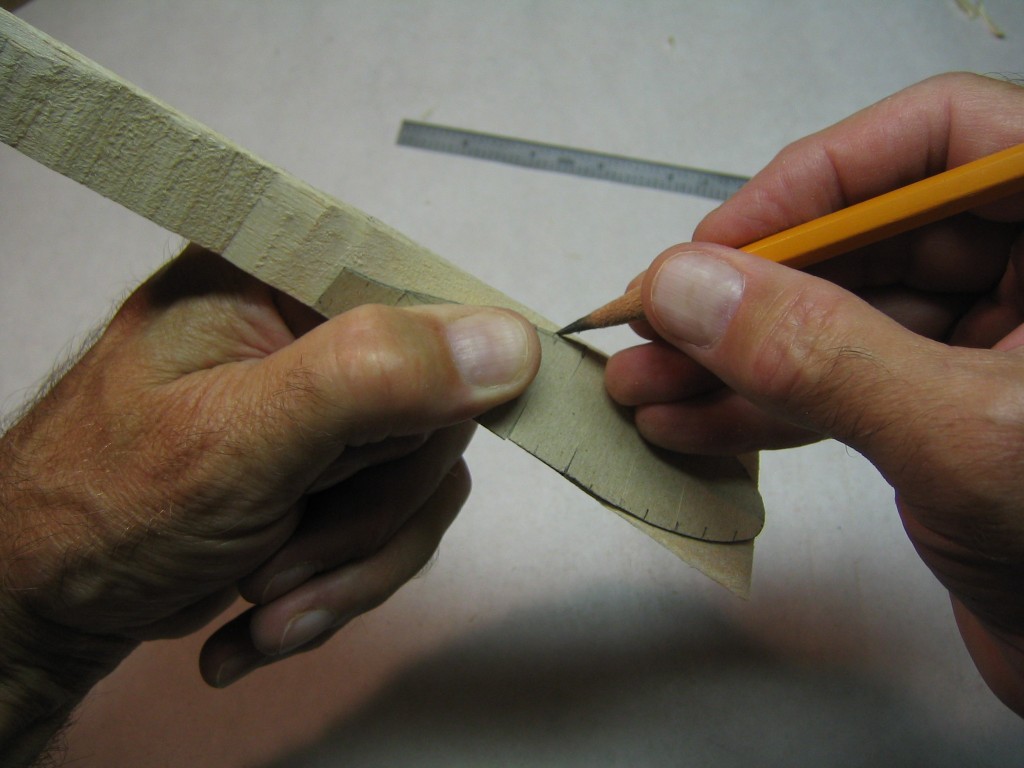
Trace the outer part of the trailing edge.
Trace the inner part of the trailing edge.
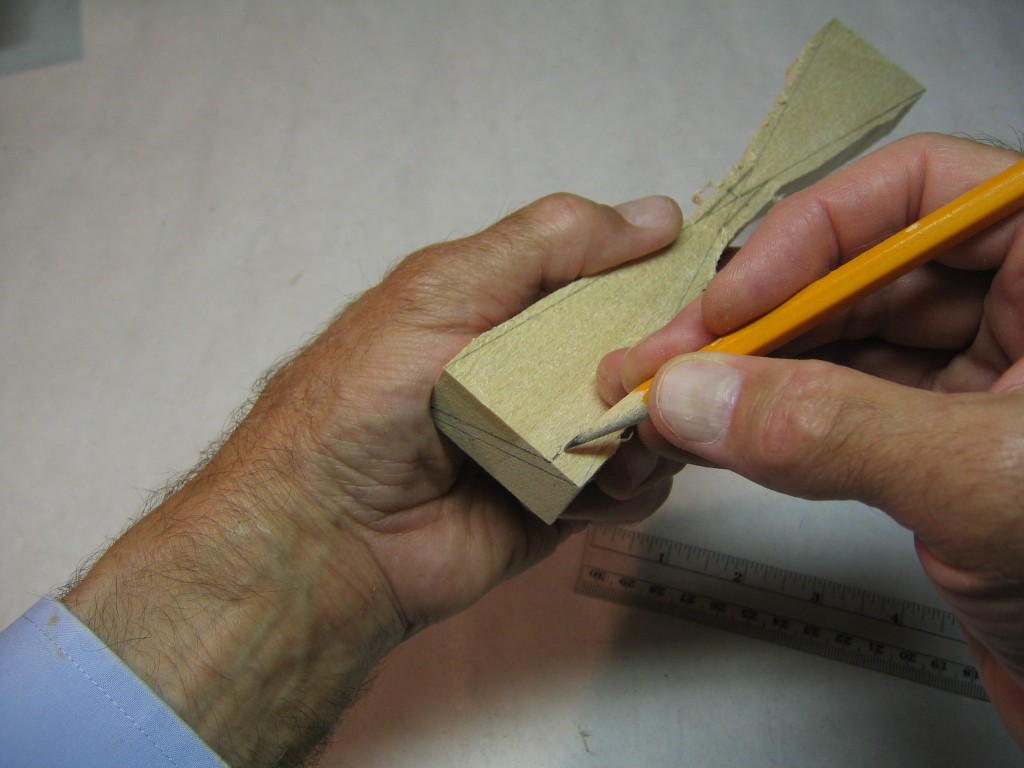
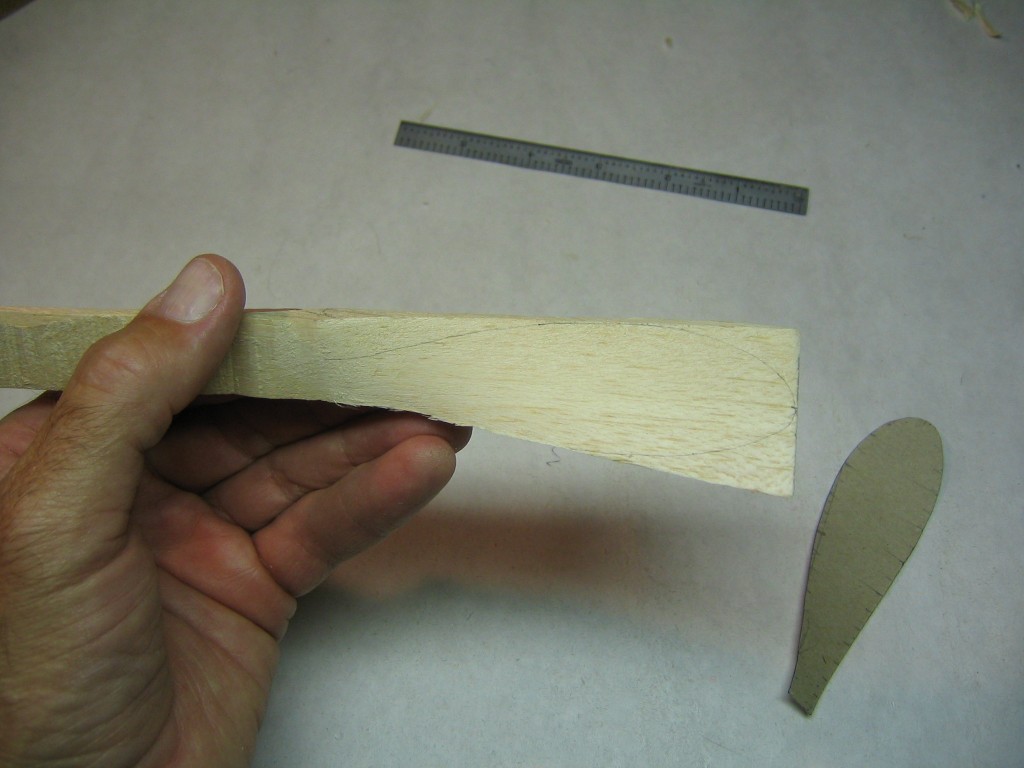
The completed blade pattern traced onto the flat back of the blank. Do the same on the opposite blade.
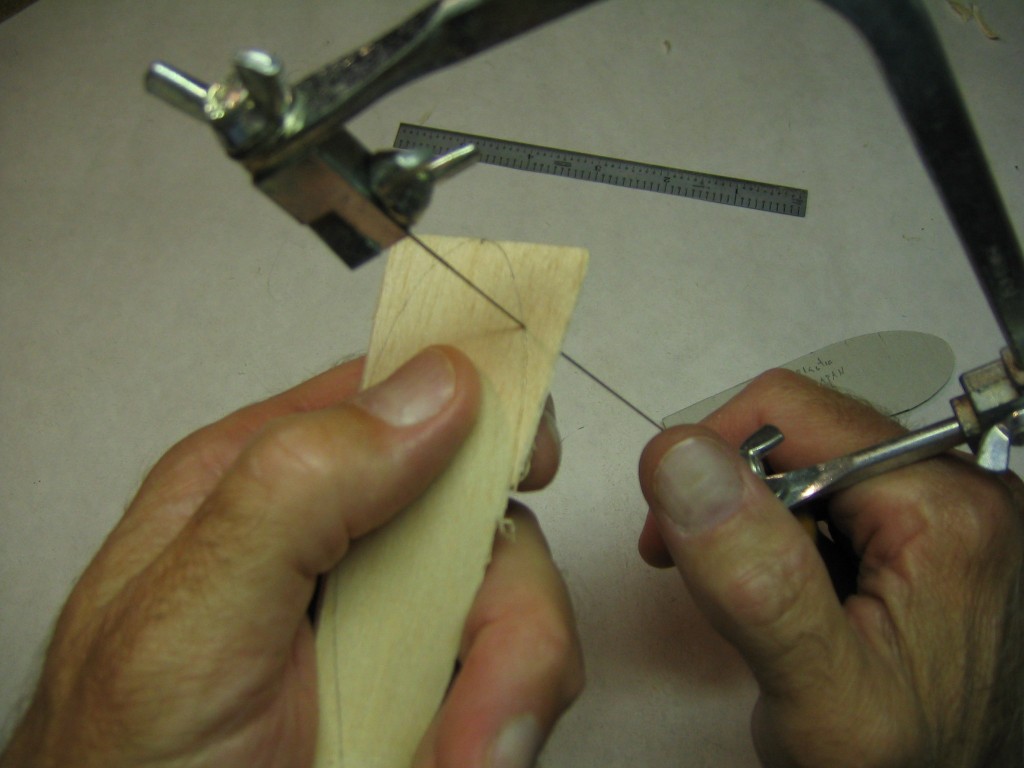
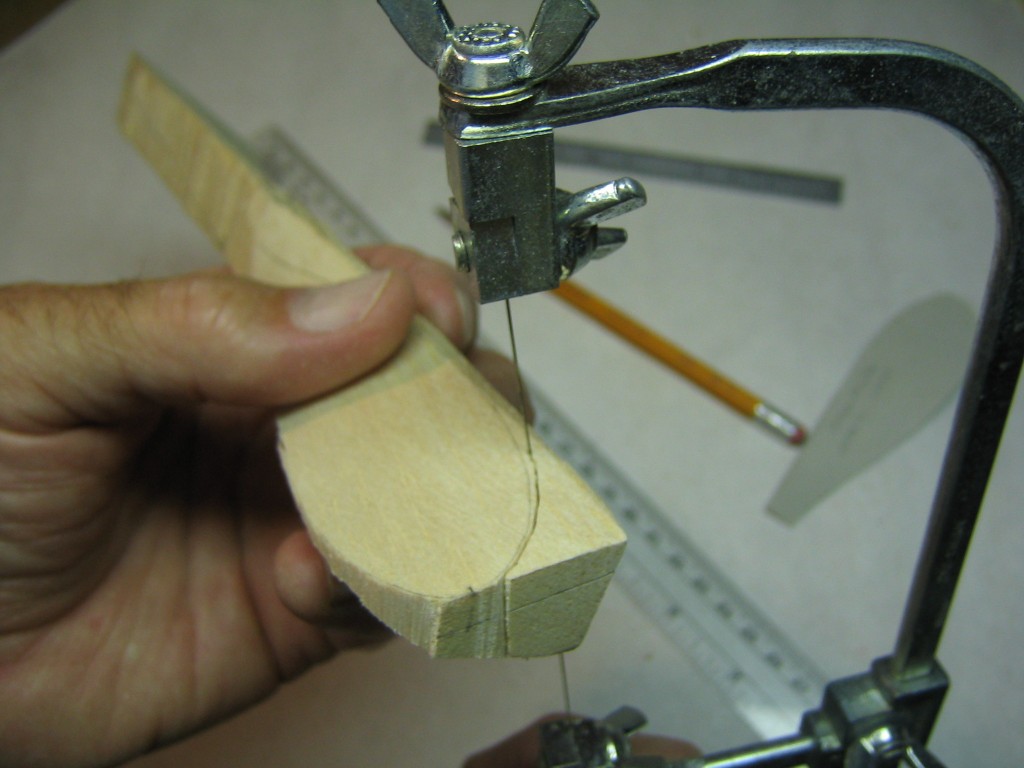
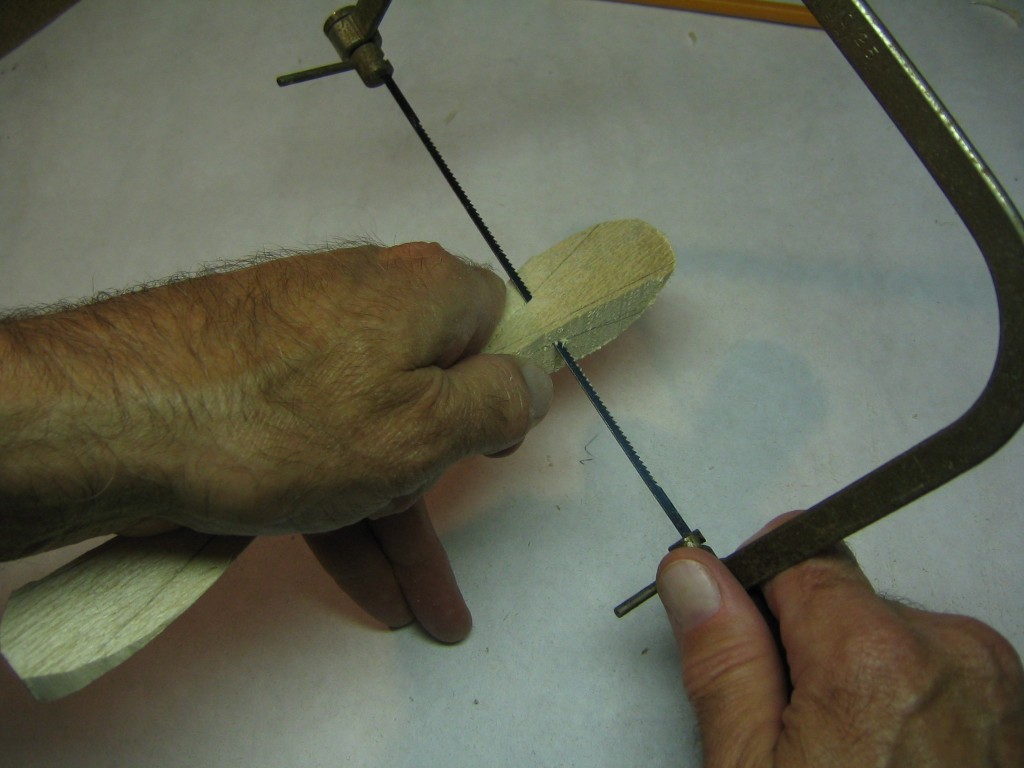
With the fine coping saw, cut slightly outside the line along the leading edge to the tip. Keep the blade perpendicular to the face of the blade.
Cut around the trailing edge at the tip.
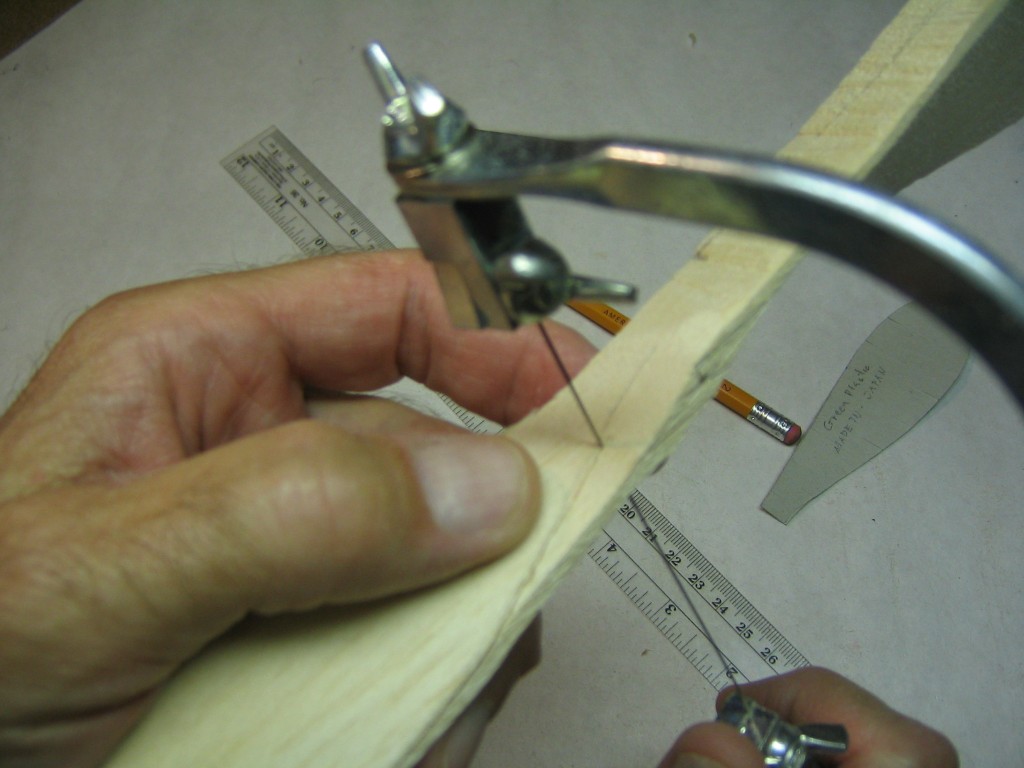
Continue cutting toward the hub, rotating the saw to keep it perpendicular to the back of the blade.
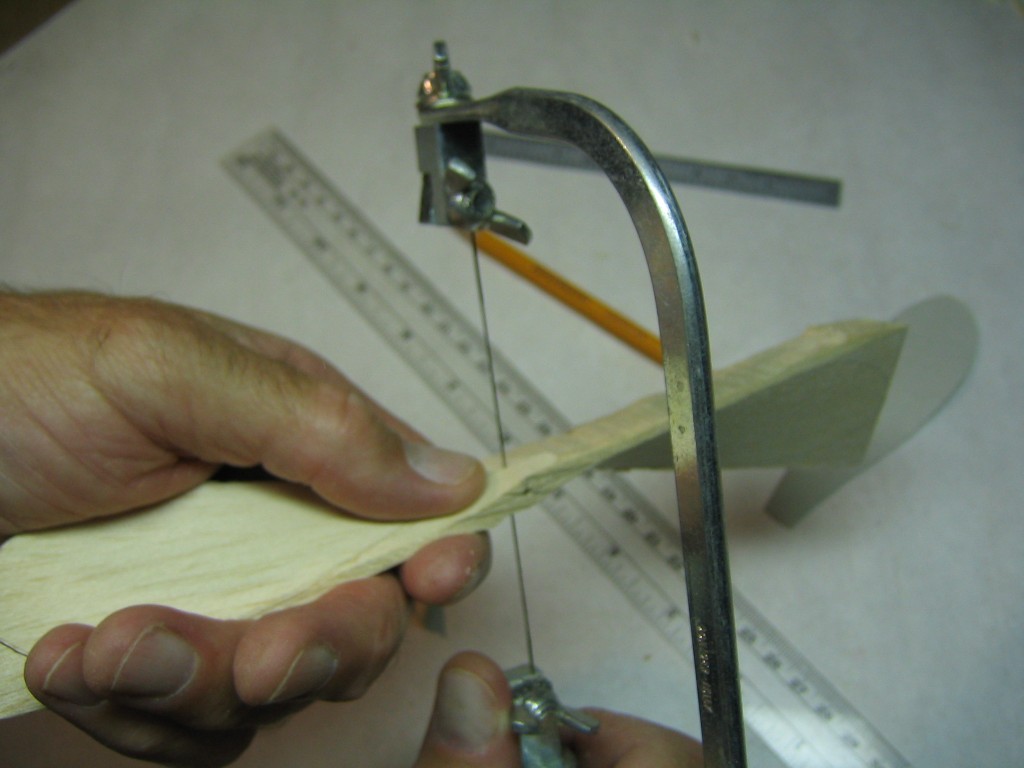
Cut straight through the hub with the blade perpendicular to the axis. Turn the prop over and do the same from the opposite end.
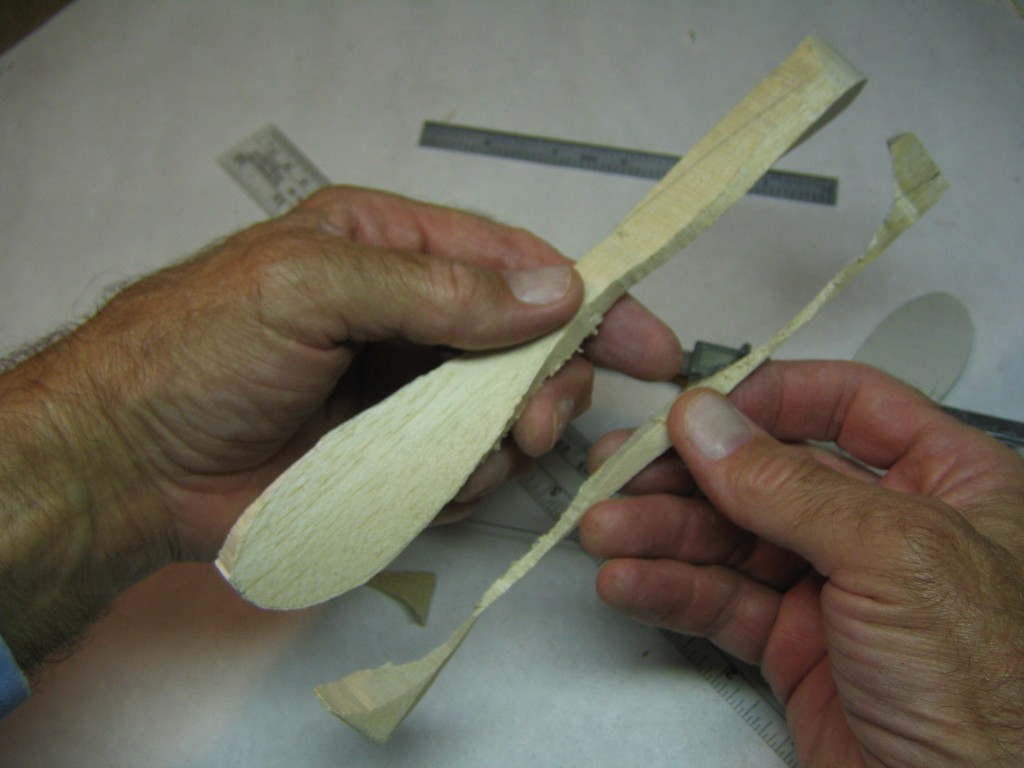
Cut into the center until the waste separates from the blank at the back of the hub.
If you didn’t cut the pyramids of excess wood off the fronts of the blades already, now is the time to do it.
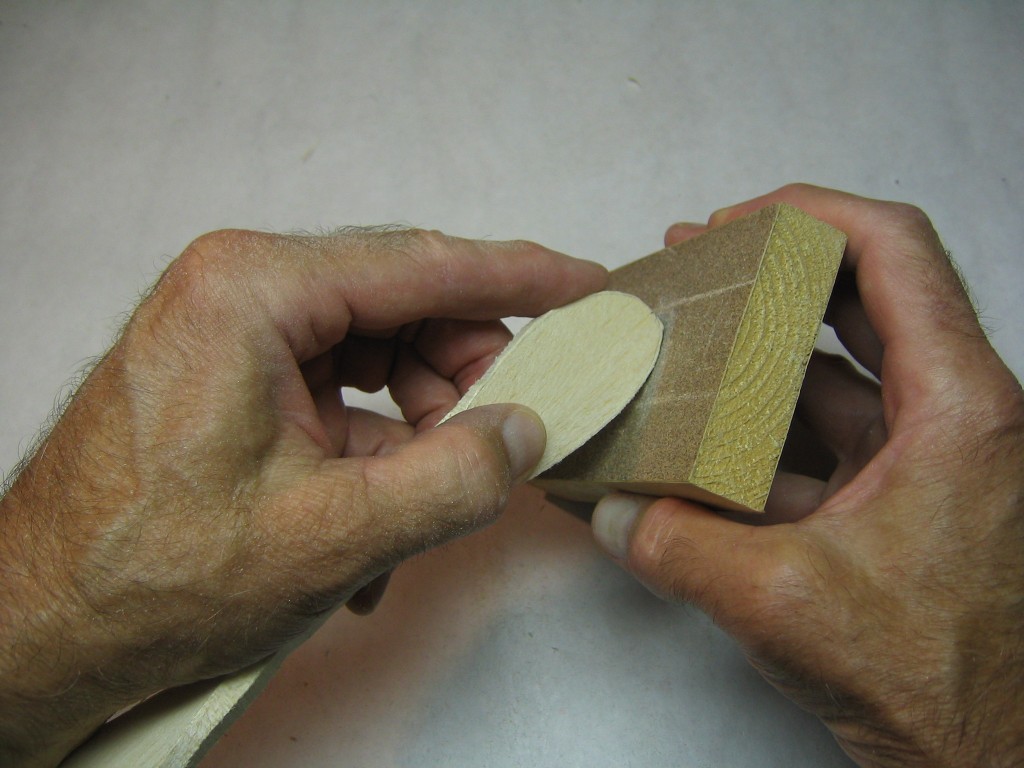
Sand the perimeter down to the line. Keep the block perpendicular to the surface at the point of contact. You can use a flat sanding block on the convex parts.
Use the round sanding form to sand the back of the hub. Get it square with the axis in the center.
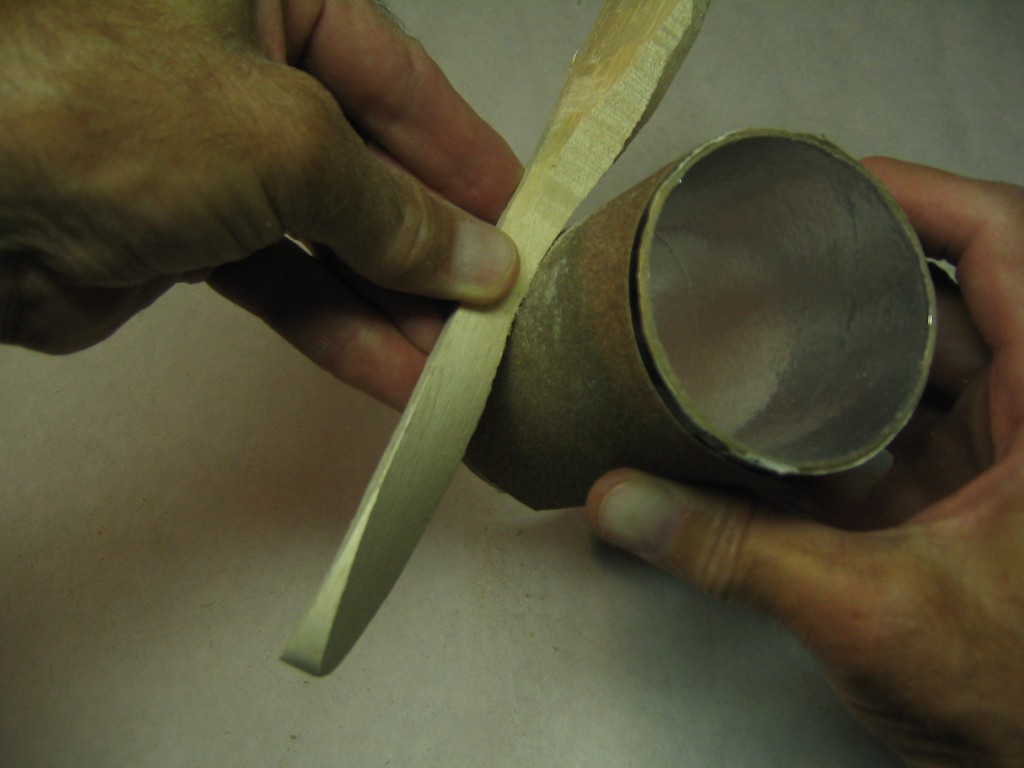
Now use the round sander to form the undercamber of the blade airfoil. Sand with a combined sliding and rotating action. Sand a little deeper near the leading edge. The deepest undercamber will be at about 40% of the blade chord. If you want an exact airfoil, make templates for several stations along the radius. Otherwise, study a sample and copy it as best you can by eye and feel.
As you come in closer to the hub, increase the angle between the sander and the blade.
Exactly at the hub, the sander would be perpendicular to the prop. You may want to switch to a smaller diameter sanding form for final shaping of the hub. Finish rough shaping the backs of both blades with coarse sandpaper, then bring them to final form with medium sandpaper.
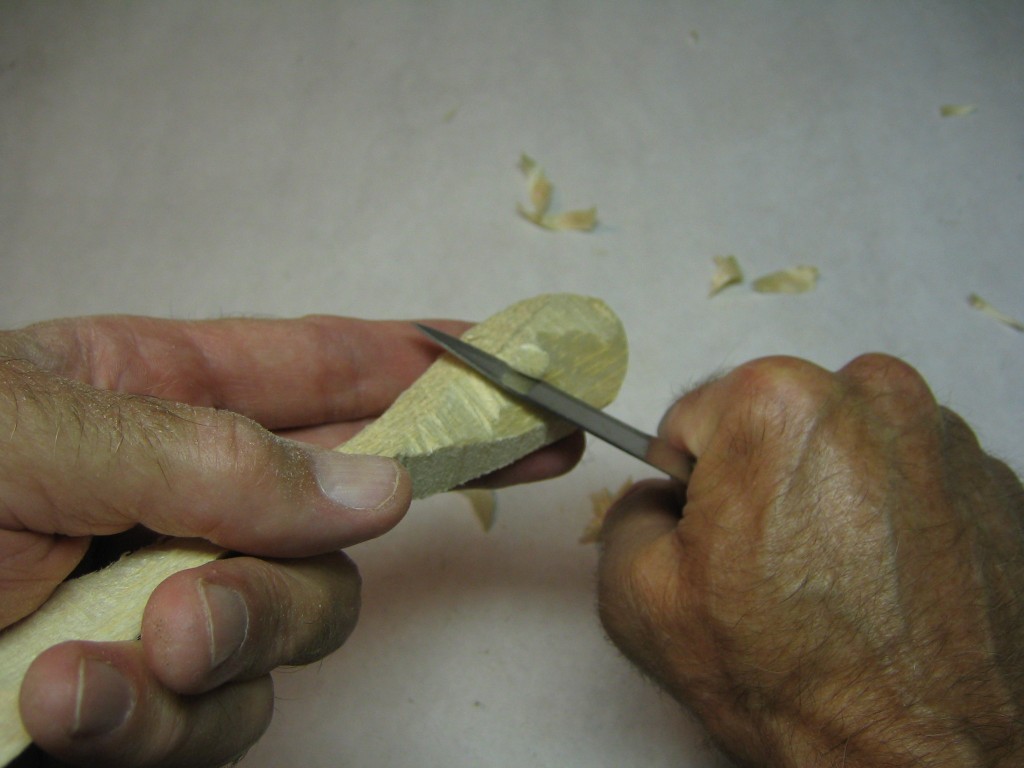
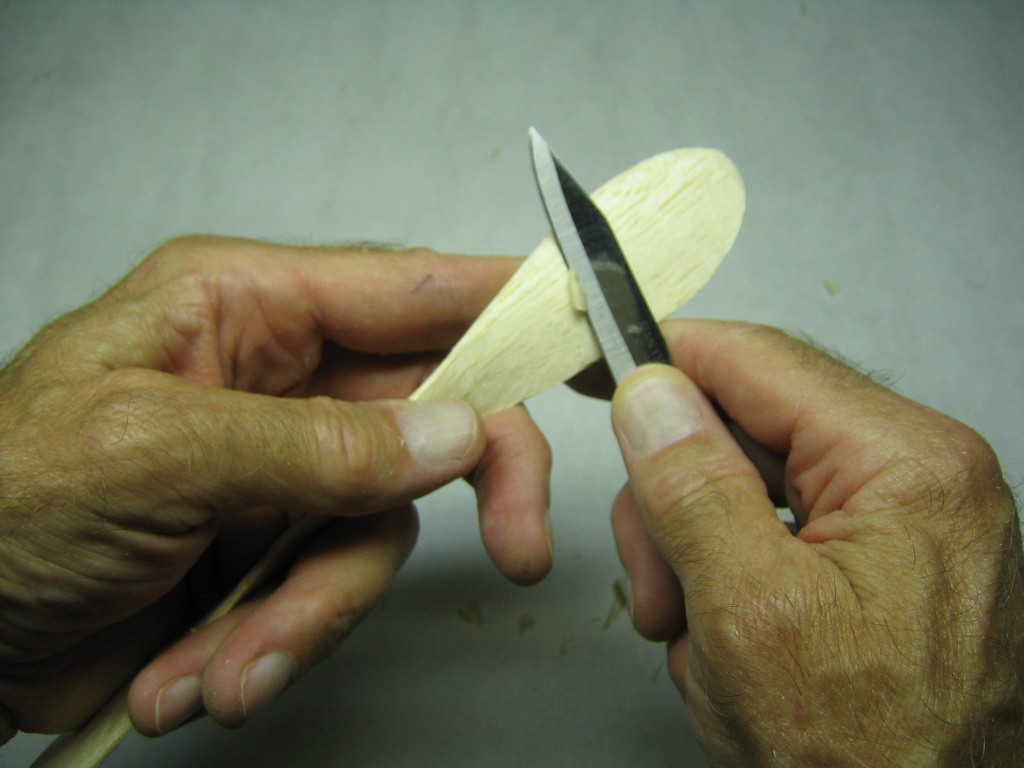
Now begin the rough carving of the front faces of the blades.
Carve into the wood along the grain, but not into the grain.
In some places you may need to reverse the direction of the cuts. Be very careful here.
Finish the final rough shaping with the knife on both blades.
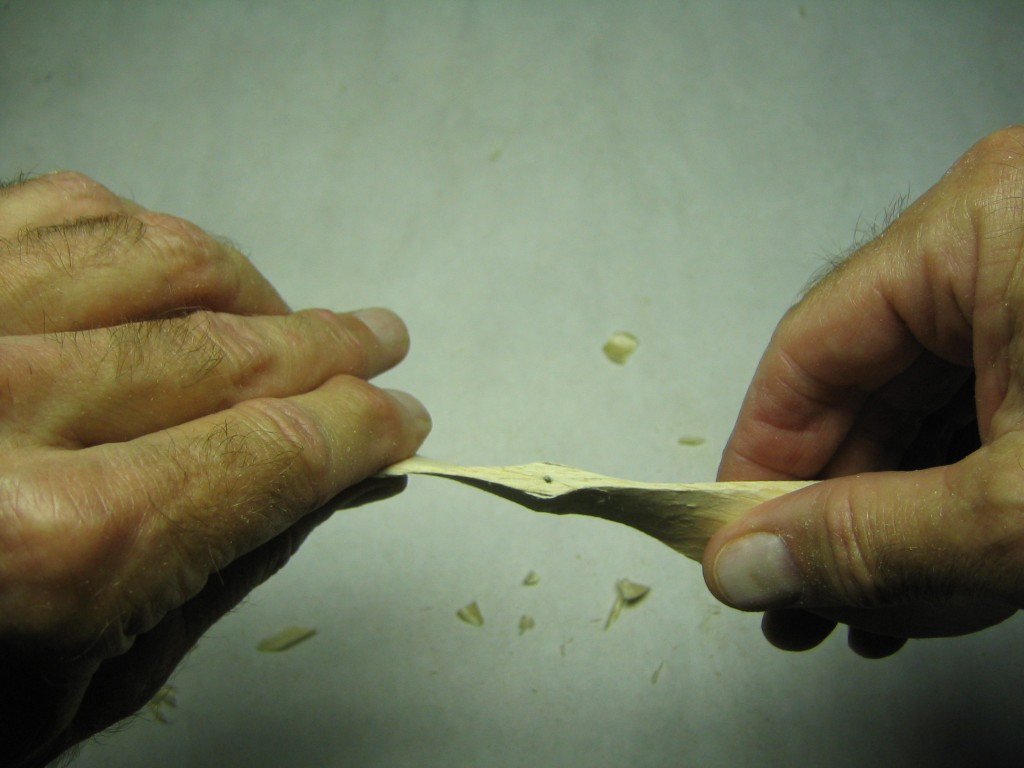
Frequently feel the prop with your fingers to check for symmetry and bumps.
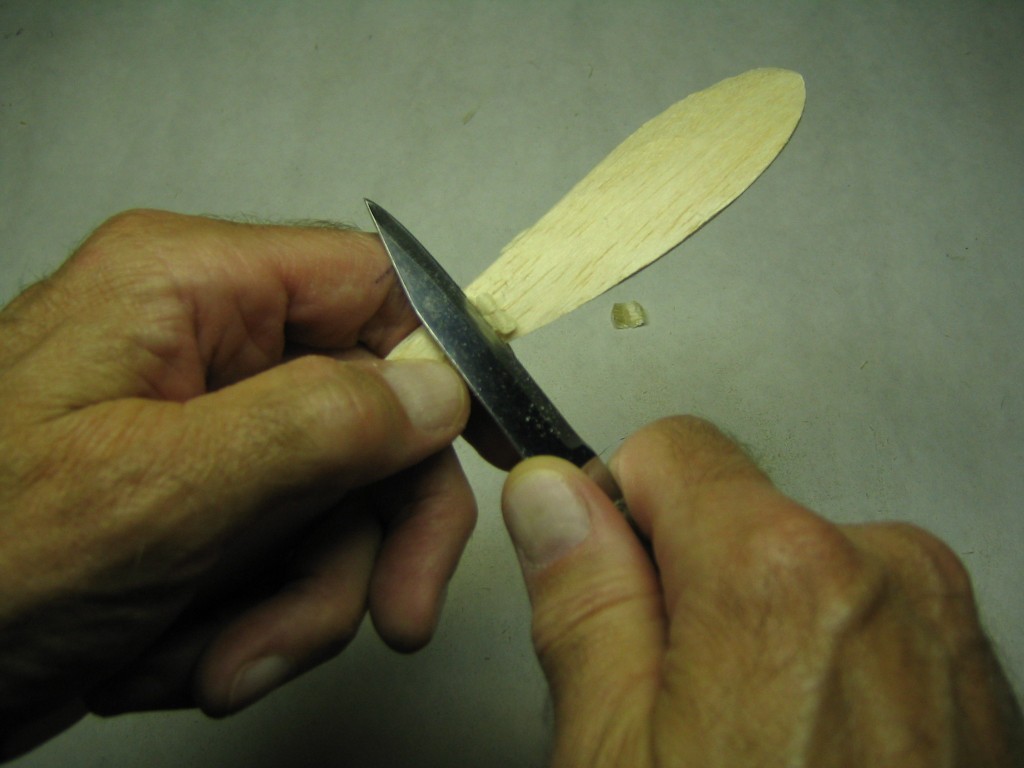
Shave down any high places.
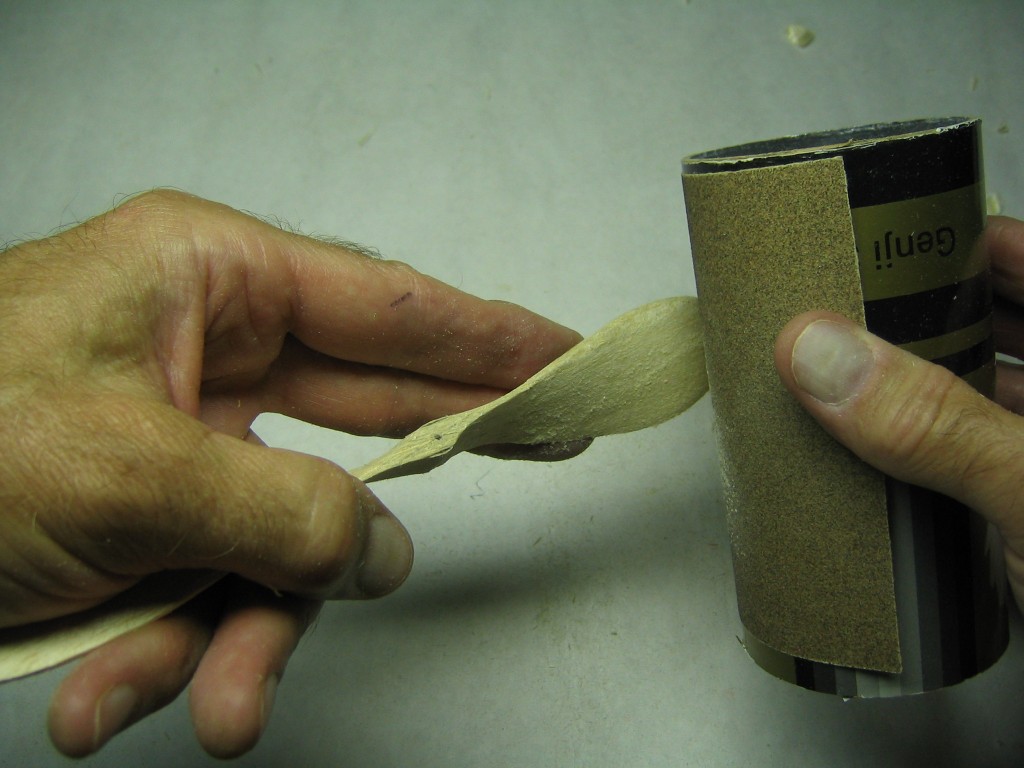
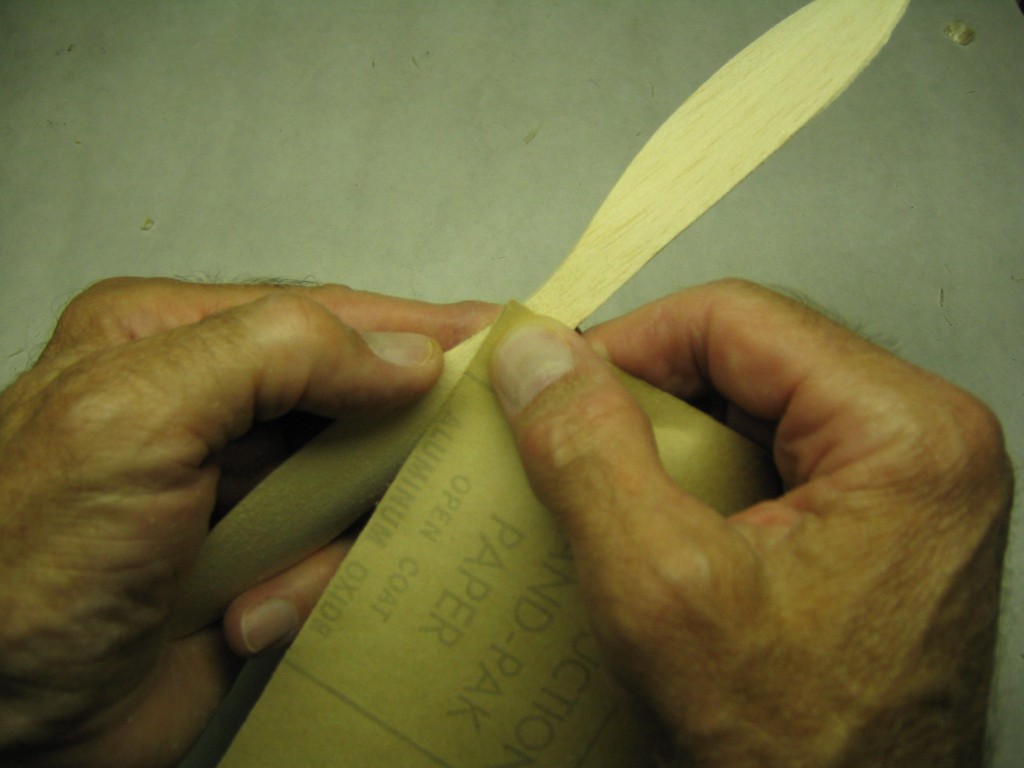
Use the coarse sandpaper to rough sand the upper surface of the blade airfoil across the grain.
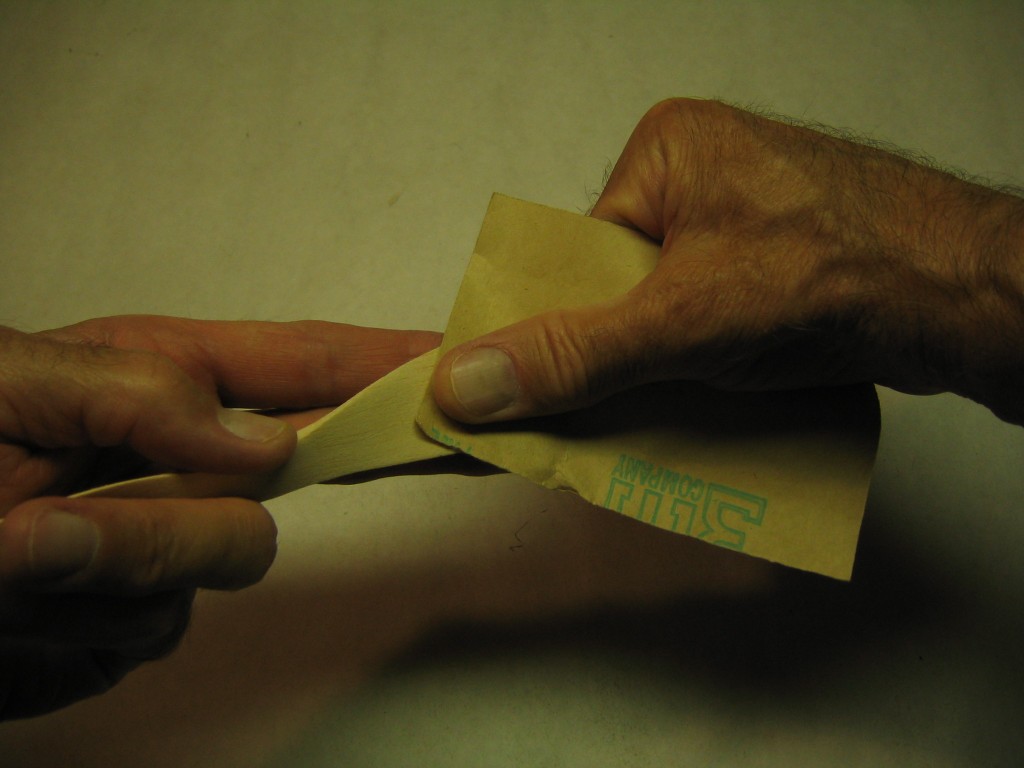
Finish the roughing out with your fingers pressing the paper to the curved upper surface of the blade airfoil, this time sanding with the grain.
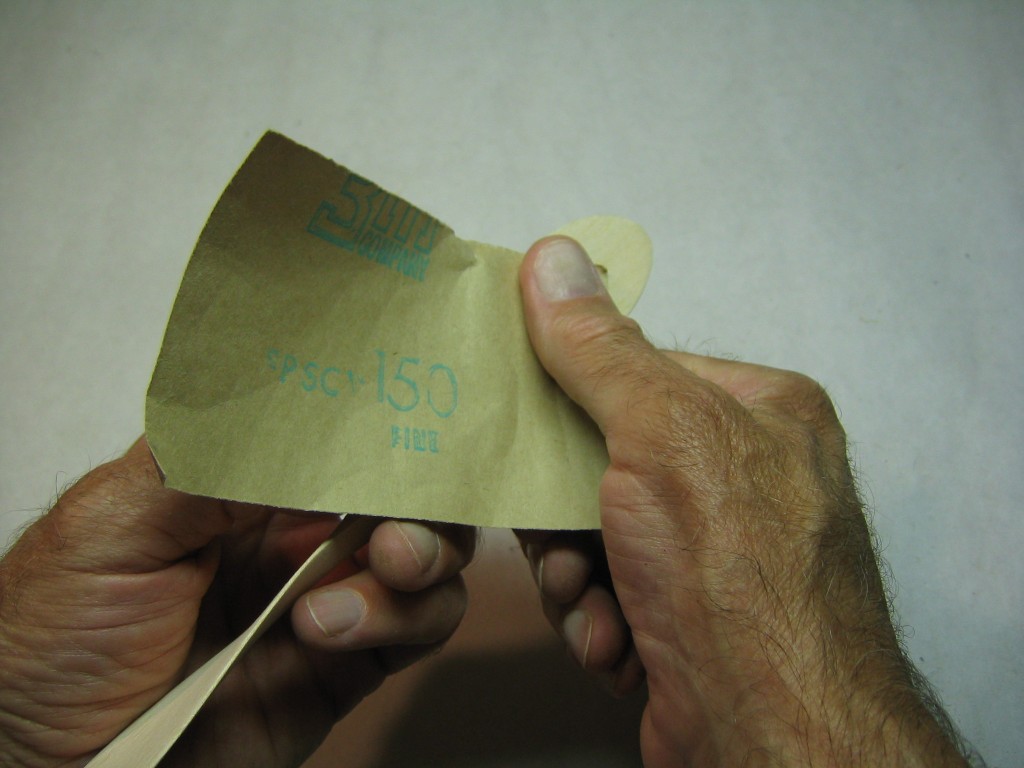
Do the final shaping of the hub conform with the paper curved around the ball of your thumb.
The prop in its nearly final form, ready for final balancing and smoothing.
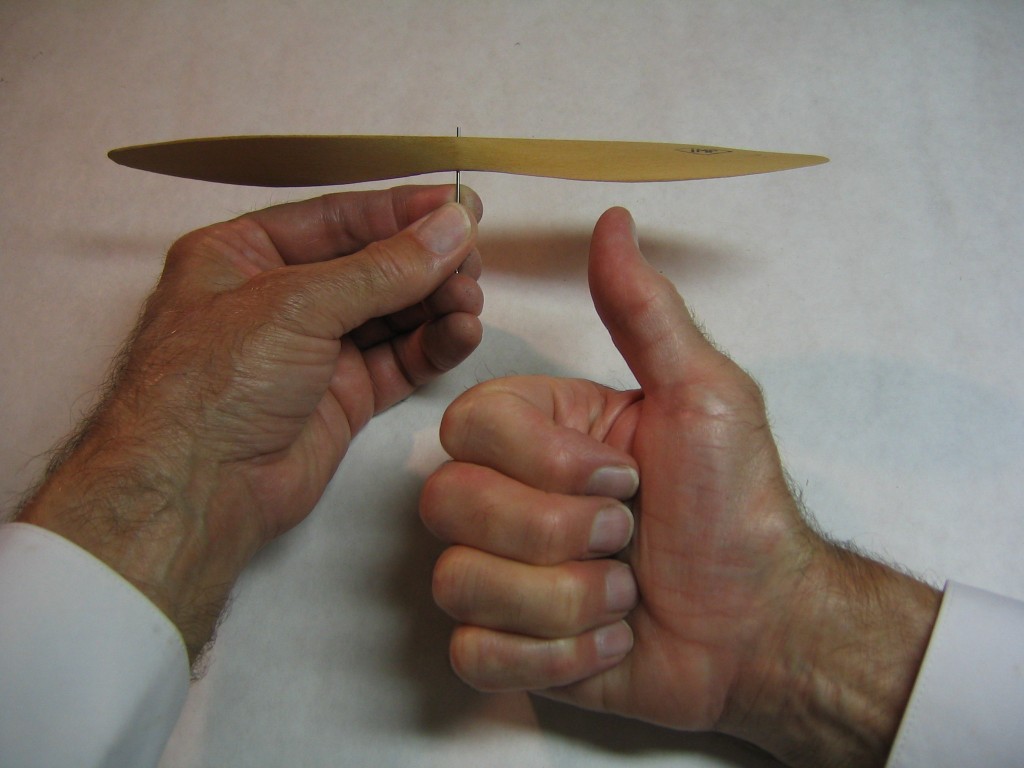
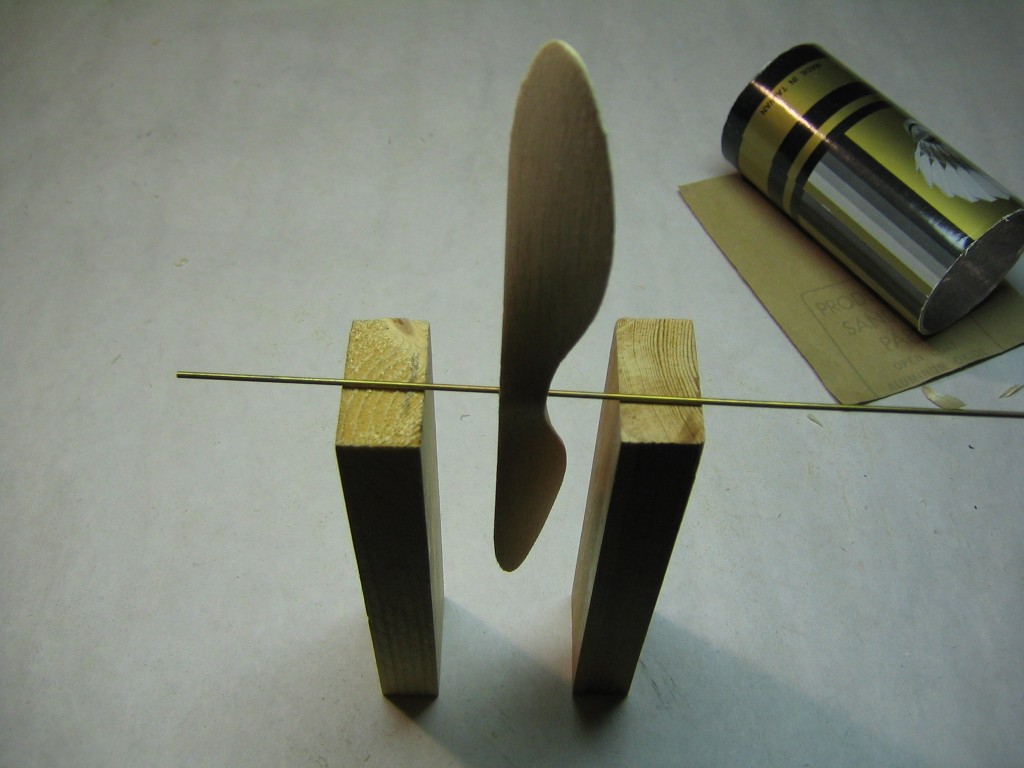
Push a piece of 1/16″ tube or wire through the hole and check the balance. It is likely that one blade will be heavier than the other and will hang down. Run the blades through your fingers and see if you can find any thick spots.
Sand away from the heavy blade with medium grit paper and recheck until the prop balances.
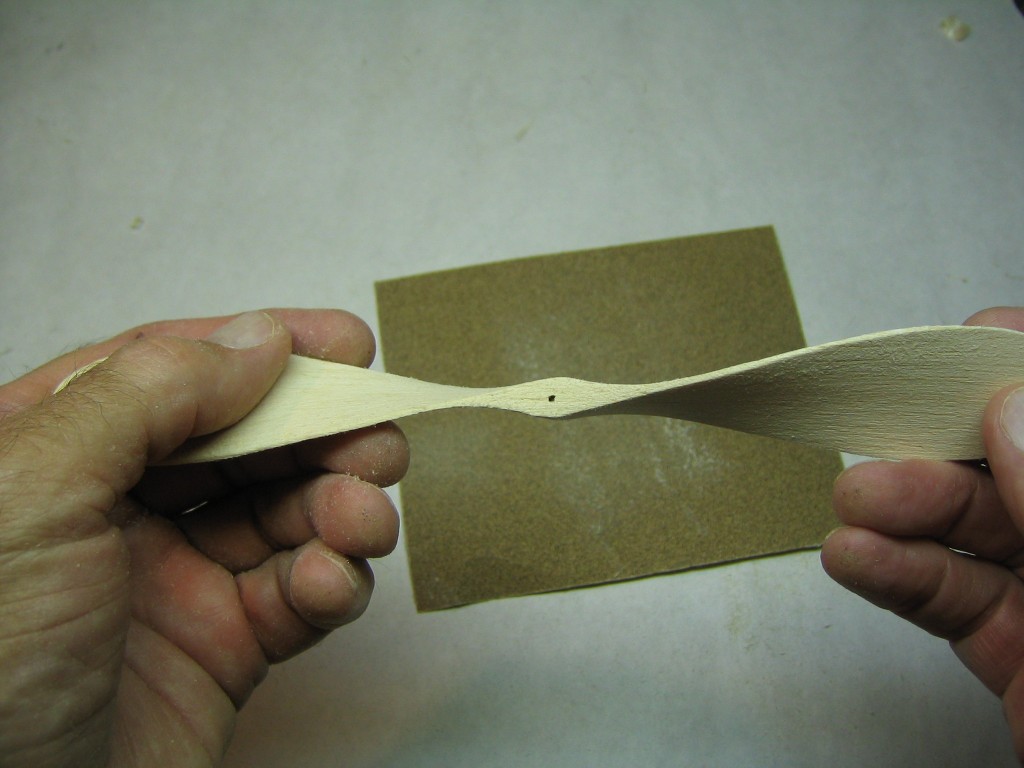
Sand lightly overall with fine paper to get a smooth surface. Recheck the balance. Dampen the prop to raise the fuzz and let it dry.
Finally sand with the finest paper and you are done. Admire your work. You can put it on the balancing rod for a final balance check, then spin it and feel the breeze on your face.
That completes the carving part of making a wood prop. There are many ways to make a hub, shaft and freewheeler, and attach the prop to your plane.
There are many ways to arrange a freewheeler for your prop. This site has 18 articles on freewheelers:
https://freeflight.org/library/technical-library/
Take your pick!



Thanks Gary for all the hard work in making this presentation. Back before I retired Don Lindley taught me to hand-carve props for my Bostonian and I carved several. This takes me back and I have to re-visit those days using your website.
Thanks a lot for clear tutorial about prop carving.
Great tutorial Gary!
I wish to learn how to carve balsa prop and make a 7″ prop for Sky Bunny (dont have a plastic prop). There is info online, but each suggests different ways of getting the dimensions of the starting block. I couldnt find consistent info on how to determine width of the block: one source mentioned dia/7, one mentioned 1.75″ (for 9″ prop), one article gave a range of width and thickness for different dia prop, Don Ross’ article in Free Flight library gave multiplication factors, and I couldnt fully understand the calculator results on Volare website…All say different things. And then there are different ways of cutting the outer portion of the block to get the required thickness at tip- some taper just the top part, some taper both the top and bottom part. So I am confused what is the simplest correct method. How to calculate dimensions of the block and go ahead? Hopefully, some excel sheet and diagram to help.
And what density balsa should be used? Since I dont have a balsa block, I will glue together several pieces of 3mm balsa to make a block of the required thickness as per this article http://www.zininmodelvliegen.nl/downloads/How_to_carve_a_balsa_prop.pdf Has anyone tried this method and has some tips?.
Great article Gary!
I dont have access to balsa blocks here, but would like to try a hand at making balsa props. I saw this fan-fold method that I can try since it uses strips from balsa sheets rather than a block, and I can use my 3mm or 1.5mm sheets for it: http://www.sam95.cz/wp-content/uploads/2013/01/Making-Balsa-Props-using-the-Laminated-Fan-method.pdf (ref: https://www.hippocketaeronautics.com/hpa_forum/index.php?topic=23674.msg232410#msg232410)
It would be great if you could post a tutorial about this method, including how to determine widths of strips. A tutorial on simple free-wheeling mechanism will be a bonus for beginners like me 🙂
I also saw this method which made a balsa block from balsa sheets: http://www.zininmodelvliegen.nl/downloads/How_to_carve_a_balsa_prop.pdf
I also know of the method of making props from plastic cups which uses spars to attach the blades to the hub. Is there a significant disadvantage to using them compared to carved balsa props? They are quite light too.
Also, can you suggest a source to determine the block size and geometry? Different designs use different shapes/methods to make the initial shape of the balsa block….some have the blade tip tapered only on top, others have it on top and bottom like you have done….
Thanks!
Your links answer most of your questions. I would add one comment; the minimum diameter of a prop should be the square root of the wing area, up to 1.5 times that. This is because the relationship is between wing area and swept disk area of the prop. The wing chord is just as important as the span.
Cup (cone) or can (cylinder) formed props are described in the Technical Library at the National Free Flight Society. These props are not helical, the blade angle is linearly related to radius station. This makes a very inefficient prop, but they will pull a plane through the air and they are light and relatively easy to make. The ICARA prop blades are can formed.
https://freeflight.org/library/technical-library/
Superior Props offer a variety of propeller blanks in which most of the rough shaping has been done with a band saw. You carve and shape the airfoil and blade plan form to your preference.
https://volareproducts.com/blog/?product_cat=superior
Vintage Model Company offers laser cut laminated propeller kits.
https://www.vintagemodelcompany.com/search.php?search_query=laminated%20propeller§ion=product
Nice article, although I became a fan (no pun intended) of laminating a blank and shaping it with a coarse wood rasp. The degree of coarseness depends on the size of the prop and the stage of the shaping.
Revisiting terminology: The face of the prop is the surface that pushes the air back, equivalent to the underside of an airfoil. The forward surface is referred to as the back. Counterintuitive, as is so much in life. We went around and around on this years ago on SFA, and I inquired to a half dozen authorities about it. They are, as I remember, FAA manuals on propeller servicing and overhaul, Sensenich, McCauley, Palm Beach Propellers (they serve the entire southeast and the Caribbean), and John Barker, who, before he retired, worked for Vickers and DeHavilland and was probably the pre-eminent UK authority of props for turboprop engines. All agreed on the terminology.
Art.
May God continue to bless you abundantly. This is the best article on propeller carving that I’ve read.
Respect to post author, some great selective information.
This propeller description was extremely helpful. Nice to see all the detail.
This is really helpful. Love to see a video clip of how this goes.
This is a very good tutorial,Thank for sharing Thank you very much
Outstanding!!!
This is truly a wonderful tutorial on prop making, I have never seen such an informative piece of work and with the basic tools and pictures too. Thanks you so much Gary.
Excellent presentation enhanced by very clear and appropriate photographs. Many thanks, it has helped my prop building considerably.
thank you
Sir,
This tremendous awesome tutorial. Really explains in details even without video. Just one thing i want to know, how to take dimensions for a prop? I mean, teach me, how to calculate the size of block, and angles on the blades? e.g. if i want a 8×4.7 prop what should the width x length x height of the wood? I’m also poor in knowledge of the pitch and its gauge.
Another thing confusing me, “Extend that line onto the edge of the blank.” – its on the [for the pic Carving-Propeller-030.jpg] and a few more places- the word “blank”, Do you want to say it “Back”(of the prop)? If its blank only- please explain “blank”.
Regards
Piyush
You are asking for a great deal and the subject for a future tutorial. At present, the best I can do is refer you to the list of technical articles on the National Free Flight Society site. There are several on propellers.
https://freeflight.org/library/technical-library/
Most presentations on props make unstated assumptions. If you make the prop presented, you may be OK, but if you alter something, you may run into trouble. The trouble is that the blade planform may not fit onto the flat back face of the new block. Often it is assumed that the block is some thickness and a width is calculated. A higher pitch prop will require a thicker block of less width.
Here is a simple calculator that can be used for a common kind of prop:
http://keveney.com/propcalc.html
The blank is the block that is being prepared for carving. You can buy prepared blanks that have been partly cut out. You draw the blade pattern on the back face, cut out the blade and shape the airfoils.
Thanks! This Tutorial with Photo is the best I’ve seen in decades & answers many questions on carving your own props.
The best tutorial on prop-carving ever made! The photography is terrifically clear and the process from step to step is, most important, never slurred over. Better than a video, much better.
Many thanks, this tutorial is an inspiration!
Ed, in another place I mentioned testing five props for the Cloud Tramp. All five were 8″ diameter. The props, with their P/D, block width and thickness are listed here. I have a machinists scale that is divided into 0.01″ divisions. I calculated the block dimensions to the nearest 0.001″ and eyeballed it as closely as I could when I set the fence on my table saw.
A 2.0 1.329″ x 0.846″
B 1.8 1.398″ x 0.801″
C 1.6 1.486″ x 0.757″
D 1.4 1.611″ x 0.718″
E 1.2 1.751″ x 0.669″
Since working with these props I have learned some ways to improve the design, layout and carving of props. That will be a subject for a future essay.
Gary, thanks very much for your speedy reply. This is a good help for me, and I look forward to following your future writings on props. Again, thank you. Ed
I have read your article on prop carving with considerable interest. I am able to carve a pretty good looking prop, but have no accurate knowledge as to what the actual pitch is. Nevertheless, they function fairly well. It would certainly be appreciated if you would list the block size for the test props you mentioned on another page. Thanks i
Thank you so much for this toturial.
I’m wondering, when will you post the hub carving and the shaft.
I’m really new in this and I have many doubts. I also want to know how to determind the size and pitch of a prop.
Another thing, I’ve seen some props with something like a clutch but some props, specially the homemade don’t have it; what the issue with that. Kind of long… Sorry!
This prop carving tutorial was originally part of my Cloud Tramp build, that has not been published yet. A computer crash lost those photos, but I have carved many props since. The dimensions and layout were determined by the plan, although I carved eight props and picked the best pitch through testing.
Eventually I would like to do a tutorial on prop layouts. There are about two dozen ways to do it.
I made a ramp freewheeler from brass tube. It works like the ones on plastic props. I plan to publish that eventually. There are many ways to make a hub and shaft with freewheeler and sometimes stops. Many of those are shown elsewhere on the Internet. I would like to do tutorials on those things, too. I have two other airplane builds photographed that I would like to post, too. It is a matter of time.
Lovely guide to propellermaking! How many mistakes did these few minutes of reading save me? Several, I imagine! Thank you Gary -I am finally feeling ready for my first oldtimer model!
its great.thanks Gray!!!!
Thanks Gary!!!!your golden hand
This is the best prop How-To I’ve seen. Thanks Gary!!!!