This reports our first experience with a class done on 13 March, 2012. The report is assembled from emails to the group of mentors prior to the event, with added comments in italics. There were four adult mentors with aeromodelling experience and nine kids.
Bill Kuhl posted my essay “Simple Gliders in the Science and Mathematics Curriculum” on his Delta Dart site.
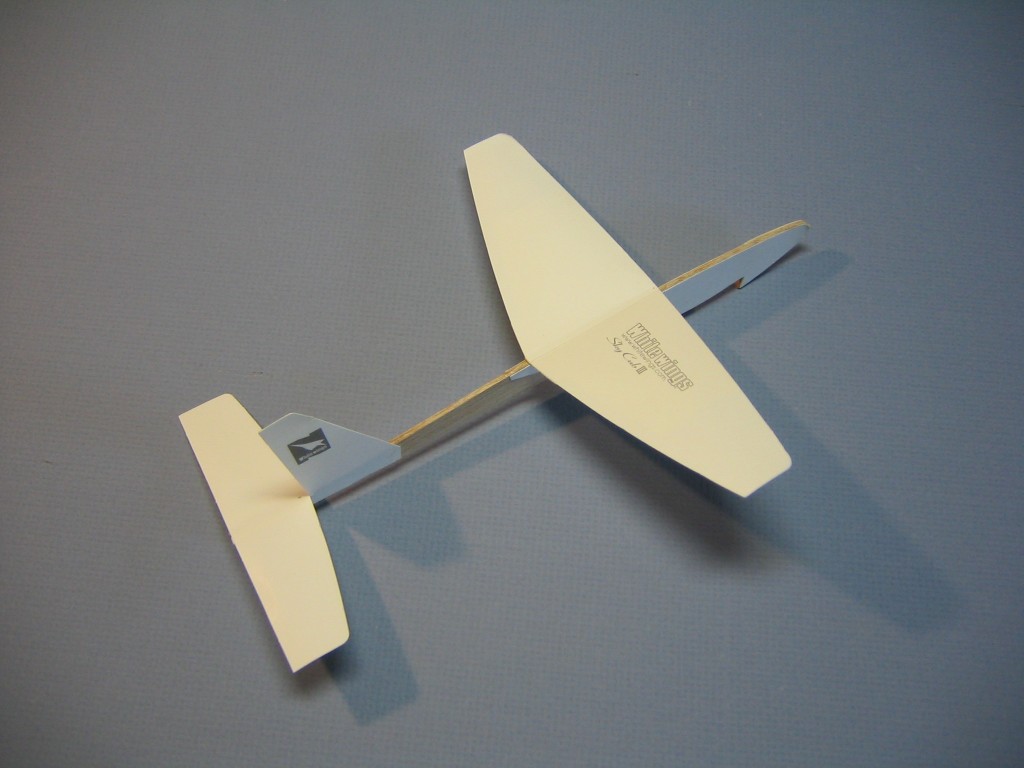
Noel Eberhardt of the South Bay Soaring Society arranged for a kids class in the Cupertino Recreation program to teach kids to make the Whitewings Sky Cub III paper airplane.
This was the third and most advanced class. Previous classes had made FPG-9, folded paper gliders and AMA Cubs. Each class was two 2-hour sessions. The kids made the Whitewings gliders on the 6 March, 2012. For the 13th we planned to do a duration contest outdoors while it was light, weather and field conditions permitting, then we would try to put my essay into practice. We planned an hour for each activity. I prepared a form for the recording of flight data and posted it to EndlessLift.
The form enables kids to measure simple flight parameters like area of wing, height of launch, distance flown, time of flight and weight of plane, then calculate basic engineering performance parameters of their gliders, such as wing loading, sink speed, airspeed, glide angle, lift, drag, lift to drag ratio and power. All are common terminology in the aviation field. This provides a practical, hands-on appreciation for what those terms mean. The form should be accompanied by a sheet of quad ruled paper. As Lou Young has pointed out, lecture should be kept to a minimum. Not more than a couple minutes of talking at a time. The emphasis should be on the activity of making the flights and measurements, then making the diagrams and calculating the results. That can be done by explaining each step and having the kids do them, blending lecture and activity. I prepared a second page for calculating lift and drag coefficients. This goes beyond the scope of my original essay. It is a little more abstract, complex and adds only three parameters. If the kids are enthusiastic, go with it. If they seem uninterested, drop it. There is enough explanation provided on the sheet that the more interested kids can do it at home. They will have made and recorded all the needed measurements in the class.
This is an activity that can be done inside, after it gets too dark outside to fly for duration. The planes will need to be trimmed to fly straight for this activity. Test flights must be made in still air over a horizontal floor.
This activity requires for the group: gram scale, 8′ tape, 100′ tape, stopwatch.
Multiple sets will allow completion of the measuring part more quickly. That may require more adult mentors, or some of the kids may be able to help. It will reduce the amount of down time for each kid and keep their minds from wandering too far. It will likely take more than a few attempts for the kids to get a good, straight, steady, recordable flight. With two setups, flights can be made in opposite directions, so kids can fly back and forth across the room.
Each kid should have available, even if it means sharing some with a lab partner: Flight Log form, quad ruled paper, pencil (bring a pencil sharpener), ruler, protractor, calculator.
The calculator should have the arctan function on it, or copies of a tan or arctan table should be available. Kids don’t need to understand trigonometry to be talked through a series of button pushes. This is necessary only for calculating the glide angle. That can also be measured with the protractor from the flight path diagram. Calculators without arctan will suffice for all the other calculations. (All calculations could be done on a slide rule. Anybody else remember those?)
If you have the only calculator with arctan, you can have each kid read their glide slope from their sheet and you can do the calculation.
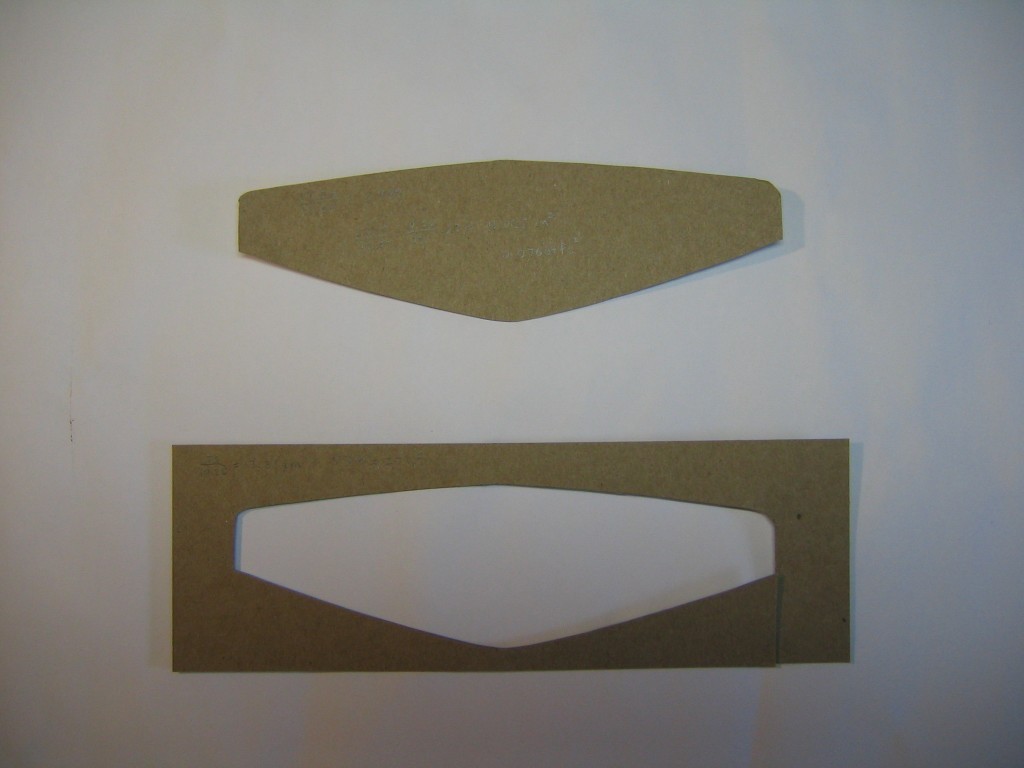
Lou’s glider weighed 6.10 grams. The wing area is 11.04 square inches = 0.07664 square feet. Those numbers are probably good to 3 significant figures. The wing area was determined by weighing a 3″ x 9″ rectangle of cardboard, tracing the wing onto the card, cutting out the pattern and weighing it. I also calculated it from measurements of root chord, tip chord and span. The result is 10.53 square inches. The edges are slightly convex.
You might run one of these yourself. Use any small glider you have, even a folded paper plane or FPG-9.
I got some glides done ahead of time so I could run through the form and see how long it might take to get the measurements and do the calculations. It was too windy for still air gliding, but I was able to fly it enough to confirm what Lou told me; it is tail heavy and stally. It is very hard to get it to make a steady flight. The CG is at 83% of the root chord. It has 5 degrees of decalage, not a lifting tail. I grabbed a wad of clay and headed outside. As the speed picked up, it developed a turn that needed a little wing straightening, one wing was higher than the other. Eventually I had the entire wad of clay on the nose and it was making nice, long, straight, steady glides. It took 1.9 grams of clay. The CG is now at 38% of root chord. Weight is up to 8.0 grams. Using two materials makes the CG variable. The balsa part has a different CG position than the total of the paper parts. Any variation in balsa density produces variation in CG position. Adding 2 grams of clay to the nose of each plane will get them close. Each might require some individual attention to get them exactly right, but I’m not sure it would be worth the trouble, given the variations in other things, like the amount of camber and launching skill of kids. I rolled 1/4″ cylinders of clay and cut them into 1.3″ lengths to make up 2 gram weights. It’s a good thing I went through the worksheet ahead of time. I found a couple problems. That reinforces a lesson I learned about teaching many years ago; never give anything to students if you have not done it yourself. Avoid nasty surprises. I went through it a second time, explaining it to myself as though I was before a class. It took 35 minutes to get through the first page and 46 minutes to get through both. It may take a little longer with the kids. I recommended we allocate an hour. With a duration contest, trimming the planes to fly straight and making the four measurements, time will be a little tight. I may have to skip a couple things. Those the kids may do at home if they are interested.
It didn’t go quite as planned. We didn’t have quite enough time or equipment. The measurement process took longer than expected. The kids had trouble getting straight, smooth flights. We should have the planes trimmed to fly without spending time on that at the beginning. We need to organize the measurement flights more closely. The adult mentors should have a better understanding of what we are doing and focus on getting everybody through. We need to be sure each kid has a calculator. Kids should arrive on time. This was the first time, so it was a learning experience. A teacher told me that working with a classroom full of kids is like trying to hold a couple dozen ping pong balls underwater with your bare hands.
There was a possibility that I would not be able to make the class, so I wrote a set of instructions. The following is adapted from that, with afterthoughts in italics. Before the class I printed and stapled both forms with a quad ruled sheet, and assembled all the materials I would need in the class.
*************************
I have been thinking about the presentation of the class. It does look like it will rain tomorrow, and at least the lawn will be wet, which is not good for paper gliders. So it will be an inside activity. That is good, because we can take it easy and not rush.
It rained. The outdoor flying was canceled. We still did not have enough time. This should be a separate activity. It will have to be more tightly organized to fit the time available; 4 to 6 PM. I think a half hour for flights and an hour and a half for the scientific discovery part might work.
Here is my thinking on how to proceed. I recommend you print out my Simple Gliders pages from Bill Kuhl’s site and EndlessLift, and read them. At the beginning of class, some of this material can be used as introductory explanation of what we will be doing. Explain to the kids what we will be doing and how these concepts are useful to aeronautical engineers and glider pilots. This gives them a feeling they are getting a glimpse into the “adult” world.
1. Hand out the forms, rulers, protractors and pencils. Each kid should bring a pocket calculator. Otherwise mentors must help the kids share calculators. (Anybody have their old slide rule?)
We had only 2 calculators for nine kids. We didn’t have time, anyway. I went through my Glider Flight Log, using my numbers, and explained the process, telling them to do theirs at home. I had hoped that the kids would be able to work with their own numbers, to make it more hands-on and personal, rather than pure lecture. The kids seemed to be interested through the whole thing. They did not get disruptive and asked good questions. Keep in mind that this was a group who wanted to be in the class, not a school class, so the motivation was already present.
2. Have the kids fill in their name and date. Give them the area of the wing, 11.04 sq in, and have them write that in the blank. Explain how the area was measured by weighing a piece of cardboard, tracing the wing, cutting out and weighing the pattern.
3. Go in the other room where the kids will test their gliders without the nose weights. Explain that Mr. Young found that the gliders are tail heavy and that we found that they fly much better with a little weight on the nose. We are going to compare flights before and after adding the weight. Gliders should be trimmed to fly straight before this session.
There was not time for test flying two CG positions, although that is an important lesson. Maybe there should have been a session devoted to flight trimming first.
4. Hand out the clay. Tell them to knead the clay until it becomes soft, roll it between their palms to form it into a ball, then press the nose into the ball and smooth it onto the nose.
We had several kids come in late, disrupting the process. Some of them missed important instructions, taking mentors away from their flightline duties.
5. Have them test their gliders again. Ask them to see how straight and steady they can make the gliders fly. Several mentors scattered around, on opposite ends of the room, can advise and assist with trim. This is about skill and control, not strength or speed. The idea is to learn to release the glider at flight speed in flight attitude. When all are getting pretty straight glides, go to the next step.
Some of the kids never got over the idea that they were throwing a baseball. Some of them continued to flick their wrist at release. This might have gone better if one of us had given a demonstration with explanation to the whole group, before scattering around the room. Once kids are throwing gliders around, you will have chaos and it becomes very difficult to address them as a group. Lou’s suggestion of a targeted flight might be a good idea here, flying the plane through an opening cut in a cardboard sheet or into an open box.
6. Have three measurement stations. Tables and chairs should have been set up previously. Walk through the process before the kids arrive. The kids will need the forms and pencils. 6. a. They weigh the glider and write the weight on the form. 6. b. Have the kids hold the gliders in launch position and measure the distance from the floor to the bottom of the fuselage to the nearest inch. 6. c. Have the kids stand at the zero end of the 100′ tape and launch the glider along the tape. One mentor times the flight, the other estimates the distance flown to the nearest tenth of a foot, and calls that out. It may take several tries for each kid. Have the kids write the distance and time on the form. Once all the planes have completed measurements of straight, steady flights, move back into the other room.
We had a small classroom with tables and chairs and an adjacent exercise room with large floor area, but low ceiling. We put the tape diagonally across the room. Gliders were able to go from wall to wall and hit the opposite wall. You will need about 60 feet of clear floor. One adult measured launch height, one directed weighing, one timed and one measured distance. The kids need to keep their forms and pencils as they retrieve their gliders, collect the data and write it on their form. They should stand in line while waiting their turn to fly and sit down when they have completed all measurements.
7. You can have the flight path and force drawing already on the board. Just go down the page, completing each calculation and filling in the blanks. Explain the significance of each item. Refer to my essay from Bill Kuhl’s site. Sink speed allows a glider pilot to estimate how much time he has in the air. It allows him to choose a glider that will stay up in the air longer. Ground speed allows him to figure out how long it will take to get home. Airspeed allows the pilot to fly at the speed of minimum sink for soaring or the speed of maximum L/D for distance. Speed is in units of distance per time. Aerodynamicists use feet, slugs and seconds. We are more familiar with miles per hour. Explain conversion factors. Last week we talked about how raising a weight takes work. Work is another name for energy. Energy is force times distance. Power is the rate of use of energy, just as speed is the rate of covering distance. The power will be a very small number for these very small planes. You might mention the scientific notation way of writing the number. It may make better sense to them to invert the number (Enter 1, push divide, enter the number for power from the form, count all the zeros, push equals. You may want to talk them through all the calculations this way.) This will tell them that the gliders consume 1/15,000th of a horsepower. 15,000 of these gliders will consume 1 Hp of gravitational energy. All this is explained in the links given above.
We did not have enough calculators or time. I covered the board with the numbers and calculations from my form.
8. Graphical solution. You will find that a scale of 1/8″ per foot will be best. The 1/4″ divisions on the quad paper represent 2′ units. They can count out the feet and interpolate the tenths. Draw the lines carefully. Show them how to put one thumb at 0″ and one thumb at 10″ on the ruler to see what tenths look like, then estimate the corresponding fraction of the 1/8″ unit. Explain how to use the protractor. These should be clear plastic, so the vertex and lines can be seen.
We didn’t get to this. Noel made several protractors, copying on bright colored paper, and punched a hole at the vertex to allow alignment. We could also have copied rulers. Architects 1/8″ scale, 1/96, would have been perfect. With the architects scale, distance measurements could be made in feet and inches.
*************************


